Upgrade Your Filament Dryer With A Swiveling Filament Port

Many FDM filament dryers have a port through which you can guide the filament. This handy feature allows you to print from the spool without removing it from the dryer, saving time and limiting exposure to (moist) air. Unfortunately, these exit ports aren’t always thought out very well, mostly in terms of the angle with the spool as it unrolls. The resulting highly oblique orientation means a lot of friction of the filament on the side of the port. This issue is addressed in a recent [Teaching Tech] video, with a simple, low-cost solution.

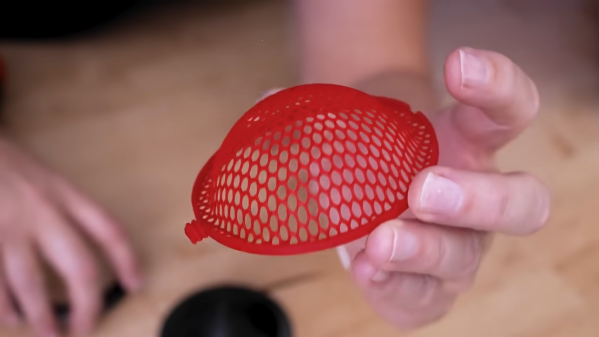
The basic idea is to have a swiveling port, inspired by a spherical bearing. The design shown in the video uses a PC4-M6 pneumatic connector to pass the PTFE tube. Connector choice is critical here, as many PC4-M6 pneumatic connectors won’t accommodate the PTFE.  As a fallback, you can drill out a connector to enable this.

Once the connector is sorted, you need a 13 mm (~0.5″) step drill bit to widen the opening in the filament dryer. This ready-to-print version has 10 degrees of freedom in any direction, but you can adapt it to fit your needs. With this mod installed, the angle with which the filament enters the port should remain as close to zero as possible, preventing both friction and damage to the port and filament.

Continue reading “Upgrade Your Filament Dryer With A Swiveling Filament Port”

Smart Lamp Keeps Students On Track With Image Recognition

It’s a common enough problem: you’re hitting the books, your phone dings with a notification, and suddenly it’s three hours later. While you’ve done lots of scrolling, you didn’t do any studying. If only there were a quick, easy project that would keep an eye on you and provide a subtle nudge to get you off the phone. [Makestreme] has that project, an AI study lamp that shifts from warm white to an angry red to remind students to get back to work. See it in action in the demo video below.

Continue reading “Smart Lamp Keeps Students On Track With Image Recognition”

RC rover/car with red and yellow-sided wheels. Electronics are visible on top of vehicle.

An RC Car Driven With Old 3D Printer Motors

With the newer generation of quick and reliable 3D printers, we find ourselves with the old collecting dust and cobwebs. You might pull it out for an emergency print, that is if it still works… In the scenario of an eternally resting printer (or ones not worth reviving), trying to give new life to the functional parts is a great idea. This is exactly what [MarkMakies] did with a simple RC rover design from an old Makerbot Replicator clone. 

Using a stepper motor to directly drive each wheel, this rover proves its ability to handle a variety of terrain types. Stepper motors are far from the most common way to drive an RC vehicle, but they can certainly give enough power. Controlling these motors is done from a custom protoboard, allowing the use of RC control. Securing all these parts together only requires a couple of 3D printed parts and the rods used to print them. Throw in a drill battery for power, and you can take it nearly anywhere! 

Continue reading “An RC Car Driven With Old 3D Printer Motors”

Adaptive Keyboards & Writing Technologies For One-Handed Users

After having been involved in an accident, [Kurt Kohlstedt] suffered peripheral neuropathy due to severe damage to his right brachial plexus — the network of nerves that ultimately control the shoulder, arm, and hand. This resulted in numbness and paralysis in his right shoulder and arm, with the prognosis being a partial recovery at best. As a writer, this meant facing the most visceral fear possible of writing long-form content no longer being possible. While searching for solutions, [Kurt] looked at various options, including speech-to-text (STT), before focusing on single-handed keyboard options. Continue reading “Adaptive Keyboards & Writing Technologies For One-Handed Users”

The PCB Router You Wish You Had Made

The advent of cheap and accessible one-off PCB production has been one of the pivotal moments for electronic experimenters during the last couple of decades. Perhaps a few still etch their own boards, but many hobbiest were happy to put away their ferric chloride. There’s another way to make PCBs, though, which is to mill them. [Tom Nixon] has made a small CNC mill for that purpose, and it’s rather beautiful.

In operation it’s a conventional XYZ mechanism, with a belt drive for the X and Y and a lead screw for the Z axis. The frame is made from aluminium extrusion, and the incidental parts such as the belt tensioners are 3D printed. The write-up is very comprehensive, and takes the reader through all the stages of construction. The brains of the outfit is a Creality 3D printer controller, but he acknowledges that it’s not the best for the job.

It’s certainly not the first PCB router we’ve seen, but it may be one of the nicer ones. If you make a PCB this way, you might like to give it professional-looking solder mask with a laser.

A black PCB is shown, with an Arduino Nano mounted in the bottom left corner. The rest of the space on the PCB is used up by ten DIP integrated circuits and a few resistors and diodes. Several black and red wires connect different parts of the PCB.

Meowsic Keyboard MIDI Adapter Aims For Purrfection

Both small children and cats have a certain tendency to make loud noises at inopportune times, but what if there were a way to combine these auditory effects? This seems to have been the reasoning behind the creation of the Meowsic keyboard, a children’s keyboard that renders notes as cats’ meows. [Steve Gilissen], an appreciator of unusual electronic instruments, discovered that while there had been projects that turned the Meowsic keyboard into a MIDI output device, no one had yet added MIDI input to it, which of course spurred the creation of his Meowsic MIDI adapter.

The switches in the keys of the original keyboard form a matrix of rows and columns, so that creating a connection between a particular row and column plays a certain note. [Steve]’s plan was to have a microcontroller read MIDI input, then connect the appropriate row and column to play the desired note. The first step was to use a small length of wire to connect rows and columns, thus manually mapping connections to notes. After this tedious step, he designed a PCB that hosts an Arduino Nano to accept input, two MCP23017 GPIO expanders to give it enough outputs, and CD4066BE CMOS switches to trigger the connections.
Continue reading “Meowsic Keyboard MIDI Adapter Aims For Purrfection”

Laptop Brick Is Brought Back From The Brink

We’ve all been there. [Kasyan TV] had a universal adapter for a used laptop, and though it worked for a long time, it finally failed. Can it be fixed? Of course, it can, but it is up to you if it is worth it or not. You can find [Kasyan’s] teardown and repair in the video below.

Inside the unit, there were a surprising number of components crammed into a small area. The brick also had power factor correction. The first step, of course, was to map out the actual circuit topology.

Continue reading “Laptop Brick Is Brought Back From The Brink”