Despite the passing of several decades since that scene in Star Trek IV, the Voyage Home in which Mr. Scott remarks “A keyboard! How quaint!“, here on earth, they remain a central plank of our user interface experience. A plank is an appropriate metaphor, for the traditional keyboard with its layout derived from typewriters and intended to minimize type bar collisions has remained the same flat and un-ergonomic device for well over a century. If like [Tom Arrell] you suffer from repetitive strain injury to your hands and wrists from using a keyboard then a more ergonomic alternative is a must. His solution was to build his own keyboard in two halves.
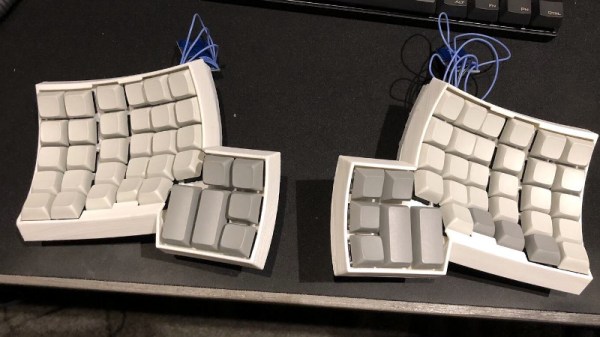
He was inspired by a colleague’s Ergodox, but balked at the price. Then he found the Dactyl, an open source 3D printed keyboard in two halves, and resolved to build his own. Unlike the Dactyl, however, he wanted his ‘board to be able to operate as either a linked pair operating as one or a pair of separate keyboards. In went a pair of Sparkfun Pro Micro boards to his slightly modified Dactyl, along with a full complement of Cherry MX Brown switches.
The final product lacks key labels so is not for the faint-hearted. But he persevered with it and after a couple of weeks was able to use it without a crib sheet. It’s a bit higher than its commercial equivalent so it needs some improvised wrist rests, but for the price, he’s not complaining.
This isn’t the first keyboard with two halves we’ve shown you, here’s one from 2017.
Via Hacker News.