It has been fascinating to watch the rise of the #BadgeLife community in North America, and a little sad when viewed from a European perspective that their creative vibrancy has not quite fully made it across the Atlantic. It’s pleasing therefore to report on something traveling in the opposite direction. We’ve found a #BadgeLife creation that’s as American as they come, but which hides a bit of European flavor under its shell.
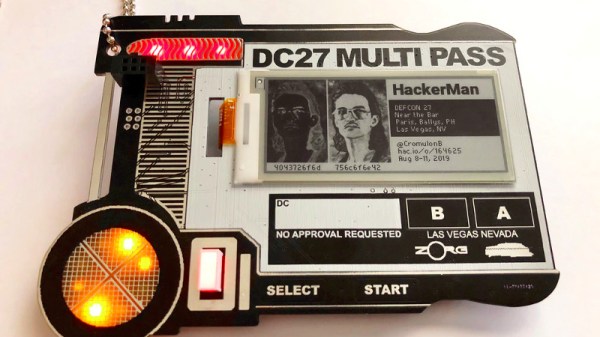
The DC27 Multi Pass is a Def Con indie badge themed as a prop from the film The Fifth Element. That is not its only trick though, because under the hood it runs the ESP32-based badge.team, the badge software platform created by the team from the Netherlands who brought us the SHA 2017 and Hacker Hotel 2019 badges. Like those two it sports an e-ink screen and a set of touch buttons, which they’ve very neatly incorporated into the Multi Pass design. The badge.team ecosystem brings with it a fully-functional and stable hackable badge platform with MicroPython apps and an app library (We won’t call it a store, it’s all free!) referred to as the hatchery. There is even a Hackaday logo nickname, should you have one of these badges and wish to identify yourself as a reader.
The launch of a new #BadgeLife badge is always cool, but with the best will in the world it is not in itself news. Where this one does, however, get interesting is that it proves that badge.team is a viable route to getting full event badge functionality into an indie badge without the heartache of creating a software platform. It also serves as a fascinating perspective on why the USA has spawned its artistic badge scene while Europe has less diversity. The whole Def Con experience is extremely expensive, while European hacker camps are relatively not so. There is no need for a European hacker to finance their trip to EMF Camp by selling badges, so for many people, the impetus to create finds its outlet in other directions. It would be nice to think that European badge scene will in time evolve as far as the US one, but meanwhile, it’s good to see the Netherlands community supplying their platform to what we think will be a very interesting Def Con indie badge.