When it comes to machining, particularly in metal, rigidity is everything. [Tailortech] had a homebuilt CNC machine with a spindle held in place by a plastic bracket. This just wasn’t up to the job, so the decision was made to cast a replacement.
[Tailortech] decided to use the lost PLA process – a popular choice amongst the maker crowd. The spindle holder was first sketched out, then modeled in Fusion 3D 360. This was then printed in PLA slightly oversized to account for shrinkage in the casting process.
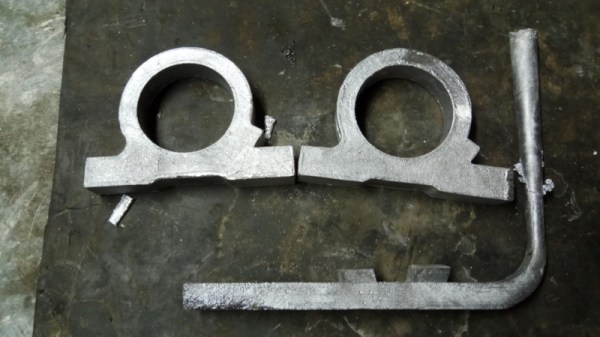
The PLA part was then used to make a plaster mold. [Tailortech] explains the process, and how to avoid common pitfalls that can lead to problems. It’s important to properly heat the mold once the plaster has set to remove moisture, but care must be taken to avoid cracking or wall calcination. It’s then necessary to slowly heat the mold to even higher temperatures to melt out the PLA prior to casting. With the mold completed, it can be filled with molten aluminium to produce the final part. When it’s cooled off, it’s then machined to final tolerances and installed on the machine.
Lost PLA casting is a versatile process, and goes to show that not everything has to be CNC machined out of billet to do the job. It’s also readily accessible to any maker with a furnace and a 3D printer. If you’ve got a casting project of your own, be sure to let us know. Video after the break.