Bringing modern protocols and techniques to vintage computers is a favorite pastime for hackers, and over the years we’ve seen some absolutely incredible hardware and software projects designed specifically to do what most people would consider impossible. They’re very rarely practical projects, of course. But that’s never really the point.
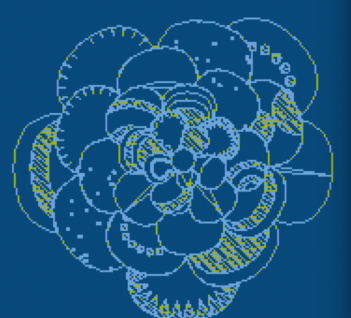
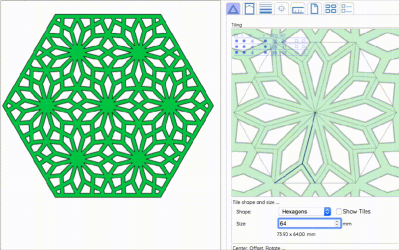
Today we present another excellent entry into this niche avenue of hacking: Renderific, a tool to render SVGs on 8-bit Atari computers by [Kevin Savetz]. The MIT licensed program is written in Turbo-BASIC XL and allows computers such the 1200XL and 800XL to not only render the image on screen but output it to an attached plotter. There are a few niggling issues with some files, and apparently the plotter draws the image upside-down for some reason, but on the whole we can now add “SVG Rendering” to the list of things you can do with a nearly 40-year-old computer.
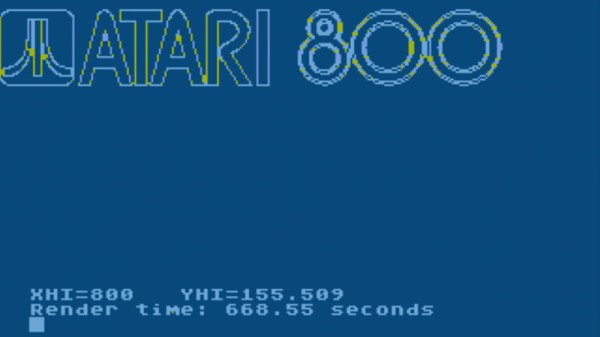
Of course, those who are familiar with these 1980’s machines might wonder how their limited CPUs can possibly cope with such a task. Well, that’s where the impracticality comes in. According to [Kevin], you can be in for quite a wait depending on the complexity of the image. In his tests, some SVGs took up to 45 minutes to fully render on the screen, so you might want to have a snack handy.
If you’re interested in lending a hand with the project, it sounds as though [Kevin] could use some assistance in figuring out why the Atari 1020 plotter doesn’t like the output of his program. There’s also a few SVG functions and forms of Bézier curves that need some work if you’ve got your Turbo-BASIC XL programming books handy.
Will you ever have a need to view SVG files on an Atari 1200XL? No, probably not. You might not have a desire to play Spotify on the Macintosh SE/30 either, but that hasn’t stopped hackers from figuring out how you can do it. As long as these old machines are still up and running, we’re confident that the community will continue to teach them new tricks.