Making a natural fiber like wool into something useful like a sweater involves a lot of steps. We might be familiar with shearing the sheep, spinning the wool into yarn, or knitting and weaving, but between shearing and spinning there’s another unfamiliar process you’ll have to go through. Known as carding, it helps align the fibers so they are able to be spun, and of course it requires either an expensive tool, or one you build on your own.
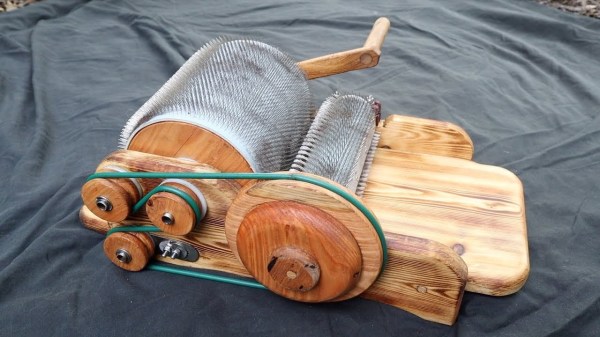
This drum carder is exactly what it sounds like. It uses two drums covered in a metal mesh, spinning at different speeds, which pull the fibers into an orderly shape. Small drum carders like this can run around $600 but with some quality wood and a lathe you can easily make one for a fraction. Making the series of drums is fairly straightforward with a lathe, and from there you need to make sure they are connected with a quality belt or chain and then covered in the appropriate metal mesh.
[kris] notes in the reddit comments section that he’d like for a second version to spin a little faster and be a little more durable, but this is a great working carder nonetheless. From there you’ll want to move on to spinning the wool into yarn, which you can do with either a wheel or an electric motor.
Continue reading “Hand-Made Drum Carder Gets Wool Ready For Spinning”