In this age of patent trolls and multi-billion dollar companies that make intellectual property claims on plant genes and photographing objects against a white background, you’d be forgiven for thinking that a patent on a plain steel block would be yet another recent absurdity. But no – [Carl Edvard Johansson] got a patent for his “Gauge Block Sets for Precision Measurement” in 1901. As [AvE] shows us with a video on how gauge blocks can be “wrung” together, there’s more to these little blocks than meets the eye.
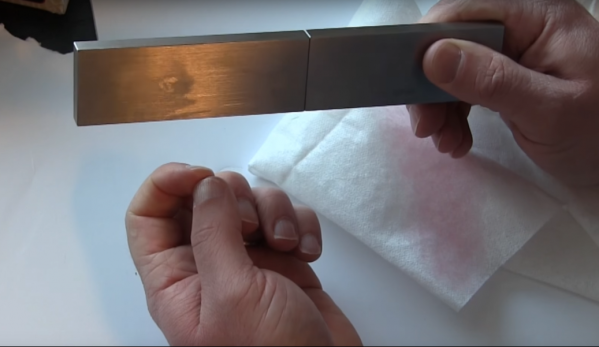
Gauge block wringing is probably nothing new to experienced machinists, but for the rest of us, it’s a pretty neat trick. To start the show, [AvE] gives us a little rundown on “Jo blocks” and what they’re good for. Basically, each block is a piece of tool steel or ceramic that’s ground and lapped to a specific length. Available in sets of various lengths, the blocks can be stacked end to end to make up a very precise measuring stick. But blocks aren’t merely placed adjacent to each other – they physically adhere to each other via their lapped surfaces after being wrung together. [AvE] demonstrates the wringing technique and offers a few ideas on how this somewhat mysterious adhesion occurs. It’s pretty fascinating stuff and puts us in the mood to get a gauge block set to try it ourselves.
It’s been a while since we’ve seen [AvE] around Hackaday – last time out he was making carbon foam from a slice of bread. Rest assured his channel has been going strong since then, with his unique blend of laughs and insight into the secret lives of tools. Definitely worth checking out, and still skookum as frig.