One amazing thing about USB-C is its high-speed capabilities. The pinout gives you four high-speed differential pairs and a few more lower-speed pairs, which let you pump giant amounts of data through a connector smaller than a cent coin. Not all devices take advantage of this capability, and they’re not required to – USB-C is designed to be accessible for every portable device under the sun. When you have a device with high-speed needs exposed through USB-C, however, it’s glorious just how much USB-C can give you, and how well it can work.
The ability to get a high-speed interface out of USB-C is called an Alternate Mode, “altmode” for short. The three altmodes you can encounter nowadays are USB3, DisplayPort and Thunderbolt, there’s a few that have faded into obscurity like HDMI and VirtualLink, and some are up and coming like USB4. Most altmodes require digital USB-C communication, using a certain kind of messages over the PD channel. That said, not all of them do – the USB3 is the simplest one. Let’s go through what makes an altmode tick. Continue reading “All About USB-C: High-Speed Interfaces”→
When the automobile industry really began to take off in the 1930s, radar was barely in its infancy, and there was no reason to think something that complicated would ever make its way into the typical car. Yet here we stand less than 100 years later, and radar has been perfected and streamlined so much that an entire radar set can be built on a single chip, and commodity radar modules can be sprinkled all around the average vehicle.
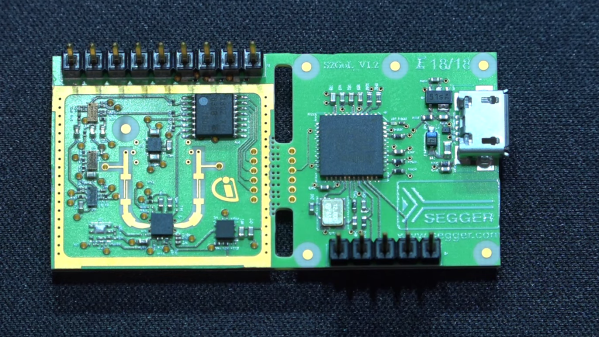
Looking inside these modules is always fascinating, especially when your tour guide is [Shahriar Shahramian] of The Signal Path, as it is for this deep dive into an Infineon 24-GHz automotive radar module. The interesting bit here is the BGT24LTR11 Doppler radar ASIC that Infineon uses in the module, because, well, there’s really not much else on the board. The degree of integration is astonishing here, and [Shahriar]’s walk-through of the datasheet is excellent, as always.
Things get interesting once he gets the module under the microscope and into the X-ray machine, but really interesting once the RF ASIC is uncapped, at the 15:18 mark. The die shots of the silicon germanium chip are impressively clear, and the analysis of all the main circuit blocks — voltage-controlled oscillator, power amps, mixer, LNAs — is clear and understandable. For our money, though, the best part is the look at the VCO circuit, which appears to use a bank of fuses to tune the tank inductor and keep the radar within a tight 250-Mz bandwidth, for regulatory reasons. We’d love to know more about the process used in the factory to do that bit.
This isn’t [Shahriar]’s first foray into automotive radar, of course — he looked at a 77-GHz FMCW car radar a while back. That one was bizarrely complicated, though, so there’s something more approachable about a commodity product like this.
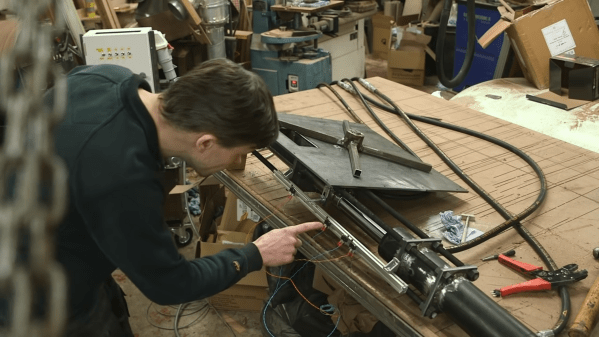
When you are a life long carpenter with an amazing workshop, you’re going to make a lot of saw dust, and managing its collection and storage poses quite a challenge. [Russ] from [New Yorkshire Workshop] built an impressive Briquette press to handle the problem.
It’s a hydraulic press that ingests saw dust and spits out compressed briquettes ready for fueling his rocket mass heater. The build starts with a batch of custom, laser cut steel parts received from Fractory. The heart of the machine is a 300 mm stroke hydraulic cylinder with a beefy 40 mm rod. The cylinder had to be taken apart so that the laser cut mounting flanges could be welded, slowly so as not to deform the cylinder. The intake feed tube was cut from a piece of 40 mm bore seamless tube. A window was cut in the feed tube and funnel parts were welded to this cutout. The feed tube assembly is then finished off with a pair of mounting flanges. The feed tube assembly is in turn welded to the main feed plate which will form the base of the saw dust container. The hydraulic cylinder assembly is mated to the feed tube assembly using a set of massive M10 high tensile class 10.9 threaded rods. The push rod is a length of 40 mm diameter mild steel bar stock, coupled to the hydraulic cylinder using a fabricated coupling clamp. On the coupling clamp, he welded another bracket on which a bolt can be screwed on. This bolt helps activate the limit switches that control the movement of the hydraulic cylinder and the feed motor. Continue reading “Impressive Sawdust Briquette Machine”→
We wanted to see what the Hackaday crowd was up to in first-person view tech, and you didn’t disappoint! Commercial FPV quads have become cheap enough these days that everyone and their mom got one for Christmas, so it was fantastic to see the DIY spirit in these projects. Thanks to everyone who entered.
The Winners
None of the entries do the DIY quite as thoroughly as [JP Gleyzes]’s “poor man’s FPV journey”. This is actually three hacks in one, with DIY FPV goggles made from cheap optics and 3D printed additions, a USB joystick to PPM adapter to use arbitrary controllers with an RC transmitter, and even a fully DIY Bluetooth-based controller for a popular flight simulator. [JP] has done everything but build his own drone, and all the files are there for you to use, whether you’re goal is to do it on the cheap, or to do something new.
If you want to build your own drone from scratch, though, ESP32 Drone project has you covered. At least, mostly. This build isn’t entirely finished yet, and it’s definitely got some crash-testing still in its future, but the scope and accessibility of the project is what caught our eyes. The goal is to make a lightweight indoor quad around parts we can all get easily and cheaply, completely scratch-built. This drone is meant to be controlled by a smartphone, and the coolest parts for us are the ESP_Drone and ESPStream software that run on the drone and your phone respectively. Congrats to [Jon VB]! Now get that thing in the air.
And if you’re looking for a tidy little build, [Tobias]’s Mini FPV Speed Tank doesn’t disappoint. It’s a palm-sized mini tank, but this thing hauls, and looks like a ton of fun to drive around. It uses an absolutely tiny RP2040 module, an equally tiny receiver, and a nano FPV camera and transmitter to keep it compact. The 3D-printed frame and tracks are so nice that we’re not even complaining that the FPV rig is simply rubber-banded on top of the battery. This looks like a super fun build.
Each of these three projects have won a $150 Digi-Key shopping spree to help out with parts in this, or your next project. Thanks again to Digi-Key for sponsoring!
With few exceptions, metalworking has largely been about making chips, and finding something hard enough and tough enough to cut those chips has always been the challenge. Whether it’s high-speed steel, tungsten carbide, or even little chunks of rocks like garnet or diamond, cutting metal has always used a mechanical interaction between tool and stock, often with spectacular results.
But then, some bright bulb somewhere realized that electricity could be used to remove metal from a workpiece in a controlled fashion. Whether it’s using electric sparks to erode metal — electric discharge machining (EDM) — or using what amounts to electroplating in reverse — electrochemical machining (ECM) — electrical machining methods have made previously impossible operations commonplace.
While the technology behind ExM isn’t really that popular in the hobby machine shop yet, a lot of the equipment needed and the methods to make it all work are conceivably DIY-able. But the first step toward that is understanding how it all works, and we’re lucky enough to have Daniel Herrington stop by the Hack Chat to help us out with that. Daniel is CEO and founder of Voxel Innovations, a company that’s on the cutting edge of electrochemical machining with its pulsed ECM technology. There’s a lot to unpack, so make sure you stop by so we can all get up to speed on what’s up with using electricity to do the machining.
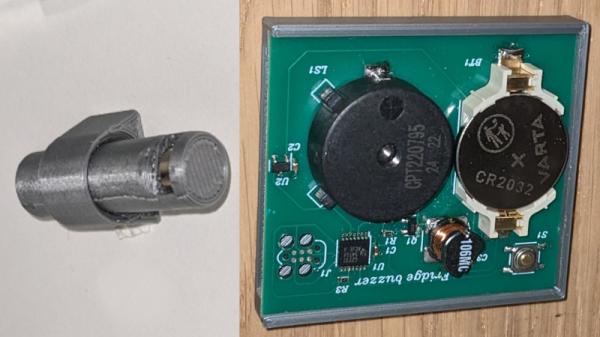
[CarrotIndustries] wanted to add an audible warning for when the refrigerator door was left open. The result is a fridge buzzer that attaches to the inside of a fridge door and starts buzzing if the door is left ajar for too long.
The main components of the fridge buzzer consist of an MSP430G2232 low-power MCU connected to a SI7201 hall sensor switch, along with a CR2032 battery holder, push button and buzzer. The MSP430’s sleep mode is used here, consuming less than 3 µA of current which [CarrotIndustries] estimates lasting 9 years on a 235 mAh CR2032 battery.
A 3D printed housing is created so that the board slides into a flat bed, which can then be glued onto to the fridge door. The other mechanical component consists of a cylinder with a slot dug out for a magnet, where the cylinder sits in a mounting ring that’s affixed to the side of the fridge wall that the end of the door closes on. The cylinder can be finely positioned so that when the refrigerator is closed, the magnet sits right over the hall sensor of the board, allowing for sensitivity that can detect even a partial close of the fridge door.
All source code is available on [CarrotIndustries] GitHub page, including the Horizon EDA schematics and board files, the Solvespace mechanical files, and source code for the MSP430. We’ve featured an IoT fridge alarm in the past but [CarrotIndustries]’ addition is a nice, self contained, alternative.
In just a few days time, Google’s Stadia game streaming service will finally shut down for good. But not for any technical reason, mind you. Microsoft has managed to demonstrate that streaming modern games over home and even mobile Internet connections is viable with their immensely popular Game Pass Ultimate service, and NVIDIA is making similar inroads with GeForce Now. No, like so many of Google’s failed experiments, they’ve simply decided they don’t want to play anymore and are taking their proverbial ball home back with them.
But not all is lost for those who shelled out money for Stadia’s wares. Not only will Google be refunding any money players spent on games, but a company representative has also announced they will be releasing a tool to unlock the latent Bluetooth capabilities of the service’s custom controller — hopefully stemming a surge of e-waste before it starts.
Thanks for playing, chumps.
In a forum thread titled “A Gift from the Stadia Team”, Community Manager [DanFromGoogle] explains that information on how you can enable Bluetooth on the controller will be coming next week. In the meantime, he also announced the immediate release of “Worm Game”, a tech demo that staffers apparently used to test out capabilities of the streaming service before its public release.
That this ridiculously simple game, which looks all the world like something a kid would crank out during an after-school programming class, will be the final title to officially release on Stadia is a stunningly insulting epitaph for the fledgling service. But then, Google seems to have developed a special affinity for mistreating their most loyal cattle users over these last few years.
Enabling Bluetooth on a game controller might not seem like such a big deal, but in this case, it will potentially give the piece of hardware a second chance at life. The Stadia controller is unique in that it uses WiFi to communicate directly over the Internet to Google’s streaming service, so once those servers stop responding, the orphaned device will end up being little more than a curiosity. Although it does technically work over USB, being able to use it wirelessly will not only provide a more modern experience, but help justify its internal batteries.
The last time we mentioned the Stadia controller, it was to document one user’s attempt to rid it of an internal microphone they didn’t feel comfortable with. Now that the service is being put to pasture, we wonder if we’ll start to see more hacks involving the admittedly interesting peripheral. We’ll certainly be keeping an eye out for them, but if you see anything we miss, you know where to send it.