A Collection Of Hands To Inspire Your Halloween Animatronics

Jump scares are a lot of fun, but if you want to hold the attention of all those trick-or-treaters we’d suggest a creepy prop. One of the best choices in that category is a ghoulishly lifelike hand. You can draw some inspiration from this roundup of robot hands which Adafruit put together.

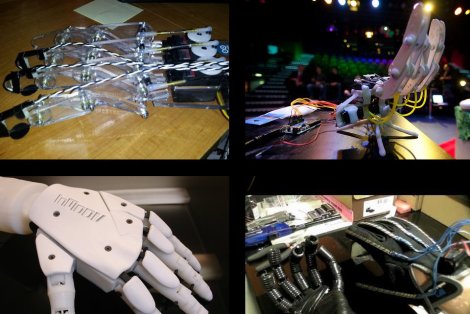
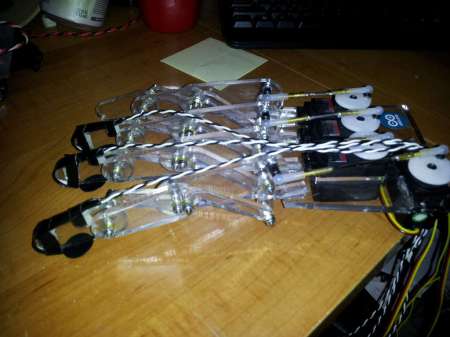
We’ve chosen four examples for the image above but there are more to be had than just these. In the upper left there is a laser-cut acrylic hand that actually features some force sensitive resistors on the fingertips to help implement some haptic feedback. This project was inspired by the hand seen in the lower right which uses flex sensors on a glove to control the bot’s movement. If you’re looking for something more realistic the 3D printed parts on the lower left are the best bet. But if you’re looking to put something together by Halloween night the offering in the upper right is the way to go. It’s hacked together using cardboard templates to cut out plastic parts and using polymorph to form joints and brackets.

The ShockerDrone; A Shocking Mod For The AR Drone


You’ve all seen taser like devices built from disposable cameras. We have seen them mounted to rubber gloves, finger tips, even potato gun ammo! We had not yet seen them on a quadcopter. This was quickly remedied once we had one to play with. Meet the shockerDrone, a Parrot AR Drone with built in shocker attachment.

Continue reading “The ShockerDrone; A Shocking Mod For The AR Drone”

Robotic Hand With Haptic Feedback

While I was at Heatsync Labs in Mesa Arizona, [Nate] mentioned that he was really proud of helping someone build a robotic hand. I have tracked down that project because it looked pretty cool.

[Macguyver603] built this robotic hand that is controlled by a glove with flex sensors. He was originally going to 3d print the structure for the hand but the availability of the laser cutter allowed him to create something a that would be a little more structurally sound. Haptic feedback is supplied by vibrating pager motors that are triggered by sensors in the tips of the robotic hand’s fingers.

The total cost of the project was roughly $240, and there’s unfortunately no video. It did, however, earn him second place at the state fair!

Chorded Keyboard For Touchscreens

For over a hundred years, good typists didn’t ‘hunt and peck’ but instead relied on keeping their fingers on the home row. This technique relies on physical buttons, but with on-screen keyboards used on tablets and other touch screen devices touch typists have a very hard time. [Zach] is working on a new project to bring a chorded keyboard to these devices called ASETNIOP.

Instead of training a typist where to place their finger – the technique used in most other keyboard replacements, ASETNIOP trains the typist which fingers to press. For example, typing ‘H’ requires the typist to press the index and middle fingers of their right hand against the touchscreen. In addition to touchscreens, ASETNIOP can be used with projection systems, Nintendo Power Glove replicas, and extremely large touchpads that include repurposed nooks and Kindles.

If you’d like to try out ASENTNIOP, there’s a tutorial that allows you to try it out on a physical keyboard as well as one for the iPad. It’s a little weird to try out but surely no more difficult to learn than a Dvorak keyboard.

Flimsy Pi Case Still Provides A Level Of Protection

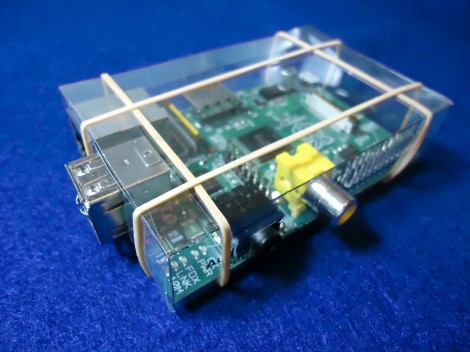
This flimsy case isn’t going to protect your Raspberry Pi if you knock it off the workbench. It will provide a level of protection against shorting out from contact with metal objects, or from liquids spilled in the near vicinity. [CGPatterson] ended up making this case from a single sheet of transparency film.

The project is basically papercraft. He started with the dimensions published on the Raspberry Pi FAQ, which turned out to be wrong. Not having a caliper available to help with the precision of the measurements, he grabbed his ruler and did the best he could. The first two cases were a poor fit, but as you can see the third is like a glove. Luckily you don’t have to go through this same trial and error as he release the design. Both A4 and US Letter sized PDFs are available for download. Print them out on the transparency, cut along the lines, apply transparent double-sided tape to the tabs and you’re in business. If you wish to alter the design he has also posted the SVG source he made in Inkscape.

This is certainly a good option for those of us without the ability to produce laser cut parts.

Printing Mounting Boards And Boxes For Hobby Projects

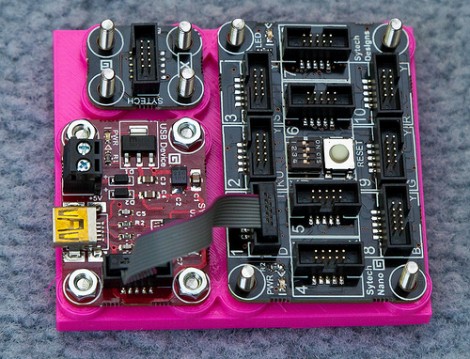
That’s a great base board for these Gadgeteer components. [Rob Miles] has been designing and printing mounting boards and enclosures for several of his projects. He just got into printing parts with the Ultimaker last week, and we’d say he’s found his stride. The board pictured here features nubs that act as stand-offs, and on the underside there are countersunk spaces for the bolt heads used as fasteners.

He started designing with Autodesk 123D but the interface didn’t really suit his working style. He switched over to FreeCAD and that experience fit him like a glove. He starts out with the sketch view to draw his parts, then extrudes that into the 3D model for further refinement before having the printer turn the digital into the real. This is the third board he produced in just one day of experimenting, but he is also showing off an enclosure he made for his thermal printer.

If you’re not working with boards that have nice mounting holes like these, don’t fret. We’ve seen 3d printed mounting systems that cradle the board, like these Raspberry Pi enclosures.

[Thanks Peter]

Resurrecting A PS3 Controller That Won’t Charge

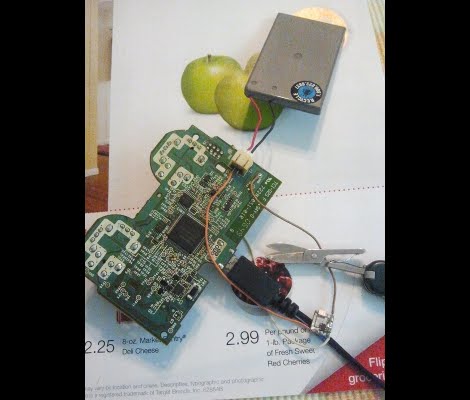
[SJM4306] grabbed a used PlayStation 3 from a game store that was going out of business. He got a pretty good deal on what had obviously been the floor model for a number of years. The one real problem was the controller that came with it. The thing was so filthy that he literally used gloves to disassemble and sanitize it. It worked just fine after that,until he discovered that it wouldn’t charge from the USB port as it’s supposed to. But he managed to replace the charging circuitry with some of his own.

When cleaning the insides of the controller he found there were numerous deposits of sludge which he attributes to spilled soda. This must have damage one of the chips responsible for charging because he was probing an unstable 2V rather than the regulated 5V which should be coming in on the USB lines. His solution was to desolder the USB port in order to separate its 5V pin from the PCB. He then etched a tiny board to host a MAX1555 charging IC. With the new hardware in place the controller is back in action.