We lost a true legend this week with the passing of NASA astronaut Jim Lovell at the ripe old age of 97. Lovell commanded the ill-fated Apollo 13 mission back in 1970, and along with crewmates Jack Swigert and Fred Haise — along with just about every person working at or for NASA — he managed to guide the mortally wounded Odyssey command module safely back home. While he’s rightly remembered for the heroics on 13, it was far from his first space rodeo. Lovell already had two Gemini missions under his belt before Apollo came along, including the grueling Gemini 7, where he and Frank Borman undertook the first long-duration space mission, proving that two men stuffed into a Volkswagen-sized cockpit could avoid killing each other for at least two weeks.
2025 One Hertz Challenge: Using Industrial Relays To Make A Flasher
These days, if you want to flash some LEDs, you’d probably grab a microcontroller. Maybe you’d go a little more old-school, and grab a 555. However, [Jacob] is even more hardcore than that, as evidenced by this chunky electromechanical flasher build.
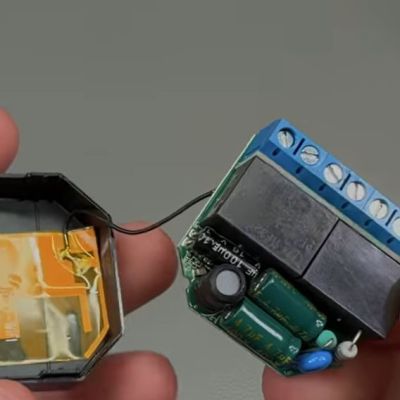
[Jacob] goes into great detail on his ancillary write-up, describing how the simple building blocks used by industrial control engineers can be used to make a flasher circuit that cycles once per second. Basically, two relays are paired with two 0.5-second delay timers. The two relays tag each other on and off on delay as their timers start and expire, with the lamp turned on and off in turn.
We’ve had lots of other great entries to our One Hertz Challenge, too — from clocks to not-clocks. There’s still time to get an entry in — the deadline for submission is Tuesday, August 19 at 9:00AM Pacific time. Good luck out there!
Coping With Disappearing Capacitance In A Buck Converter
Designing a circuit is a lot easier on paper, where components have well-defined values, or lacking that, at least well-defined tolerances. Unfortunately, even keeping percentage tolerances in mind isn’t always enough to make sure that circuits work correctly in the real world, as [Tahmid] demonstrates by diagnosing a buck converter with an oddly strong voltage ripple in the output.
Some voltage ripple is an inherent feature of the buck converter design, but it’s inversely proportional to output capacitance, so most designs include a few smoothing capacitors on the output side. However, at 10 V and a 50% duty cycle, [Tahmit]’s converter had a ripple of 0.75 V, significantly above the predicted variation of 0.45 V. The discrepancy was even greater at 20 V.
The culprit was the effect of higher voltages on the ceramic smoothing capacitors: as the voltage increases, the dielectric barrier in the capacitors becomes less permittive, reducing their capacitance. Fortunately, unlike in the case of electrolytic capacitors, the degradation of ceramic capacitors performance with increasing voltage is usually described in specification sheets, and doesn’t have to be manually measured. After finding the reduced capacitance of his capacitors at 10 V, [Tahmid] calculated a new voltage ripple that was only 14.5% off from the true value.
Anyone who’s had much experience with electronics will have already learned that passive components – particularly capacitors – aren’t as simple as the diagrams make them seem. On the bright side, they are constantly improving.
A Solar-Only, Battery-Free Device That Harvests Energy From A BPW34 Photodiode
Normally when you think solar projects, you think of big photovoltaic cells. But a photodiode is just an inefficient, and usually much smaller, PV cell. Since [Pocket Concepts]’s Solar_nRF has such a low power budget, it can get away with using BPW34 photodiodes in place of batteries. (Video, embedded below.)
The BPW34 silicon PIN photodiode feeds a small voltage into a BQ25504 ultra-low-power boost converter energy harvester which stores power in a capacitor. When the capacitor is fully charged the battery-good pin is toggled which drives a MOSFET that powers everything downstream.
When it’s powered on, the Nordic nRF initializes, reads the current temperature from an attached I2C thermometer, and then sends out a Bluetooth Low Energy (BLE) advertising packet containing the temperature data. When the capacitor runs out of energy, the battery-good pin is turned off and downstream electronics become unpowered and the cycle begins again.
Continue reading “A Solar-Only, Battery-Free Device That Harvests Energy From A BPW34 Photodiode”
Building A 7-Segment Shadow Clock
There are plenty of conventional timepieces out there in the world; we’ve also featured a great many that are aesthetically beautiful while being unreadably esoteric. This neat “shadow clock” from [Smart Solutions for Home] is not conventional, but it’s still a clock you could use every day.
The display is made of four seven-segment digits, which have a subtle appearance. Each segment uses a solenoid to extend it forward out of the display, or to retract it flush with the faceplate. This creates a numerical display in all one color, with the physical protrusion doing the job of making the numbers visible. This is perhaps where the “shadow clock” name comes from, though you notice the protruding segments moreso than the shadows they cast on the faceplate.
Running the show is an ESP32, paired with H-bridges to drive the solenoids that make up the 7-segment displays. The H-bridges are driven via shift registers to reduce the number of GPIO pins needed. Unlike many other ESP32 clock builds, this one uses a DS3231 real-time clock module to keep accurate time, rather than solely relying on Internet-based NTP time servers. Configuring the clock can be done via a web interface. Design files are available online.
If you think you’ve seen this recently, maybe you’re thinkig of this prototype for a very similar display by [indoorgeek]. And that’s not the only way to make shadow clocks either. After all, the term is not enforced or defined by any global horological organization. Maybe that’s a good thing! Video after the break.
Cheap Thermal Camera Fits The Bill
If you want to save a little money on a thermal camera, or if you just enjoy making your own, you should have a look at [Evan Yu’s] GitHub repository, which has a well thought out project built around the MLX90640 and an ESP32. The cost is well under $100. You can watch it do its thing in the video below.
There’s a PCB layout, a 3D-printed case, and — of course — all the firmware files. The code uses the Arduino IDE and libraries. It leverages off-the-shelf libraries for the display and the image sensor.
SparcStation 1+ Finally Gets Attention
We can’t throw stones. [Leaded Solder] picked up a SparcStation 1+ in 2018 and found it only produced illegal instruction errors. We’re sure he’s like us and meant to get back to it, and, instead, it sat on the bench, taking up space. You eventually have to move it, though, so seven years later, it was time for another go at it.
The first pass back in 2018 revealed that the machine had an interesting life. The full-sized hard drive was salvaged from an Apple computer. Removing the drive resolved the illegal instruction error. The drive seemed to work, but there was still nothing that suggested the machine would fully boot up. The next step was to try booting from a floppy, but that didn’t work either. The floppy cable had been surgically altered, again hinting this machine had seen some tough love.
Fast forward to 2025. This time, a Pi Pico-based SCSI emulator would stand in for the aging and suspect hard drive. Unfortunately, as noted, this machine has undergone some extensive and strange surgery. The power cable feeding the emulator had been rewired backwards, exposing the poor Pi Pico to 12 V, with predictable results. Luckily, it didn’t seem to phase the SparcStation.