Today I am experimenting with a single chip Universal Active Filter, in this case I made a small PCB for the UAF-42 from Texas Instruments. I chose this part in particular as it facilitates setting the filter frequency by changing just a pair of resistors and the somewhat critical values that are contained on the chip have been laser trimmed for accuracy. This type of active filter includes Operational Amplifiers to supply gain and it supports various configurations including simultaneous operating modes such as Band Pass, Low Pass and High Pass make it “Universal”.
UAF421 Universal Active Filter
UAF421 Universal Active Filter using a dual ganged potentiometer.
Filter Basics
Speaker Crossover Example
Looking at the block diagram you can see where I have inserted a dual-ganged potentiometer to change both resistors simultaneously which should allow a straight forward adjustment for our purposes here.
Looking into the components of a simple RC filter which can easily implement a simple Low Pass or High Pass filter, we see that the math is fairly straight forward and swapping the components with each other is all that is needed to change the type of filter. Continue reading “Universal Active Filters: Part 1”→
This is not an artist’s rendering, nor a physics simulation. This device held together with hardware-store MDF and eyebolts and connected to a breadboard, is taking pictures of actual atomic structures using actual measurements. All via an 80¢ piezo buzzer? Madness.
Gold atoms in a crystal.
This apparent wizardry is called a scanning tunneling microscope which takes advantage of quantum tunneling. The device brings a needle atomically close to the object to be measured (by hand), applying a small voltage (+-15V), and stopping when it starts to conduct. Depending on the distance between the tip and the target, the voltage varies and does so precisely enough to identify whether an atom is underneath or not, and by how much.
The “pictures” are not photographs like a camera might take from a standard optical microscope, however they are neither guesses nor averages. They are representations of real physical measurements of specific individual atoms as they exist on the infinitesimal area being probed. It “sees” by measuring small voltage changes. Another difference lies in the “scanning.” The probe examines atoms the way one would draw ASCII images – single pixels at a time until an entire atom was drawn. Note that the resolution – as shown in the pictures – is sub-atomic. Sizes of atoms are apparent as are the distances between them. In this they are closer related to the far more expensive Scanning Electron Microscope technology, but are 10-100x zoomier; resolving 0.00000000001m, or 0.00000000039″.
Scan Head – Piezo cut into quadrants
One would presume that dealing with actual atoms requires precision machining vast orders of magnitude beyond the home hobbyist but, no. Any one of us could make this at home or in our hackerspaces, for nearly free. Apparently even sharpening a tip to a single atom is, as [Dan] says “not as hard to achieve as you might think!” You take some tungsten wire and pull on it as you cut so that it shatters diagonally. There are better ways he suggests, but that method is good enough.
The ordinary piezo buzzer that is key to the measurement is chopped into quadrants with an ordinary X-Acto knife by hand. Carefully, because it is fragile, but, nothing more to it than that. There are two better and common methods but they cost hundreds of dollars, not 80 cents. It should be carefully glued since soldering heat will damage it, but, [Dan] soldered his anyway because it was easier. Continue reading “Cheap DIY Microscope Sees Individual Atoms”→
Wandering the aisles of Eureka Park, the startup area of the Consumer Electronics Show, I spotted a mob of people and sauntered over to see what the excitement was all about. Peeking over this gentleman’s shoulder I realized he was getting spanked at Beer Pong… by a robot!
Those in the know will recognize that the bot has only 3 cups left and so the guy definitely was giving it run for its money. But the bot’s ability to swish the ball on nearly every throw accounts for the scoreboard which read Robot: 116, Humans: 11. Unlike the ping pong robot hoax from last March, we can vouch for this one being real!
If you’re trying to attract the geek demographic, this must be one of the best offerings ever shown at a trade show. Empire Robotics manufactures the VERSABALL gripper. We know this as a jamming gripper and have been looking at the tech progress for many years now. Looking back to this Cornell research video from 2010 we realize it is based on the white paper which [John Amend, PhD] co-authored. He’s now CTO and Co-Founder of the company and was one of the people running the booth. We love it when trade show booths are staffed by the engineers!
Join me after the break for a rundown of how the system works along with a video clip of it hitting the target.
[Texane] built a low-cost software defined radio rig which could be remotely controlled. This allows the hardware to be placed outside for better reception, while being controlled from any PC that can connect over TCP. To do this, he created a fork of librtlsdr, the library used to turn cheap TV tuners into software defined radios.
The official release of rtl-sdr includes the rtl_tcp utility, which is meant for this purpose. Unfortunately, not all of the SDR tools for Linux support this. By modifying the library itself, remote devices interact with software in the same way as local devices. This means that any software that supports librtlsdr should work.
The outdoor rig contains a BeagleBone Black and the SDR hardware, sealed up in a weather-resistant box. This connects to [Texane]’s home network over ethernet, and allows SDR utilities to be run elsewhere.
This feature is quite experimental, but the source for the fork is provided for those who want to build the code and try it out.
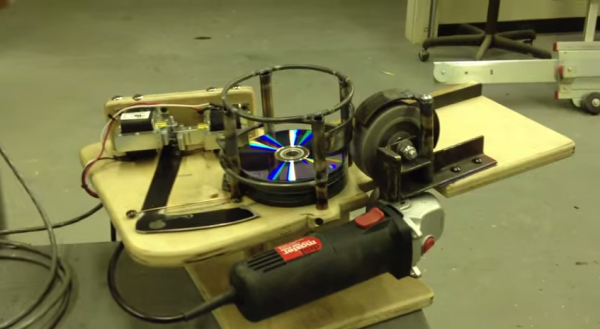
[sudarshan] is a solar hobbyist and needed a way to cut solar cells for his projects. He had previously created a rotary tool saw but manually feeding them through was sketchy at best. With just a slight wrong movement of his hand or flex in the work surface would cause the cell to break. These cells are extremely brittle and break easily. He needed a method of cutting these cells that was free from jitters and would cut in a straight line. He looked around his junk bin and found an odd solution… a scanner. Yes, the type you would scan photos in your computer with. The scanner had two critically important features, a flat surface and a carriage mechanism that moves perfectly parallel with that flat surface.
[sudarshan] made a solar cell cutting mini table saw with that scanner and made the cutting happen automatically. He mounted a motor with a diamond saw disk to the carriage, that is responsible for the cutting. The blade was positioned just high enough to poke through the plexiglass that replaced the original glass bed. A power switch turns on the cutting disk motor and an Arduino was used to move the carriage, including the cutting blade, back and forth. Two of the stock scanner buttons were reused and wired to the Arduino to keep the saw looking good.
The first few passes of the saw were done to cut a slot in the plexiglass. In order to cut a solar cell, the cell is taped to the bed with the desired cut location aligned with the slot in the plexiglass bed. Once everything is set, hit the ‘go’ button and the saw blade is slowly pushed through the cell, leaving a straight, clean cut.
The mountainous Italian town of Artena holds an annual soap box derby for wood vehicles – and they mean 100% wood, not a speck of anything else. Fierce competition led [Alessio] to engineering and CNC fabricating these gorgeous wooden roller bearings for the wheels to give him an edge.
Thousands in costume attend the renaissance faire known as “Palio delle contrade di Artena”, and the popular wood-only race is called “La Carettella.” The karts are operated by a two-man team: one in front who brakes, the other in the rear who hops on and off to push as needed throughout the course. There appears to be no steering from the wheels** so turning is also a two-man effort. The wooden levers dragging on the pavement provide some steering from the “driver”, and the push-man often manhandles the entire rear end, drifting where necessary. The course also includes full-width obstacles like hay bales. Teams are divided by community or “contrada”, and it was [Alessio]’s team captain who came to him with the special request of roller bearings. Unable to find evidence of other wooden bearings, [Alessio] knew he would have to invent them himself – so he did.
A few days ago, we saw a dev time trial between the Arduino and Phidgets, a somewhat proprietary dev board that is many times more expensive than an Arduino. The time trial was a simple experiment to see which platform was faster to prototype simple circuits. As always in Hackaday comments, there was a ton of comments questioning the validity and bias of the test. Not wanting to let a good controversy go to waste, [Ian Lee] tossed his hat into the ring with the same dev trial with the Gadgeteer.
The Gadgeteer has the same design philosophy as Phidgets: modular components and a unique software system -the Gadgeteer is based on .NET Micro Framework – that allows you to get up and running quickly. Unlike Phidgets, the Gadgeteer is priced competitively with the Arduino, and the mainboard is priced within an order of magnitude of a single ATMega chip.
[Ian] pulled off three projects with the three development platforms: blinking a LED, moving a servo, and building a pedometer with an accelerometer. For each trial, the time taken and the price of all components were added up. Here’s the relevant graph: