Stickvise is a simple device for a simple problem. It holds a work piece while you work on it. Most obviously this means a PCB for soldering, but there’s a twist of versatility that will make it work for a wide range of needs. Being someone who has often used the roll-of-solder-to-hold-a-circuit-board-down trick, only to upset the apple cart when I run out solder, this is a great little tool to have within arm’s reach. For those that already have a PCB vise, how often do you need more than one? How rarely do you need something that large? And if you’re lucky enough to have a microscope for soldering this is a perfect fixture for moving a board to and from without adjusting the focus.
Details of the Design
Simplicity. This is three pieces of aluminum bar-stock, some steel rod, nylon jaws, two springs, and some fasteners. It all works extremely well. To load up a new circuit board I loosen the wing nut and squeeze the clamp shut. Hand tightening the nut doesn’t take much force and it hasn’t slipped for me at all despite moving it around the bench for several days. Once set, the board can be taken out and flipped over easily thanks to the springs.
The extensibility here is key. As it stands, the nylon jaws have a V-groove to hold a board. If you need to support much taller boards you can always put some standoffs between the aluminum and the nylon jaws.
 Better yet is the ability to design jaws for your own needs. [Alex Rich], Stickvise’s creator, already has a number of STL files available so that you may print out your own. The “fingers” on the custom jaw shown here interlock with the ones on the opposite side. But my favorite is an articulated set of “third-hand” style jaws based off of the PCB probe jig [Anool] covered back in May. There are even plans to make a parametric STL file so that printing larger or taller jaws doesn’t require a CAD modeling session.
If the range of the vise is too narrow you can simply replace the center bar with a longer one (source yourself or purchase from [Alex]) — the fixed aluminum end is secured with a set screw. This can even be used as a type of stretcher by reversing the spring jaw. I couldn’t think of an application in my own shop for this but you never know.
Stickvise Roots
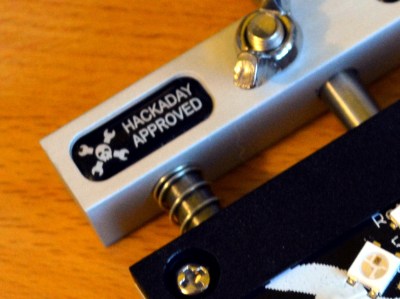 If you have an eagle eye you’ll have noticed the Jolly Wrencher with “Hackaday Approved” next to it on the Stickvise. When [Alex Rich] started refining his original design he posted about it as a project on Hackaday.io. It didn’t take long to grab our attention and, after tossing around the idea a bit we approached [Alex] about his plans for manufacturing and how Hackaday might figure into that. I love seeing hardware come to life like this; it puts an artisanal spin on the things I choose to have in my lab.
Conclusion
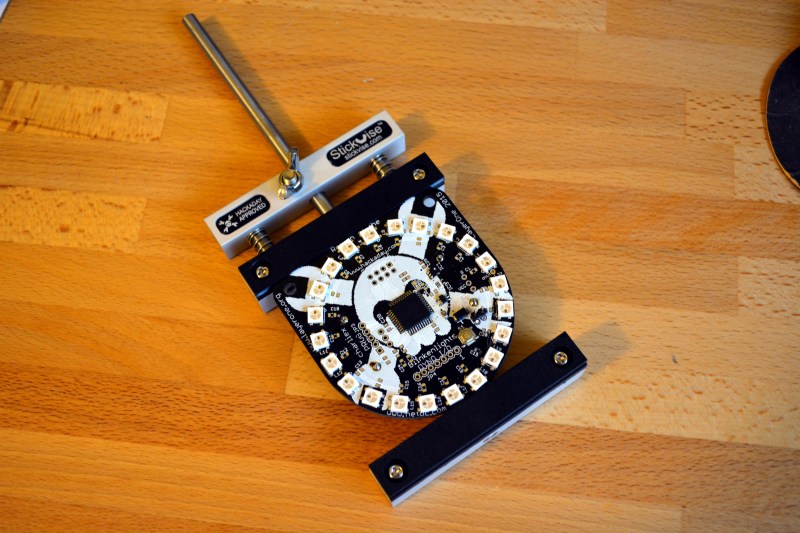
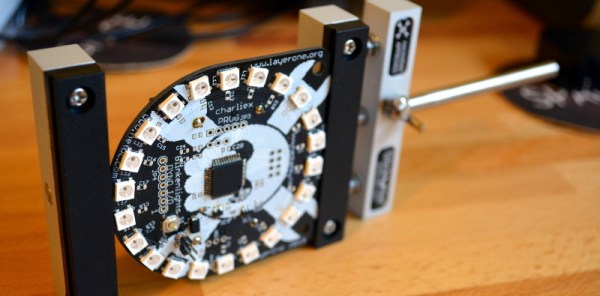
It’s so simple you could build it, but for me the production quality is well worth buying it instead. It’s simple and durable, with the ability to be specialized for a number of different purposes. I wish I had had it when populating the board I’ve been showing off in these pictures (the LayerOne Badge from this year). If you do any work with circuit boards at the bench the Stickvise is a solid entry on your must-have-tools list.