Simple 3D Printed Robotic Arm Uses Compliant Mechanism

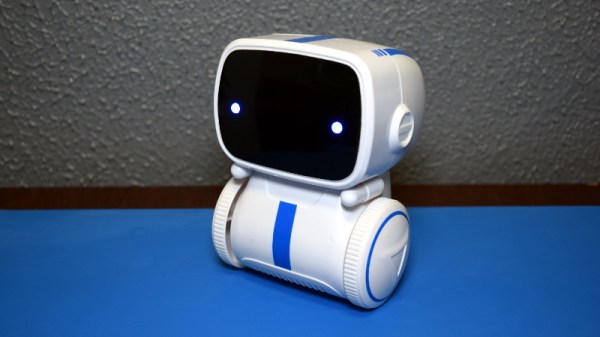
Learning through play is effective for humans of all ages, and since 2016 [slantconcepts] has been designing STEM kits that help teach kids to build their future overlords. They are launching version 3 of their LittleArm robotic arm, and the progression from version 1 is an interesting study in simplification and parts count reduction without sacrificing functionality.

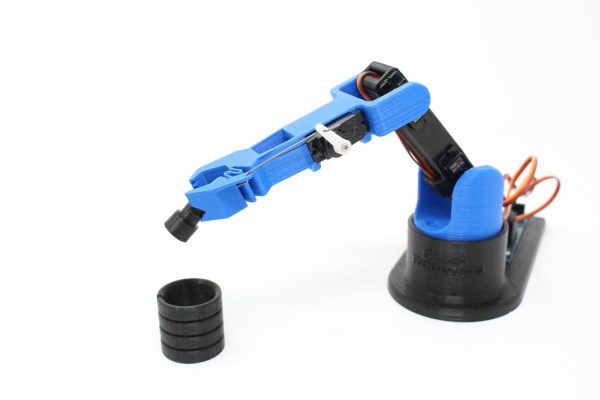
In all of the LittleArm versions the main mechanical components are 3D printed, and driven by 3 servos for motion plus one additional servo to run the gripper. These kits are specifically intended to be built and disassembled repeatedly, and classrooms are a great place for small screws to easily disappear, so reducing the number of screws was a big goal for v3. The gripper/forearm shows the most dramatic improvement from the previous versions, being simplified from 8 separate components to a single 3D printed part by using a compliant mechanism — that squiggly pattern that allows the gripper to flex into place. The gripper tips also feature a simple “cutout” that allow it more easily grasp horizontal objects.

An Arduino Nano based expansion board is used to control the arm, with a HC-06 Bluetooth module to allow it to be controlled via a smart phone app. Various sensors can also be added to expand the kit’s capabilities. Unfortunately the mechanical design is not open source, but it can still be a source of inspiration for your own design projects.

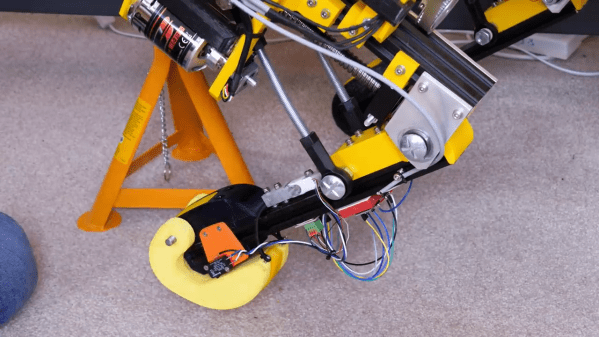
Hopefully this kit will inspire some future hackers to build a more advanced 3D printed version, or even a giant hydraulic powered arm.

Sonic The Hedgehog Self-Balancing Robot Can Bend At The Knees

Building your own self-balancing robot is a rite of passage for anyone getting into the field of robotics. Master of robots, [James Bruton] has been there, done that, and collected a few T-shirts. Now he’s building a large Sonic the Hedgehog self balancing robot that can bend at the knees and hip, allowing it to lean while turning and handle uneven terrain. Check out the first video embedded after the break.

Standing about 1 m tall, the robot is inspired by Boston Dynamic’s box handling bot, Handle. It’s “skeleton” consists of 20×20 aluminium extrusions, bolted together using a bunch of 3D printed fittings in the signature blue and red of Sonic. The wheels and tyres are also 3D printed, and driven by brushless motor via a toothed belt. The knee/hip mechanism is actuated using a ball screw, also driven by a brushless motor.

[James] intends to implement an active shock absorption system into the leg mechanism, using the same technique he tried on his OpenDog robot. It works by bolting a load cell onto one of the leg extrusion to sense when it flexes under load, and then actuating the knee mechanism to absorb the force. His first version of the system on OpenDog used PWM signals to send the load cell data to the main controller, but the motors on the legs induced enough noise in the signal wires to make it unusable. He has since started experimenting with the CAN bus protocol, which was specifically designed to work reliably in noisy systems like modern automobiles. If he gets it working on the two legs of this Sonic robot, he plans to also implement it on the quadruped OpenDog.

Continue reading “Sonic The Hedgehog Self-Balancing Robot Can Bend At The Knees”

Teardown: BilBot Bluetooth Robot

Historically, the subject of our January teardown has been a piece of high-tech holiday lighting from the clearance rack; after all, they can usually be picked up for pocket change once the trucks full of Valentine’s Day merchandise start pulling up around the back of your local Big Box retailer. But this year, we’ve got something a little different.

Today we’re looking at the BilBot Bluetooth robot, which over the holidays was being sold at Five Below for (you guessed it) just $5 USD. These were clearly something the company hoped to sell a lot of, with stacks of the little two-wheeled bots in your choice of white and yellow livery right by the front door. With wireless control from your iOS or Android device, and intriguing features like voice command, I’d be willing to bet they managed to move quite a few of these at such a low price.

For folks like us, it can be hard to wrap our minds around a product like this. It must have a Bluetooth radio, some kind of motor controller, and of course the motors and gears themselves. Yet they can sell it for the price of a budget hamburger and still turn a profit. If you wanted to pick up barebones robotics platform, with just a couple gear motors and some wheels, it would cost more than that. The economies of scale are a hell of a thing.

Which made me wonder, could hackers take advantage of this ultra-cheap robot for our own purposes? It’s pretty much a given that the software for this robot will be terrible, and that whatever control electronics live inside it will be marginal at best. But what if we write those off and just look at the BilBot as a two-wheeled platform to carry our own electronics? It’s certainly worth $5 to find out.

Continue reading “Teardown: BilBot Bluetooth Robot”

Exploring Early ’90s Video Game Architecture With Another World

Curious about past computer architectures? Software engineer [Fabien Sanglard] has been experimenting with porting Another World, an action-adventure platformer, to different machines and comparing the results in his “Polygons of Another World” project.

The results are pretty interesting. Due to the game’s polygon-based graphics, optimizations vary widely across different architectures, with tricks allowing the software to run on hardware released five years before the game’s publication. The consoles explored are primarily from the early ’90s, ranging from the Amiga 500, Atari ST, IBM PC, and Super Nintendo to the Sega Genesis.

The actual game contains very little code, with the original version at 6000 lines of assembly and the PC DOS executable only containing 20 KiB. The executable simply exists as a virtual machine host that reads and executes uint8_t opcodes, with most of the business logic implemented with bytecode. The graphics use 16 palette-based colors, despite the Amiga 500 supporting up to 32 colors. However, the aesthetics still fit the game nicely, with some very pleasant pixel art.

There’s a plethora of cool tricks that emerge in each of the ports, starting with the original Amiga 500 execution. Prior to the existence of the CPU/GPU architecture, microprocessors had blitters – logic blocks that rapidly modified data within the memory, capable of copying large swathes of data in parallel with the CPU, freeing up the CPU for other operations.

To display the visuals, a framebuffer containing a bitmap drives the display. There are three framebuffers used, two for double buffering and one for saving the background composition to avoid redrawing static polygons. Within the framebuffer, several tricks are used to improve the graphical experience. For scenes with translucent hues, special values are interpreted from the framebuffer index by “reading the framebuffer index, adding 0x8 and writing back”.

Challenges also come when manipulating pixels given each machine’s CPU and bus bandwidth limitations. For filling in bits, the blitter uses a feature called “Area Fill Mode” that scans left to right to find edges, rendering the bit arrays with spaces between lines filled in. Since the framebuffer is stored in five separate areas of memory – or bitplanes – this requires drawing the lines and filling in areas four times, multiplying by the hundreds of polygons rendered by the engine. The solution was to set up a temporary “scratchpad” buffer and rendering a polygon into the clean space. The polygon can then get copied to the screen area with a masked blit operation since the blitter can render anywhere in memory.

Intrigued? The series continues with deep dives into Atari ST, IBM PC, and upcoming writeups on SEGA Genesis/MegaDrive.

Don’t DIY This Surgical Robot At Home

The LVL1 Hackerspace in Louisville hosted a hackathon for useless and impractical devices a couple of years ago and this makeshift Duh-Vinci Surgical Robot was one of the “successful” results. While it’s not necessarily a project that should ever be used for its intended purpose, its miniature setup is certainly an interesting one.

The project builds on top of the MeArm Open Source Robot and a camera controlled by a Blynk board. Servos are wired into the base of each of the robotic arms for freedom in rotating. A separate microcontroller is used for the motor controllers for the arms and for the camera, partially due to the current draw for the camera power supply. The remote control system runs on an Android tablet and is used to control each of the arms.

The ESP32-Cam supplied video input is configured as a RTSP stream. As for the operation, while the movements are jerky and the range of dexterity limited, the robot is technically able to handle the sharps. Its final setup looks a bit like a deranged game of Hungry Hungry Hippos meets Operation and definitely not something to be making its way to surgical tables anytime soon.

Continue reading “Don’t DIY This Surgical Robot At Home”

It Turns Out, Robots Need Tough Love Too

Showing robots adversarial behavior may be the key to improving their performance, according to a study conducted by the University of Southern California. While a generative adversarial network (GAN), where two neural networks compete in a game, has been demonstrated, this is the first time adversarial human users have been used in a learning effort.

The report was presented at the International Conference on Intelligent Robots and Systems, describing the experiment in which reinforcement learning was used to train robotic systems to create a general purpose system. For most robots, a huge amount of training data is necessary in order to manipulate objects in a human-like way.

A line of research that has been successful in overcoming this problem is having a “human in the loop”, in which a human provides feedback to the system in regards to its abilities. Most algorithms have assumed a cooperating human assistant, but by acting against the system the robot may be more inclined to develop robustness towards real world complexities.

The experiment that was conducted involved a robot attempting to grasp an object in a computer simulation. The human observer observes the simulated grasp and attempts to snatch the object away from the robot if the grasp is successful. This helps the robot discern weak and firm grasps, a crazy idea from the researchers that managed to work. The system trained with the adversary rejected unstable grasps, quickly learning robust grasps for different objects.

Experiments like these can test the assumptions made in the learning task for robotic applications, leading to better stress-tested systems more inclined to work in real-world situations. Take a look at the interview in the video below the break.

Continue reading “It Turns Out, Robots Need Tough Love Too”

OpenDog: Adding Force Sensitive Feet

[James Bruton] OpenDog remains one of the most impressive home-built robotics projects we’ve seen here on Hackaday, and it’s a gift that just keeps on giving. This time he’s working on adding force sensing capabilities to OpenDog’s legs to allow for more dynamic movement control.

The actuators in the legs are three-phase outrunner motors that drive ball-screws via a belt. This configuration is non-backdrivable, meaning the legs cannot be moved when an external force is, which could lead to mechanical failures. He as tested other backdrivable leg configurations with other robots, but did not want to rebuild OpenDog completely. The solution [James] went with is a redesigned foot with an inbuilt switch, to confirm that the foot is touching the ground, and a load cell attached in the middle of the bottom leg segment. The load cell is bolted rigidly onto the leg segment, which allows it to sense when the leg is carrying load, without damaging the load cell itself.

Unfortunately all the serial ports on OpenDog’s main Teensy 3.6 controller are already used, so he converted the signal from the load cell to PWM, to allow it to be read by a normal GPIO pin. This works well in isolation, but when [James] switches on the motors, the PWM signal from the load sensor gets flooded by interference, making it unreadable. To solve this problem, he wants to implement a CAN bus, which will allow for more inputs and outputs and hopefully solve the interference problem. However, [James] has no experience with the CAN protocol, so learning to use it is going to be a project on its own.

OpenDog is turning into a very lengthy, time-consuming project, [James] says that the lessons learned from it have been invaluable for a number of other projects. This is something to keep in mind with everything we tackle. Choose projects were the experience gained and/or relationships developed are worth it on their own, even when the project fails in a conventional sense. This way you can never really lose.