Adafruit Builds The Back To The Future Time Circuit Display

back-to-the-future-time-circuit-clock

If you were growing up in the ’80s this display panel will be instantly recognizable. It’s the time circuit display which [Doc Brown] built into his 88 mph per hour DeLoren time machine. If this still doesn’t jog your memory (or if — *gasp* — you’ve never seen the movie Back to the Future) take a gander at the montage video below.

The thing is, if you look really closely you’ll find this isn’t an exact match. Hackaday alum [Phil Burgess] put together a guide for Adafruit that shows how to build this version. But the movie actually cheated when it came to the month display. In production the month was displayed as alpha characters by painting glass slides. To make that happen here you would need some sixteen segment modules (like in this project). But we don’t mind the change one bit. The nostalgic look stands on its own even if it’s not an exact replica.

We’re sure you’ve figured out by now that this is backed by a dead-accurate real time clock (chronodot) and powered by a Teensy microcontroller board. Which means you can use it for just about any of your timekeeping needs.

Continue reading “Adafruit Builds The Back To The Future Time Circuit Display”
No Nonsense Guide For Patching Into A Gaming Controller

patching-into-a-gaming-controller

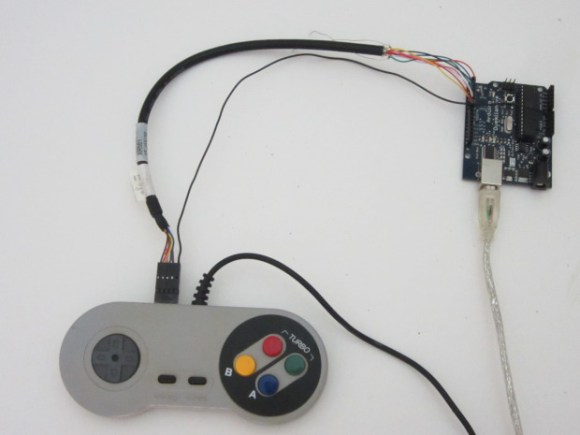
Here a straight-forward guide for tapping into the buttons on most gaming controllers. Why do something like this? Well there’s always the goal of conquering Mario through machine learning. But we hope this will further motivate hackers to donate their time and expertise developing specialized controllers for the disabled.

In this example a generic NES knock-off controller gets a breakout header for all of the controls. Upon close inspection of the PCB inside it’s clear that the buttons simply short out a trace to ground. By soldering a jumper between the active trace for each button and a female header the controller can still be used as normal, or can have button presses injected by a microcontroller.

The Arduino seen above simulates button presses by driving a pin low. From here you can develop larger buttons, foot pedals, or maybe even some software commands based on head movement or another adaptive technology.

Continue reading “No Nonsense Guide For Patching Into A Gaming Controller”

Gas, Water, And Electricity Monitoring

???????????????????????????????

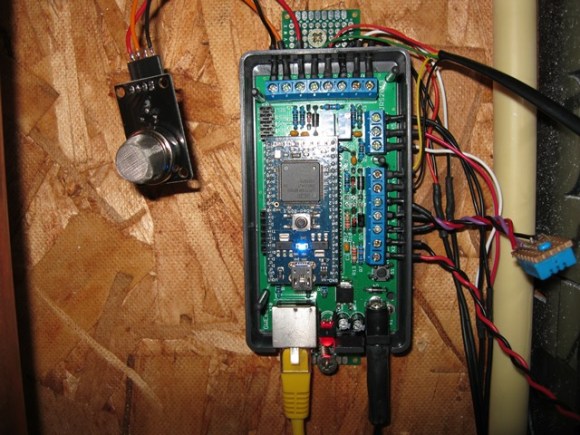
From the look of this you can tell that [Jasper Sikken] has some pretty interesting stuff going on to monitor the utilities in his home. But it’s important to note that this is a rental home. So adding sensors to the gas, water, and electric meters had to be done without making any type of permanent changes.

The module above is his own base PCB which accepts an mbed board to harvest and report on usage. His electric meter has an LED that will flash for every Watt hour that is used. He monitors that with a light dependent resistor, crafting a clever way to fasten it to the meter using four magnets. The water meter has a disc that makes one revolution for each liter of water that passes through it. Half of the disc is reflective so he uses a photoreflective sensor to keep track of that. And finally the gas meter has a reflective digit on one of the wheels. The sensor tracks each time this digit passes by, signifying 10 liters of gas used. He also monitors temperature which we’re sure comes in handy when trying to make sense of the data.

[Thanks Stephen]


Computer Monitor Ambilight Clone Shows Remarkable Performance

ambilight-project-discreet-led-boards

Check out this fantastic Ambilight clone for a computer monitor which [Brafilus] has been working on for a few years. It’s actually the third revision and watching the demo video below left our jaws agape.

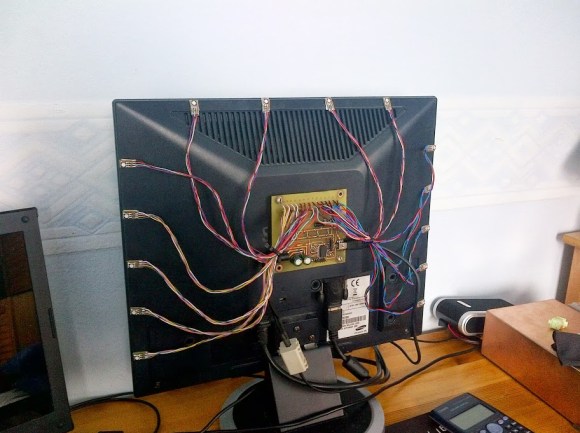
Details are only available as comments on the YouTube page. But he’s given us just enough to be satisfied. His self-etched board hosts a PIC 18F14K50 microcontroller. It is talking to each of the 28 LED pixels which themselves live on tiny hunks of diy PCB as well. He wrote his own PC software in C# to capture the colors around the edges of the screen. He also worked hard to ensure there are plenty of tweaks available for true color matching between the monitor and what your eye sees bouncing off of the wall.

If you’re looking for something like this on your television set go back a couple of days and check out that standalone unit.

Continue reading “Computer Monitor Ambilight Clone Shows Remarkable Performance”

Human Powered Flight Extravaganza

humanpoweredflight

In case you haven’t heard, the Sikorsky Prize, an aeronautical challenge to build a human-powered helicopter that can hover at three meters for a full sixty seconds, has been claimed. This incredibly difficult engineering feat was accomplished by AeroVelo, along with a lot of help from the University of Toronto and a host of companies involved in the design and manufacture of rotorcraft. This prize has stood unclaimed for thirty years, and it’s not from lack of trying; in the 80s and 90s, universities in Japan tried their hand at the challenge, and recently a team from the University of Maryland had a go at it.

But as far as human-powered flight goes, a helicopter is just about the least efficient way to get off the ground. Helicopters need power to provide their own lift and thrust, whereas airplanes only need to generate some forward momentum.

From the bicycle-powered crossing of the English channel in 1979, human-powered flight has come a long way, so far that next the Royal Aeronautical Society will be hosting the Icarus Cup 2013. It’s a competition where teams of human-powered aircraft enthusiasts will compete in challenges measuring distance, speed, endurance, and landing accuracy.

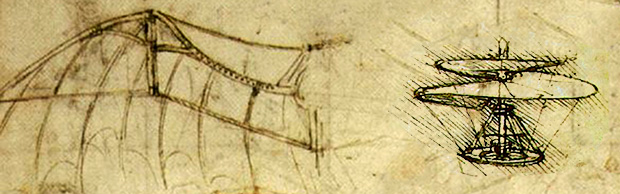
No, it’s not an ornithopter from Da Vinci’s notebook, but human pectoral muscles aren’t powerful enough for that anyway.

Thanks [DainBramage1991] for sending this one in.

A Different Type Of Arduino Internet Shield

different-arduino-internet-shield

The cost of an Ethernet shield for an Arduino isn’t horrible; generally between $17 and $32 depending on which one you buy. But have you seen the cost of a WiFi shield? Those are running North of $70! [Martin Melchior] has a solution that provides your choice of Ethernet or WiFi at a low-cost and it’ll work for most applications. He’s using a WiFi router as an Arduino Internet shield.

This is the TP-Link WR703N which has been very popular with hackers because of its combination of low price (easy to find at $25 or less) and many features: the USB is super hand and, well, it’s a WiFi router! The Arduino Pro Mini shown dead-bug style is talking to the router using its serial port. [Martin] wires a pin socket to the router, which makes the rest of assembly as easy as plugging the two together. The rest of his post deals with handling bi-directional communications with Arduino code.

If you really just need that direct Ethernet pipe consider building an ENC28J60 chip into your designs.

Adding A Digital Timer To A Cable Release Camera

slr-cable-release-timer

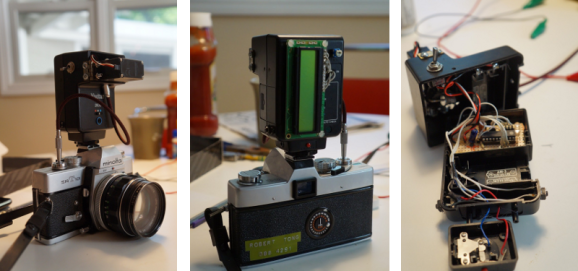
Here’s a completely non-invasive hack for a classic Minolta SLR camera. [Robby] wanted to add to the options available when it comes to remote shutter release. He ended up building a cable release add-on that mounts on the hot shoe.

He drew some of his inspiration from a similar project we saw back in March. He took the engineering example from that project which uses a small servo motor to actuate the cable release. But along the way added his own features.

The system centers around an ATtiny4313 microcontroller. It provides feedback using the character LCD on the back of the auxiliary flash body. That flash body also offers a battery compartment which provides power for the control circuitry as well as the servo motor. Right now it functions as a count-down timer, and also can hold the shutter a specified amount of time. But we could see this extended to work with external sensors to trigger at a set light level, when sensing motion, or from a remote control.