Using A Flashing LCD Monitor To Transfer Data

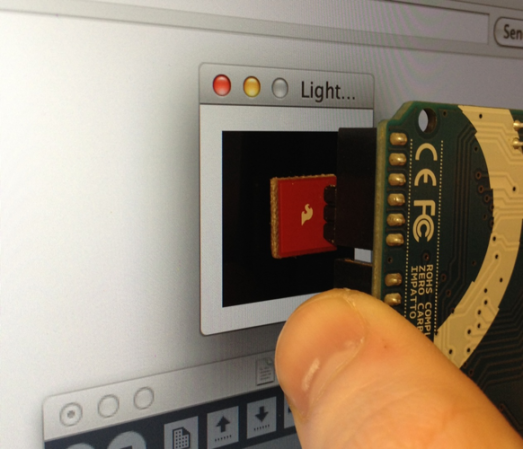
lcd-screen-data-transferWe love the concept of using an LCD screen to transfer data. The most wide-spread and successful method we know of is the combination of a QR code and the camera on a smart phone. But for less powerful/costly devices data can be transferred simply by flashing colors on the screen. That’s what [Connor Taylor] is testing out with this project. He’s using a TEMT6000 light sensor to turn a white and black flashing monitor into binary data.

So far this is just a proof of concept that takes measurements from the light sensor which is held in front of a Macbook Retina display with different backlight levels. At 3/4 and full brightness it provides more than enough contrast to reliably differentiate between black and white when measuring the sensor with the Arduino’s ADC. What he hasn’t gotten into yet is the timing necessary to actually transfer data. The issue arises when you need to have multiple 1’s or 0’s in a row. We’ve tried this ourselves using an LDR with limited success. We know it’s possible to get it working since we’ve seen projects like this clock which can only be programmed with a flashing screen.

[Connor’s] choice of the TEMT6000 should prove to be a lot more sensitive than using just an LDR. We figure he could find a way to encode using multiple colors in order to speed up the data transfer.
Ubuntu With A GUI On A Beagleboard

beagle

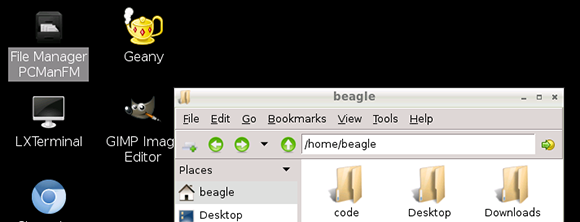
The Raspberry Pi is great if you’re looking for a cheap yet powerful computer running Linux, but let’s not forget all the other ARM dev boards out there. [Adam] spent some time this weekend putting together an Ubuntu distro for his Beagleboard XM to give it the convenience of a GUI and a whole bunch of drivers to get a lot of stuff done.

The Beagleboard XM is another high power ARM dev board that is a little more capable than the Raspberry Pi. With an integrated USB hub, LVDS LCD displays, and a camera board, the Beagleboard already has a lot of peripherals that are now only promised for the Raspberry Pi. The only problem with the Beagleboard XM is the state of drivers and software; a problem [Adam] resolved by bringing Ubuntu to the Beagleboard.

[Adam]’s distro comes with all the goodies a relatively high-powered ARM dev board should have: Python, scipy, numpy, and a few cool extras such as GIMP and Chromium. He says it’s a bit faster than the stock Raspbian distro on the Raspberry Pi, so if you’re looking for the best ARM/Linux dev board for your next project, you may want to give [Adam]’s distro a try.

SCARA Arm Finally Prints Plastic Parts

SCARA

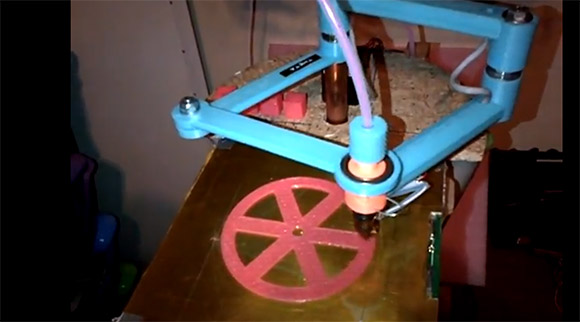
Here’s a neat alternative to the usual gantry setup you see on 3D printers. [Quentin] designed and build a SCARA arm 3D printer that just saw its first print.

We caught wind of [Quentin]’s SCARA arm a few weeks ago when it was still just a few plastic parts and a glimmer of ambition in its creator’s eye. Most of the parts are 3D printed, including the blue arms for the x and y axes that are driven by stepper motors. The z axis is controlled by two lead screws, and judging by the height of [Quentin]’s machine, he has a pretty big printable volume – at least as large as some of the delta bot 3D printers we’ve seen.

So far [Quentin] has printed a handful of calibration cubes and a wheel with a fairly impressive print resolution. You can check out a video of the SCARA arm printer after the break.

Continue reading “SCARA Arm Finally Prints Plastic Parts”

Modifying A Printer For PCB Fabbing

ohgodmyeyes

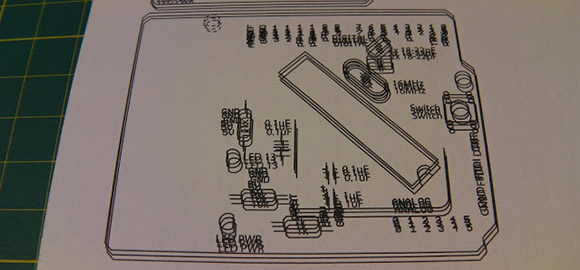
The migraine-inducing image above is the product of [Rupert Hirst]’s attempts at home PCB fabrication. He’s using the toner transfer method – printing a circuit on a piece of transparency sheet with a laser printer, setting it on a piece of copper clad board, and sending the whole assembly through a laminator. It’s a fairly straightforward process, but if you can’t run a transparency sheet through a printer multiple times your etch resist won’t hold up too well. Of course the transparency sheet must be aligned each time it goes through the printer, so [Rupert] came up with a modification that ensures laser toner goes only where it’s supposed to.

[Rupert] picked up a Samsung ML-2165W laser printer for his PCB fab shop, but printing the same image multiple times on the same transparency sheet would result in unusable masks. This problem was fixed with a few plastic shims used to hang door frames and a card stock tray that ensures the transparency sheet goes through the printer the same way every time.

We saw [Rupert]’s homebrew PCB fabrication process a few weeks ago when he sent in his six channel floppy drive MIDI synth. In his build video, [Rupert] demonstrated what is possibly the cleanest toner transfer PCB we’ve seen to date. You can check out his etching process in the video after the break.

Continue reading “Modifying A Printer For PCB Fabbing”

Building Huge Displays With LED Strips

Building RGB LED displays is one of the most interesting programming and engineering challenges we see here on Hackaday. Not only do the creators of large displays and LED cubes have to deal with the power requirements of driving a whole bunch of LEDs, but there’s also the issue of getting the frame rate high enough to display video. It’s a non-trivial task, but [Paul Stoffregen] has an interesting solution. He wrote an LED strip library that can control eight meter-long LED strips that can also be used on daisy chained Teensy 3.0 microcontrollers for really large displays.

[Paul]’s LED library works with LED strips based on the WS2811 LED controller IC. These chips are the most common controller chips for the individually controllable LED strips you can find at Adafruit or hundreds of Chinese resellers. The library requires DMA transfer to display images, so if you’re looking to build a ginormous RGB LED display, you might want to pick up a few of [Paul]’s Teensy 3.0 boards

[Paul] also created a Processing app that takes a video file and turns it into serial data for his LED strip library. You can check out a video of this app, library, and a 60×32 RGB LED display after the break.

Continue reading “Building Huge Displays With LED Strips”

Arduinofied QRP Radio Beacon

moxpd

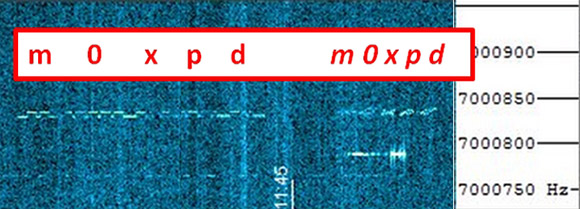
A while back, [m0xpd] picked up an unbearably cheap AD9850 DDS module from ebay. He turned this in to a Raspberry Pi-powered radio beacon, but like so many builds that grace our pages, the trolls didn’t like using such an overpowered computer for such a simple device. To keep those trolls quiet, [m0xpd] is back again, this time using the AD9850 DDS module as a radio beacon with an Arduino.

The previous incarnation of this build used a Raspberry Pi, and as a consequence needed a level converter. This was thrown out as [m0xpd]’s own Arduino clone, the WOTDUINO – pronounced, ‘what do I know’ – is able to handle the 5 Volt IO of the AD9850.

In addition to fabbing a shield for the DDS module, [m0xpd] also constructed a transmitter shield to amplify the signal and allow the ‘duino to key out a few simple messages. It’s a quite capable device – one of [m0xpd]’s messages traveled from merry olde England to Arizona, his best ever westward distance.

A Remote-controlled, Autonomous Kite Generates Power

kite

Generating power from wind is easy – just stick a windmill on a pole and attach a generator. That’s not particularly cool, though, so [Adrien] and his team from his senior design project are using an autonomously controlled kite to generate power

The basic idea of generating electricity from a kite is to fly it around in figure-eights while unwinding the kite line from a spool. The very strong forces on the kite lines can be used to drive a generator which provides power for reeling the kite back in at a lower angle of attack. You can check out [Adrien]’s kite power theory page for a few more details on how this works.

Right now, [Adrien] and his team have a basic rig set up to generate power and are flying the kite via a joystick. Updates are coming, and you can check out the video of their RC kite in action after the break.

Continue reading “A Remote-controlled, Autonomous Kite Generates Power”