Traffic Lights Tell You When Your Xbox Live Friends Are Gaming

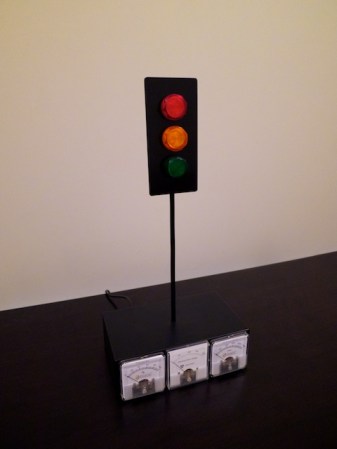
It sounds like [Andrew] is trying to build a Pavlovian response into his behavior when it comes to online gaming. He wants to make sure he doesn’t miss out when all his friends are online, so he built this traffic signal to monitor Xbox Live activity. It will illuminate the lights, and drive the meters differently based on which of his friends are currently online. When the light’s green, he drops everything a grabs a controller.

The base of the light is a black project box. Inside you’ll find the Arduino compatible chip which drives the device mounted on a piece of protoboard. A WIZnet W5100 adds network connectivity at the low price of around $25. There is one problem with the setup. The API which [Andrew] found doesn’t use any authentication. This means that he can only see the public status of his friends; anyone who has set their online status set to private will always register as ‘online’. If you know of an existing Xbox Live API that would solve this issue we’d love to hear from you in the comments.
Build A POV Death Star, You Will

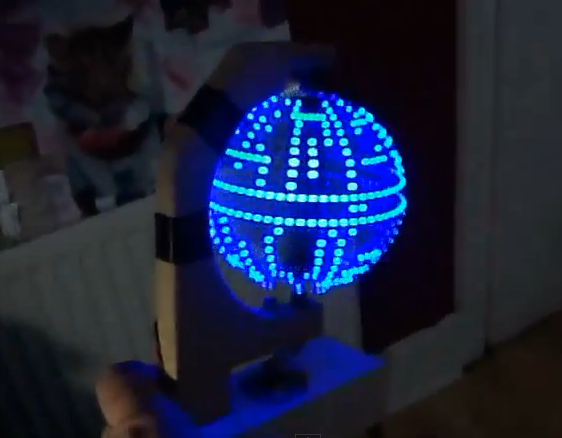
Building a Persistence of Vision globe is pretty awesome, but overlaying a Death Star pattern on the display takes it to the next level of geekery. Like us, [Jason] has wanted to build one of these for a long time. His success pushes us one step closer to taking the plunge and we hope it will inspire you to give it a shot too.

As he mentions in the beginning of his write up, the mechanical bits of these displays are really where the problems lie. Specifically, you need to find a way to transfer power to the spinning display. In this case use went with some DC motor brushes. These are replacement parts through which he drilled a hole to accept the metal axles on top and bottom. We hadn’t seen this technique before, but since motor brush replacements are easy to find and only cost a few bucks we’d say it’s a great idea.

The 24 blue LEDs that make up the display are all on one side of the PCB. They’re driven by an ATmega328 running the Arduino bootloader. [Jason] uses an FTDI adapter to program the chip. Don’t miss the video embedded after the break.

Continue reading “Build A POV Death Star, You Will”

L.I.O.S.: The Ten-ish Dollar Robot.

We love cheap stuff here. Who doesn’t? [Oscar Rodriguez Parra] does too, and wrote in to show us his super cheapey robot L.I.O.S. The build was for the AFRON design challenge, which involves building a 10 dollar robot to teach students robotics. The winners of the challenge were neat and all, but they all look too fancy flaunting their molded plastics and electronics breadboards.

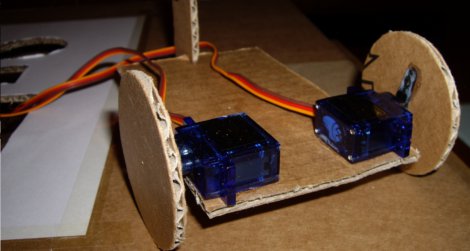
[Oscar’s] design is super simple, LDRs as eyes, a PIC12F683 to do the brainin, LEDs for indicators and a couple modded servos to drive the wheels. An extraordinarily complex cardboard flap roller helps the cart turn, but probably isn’t going to see much aside from smooth flooring. The electronics are mounted using one of our favorite techniques, the paper perf board (very similar to the substrate free technique).

Check out the video after the jump to see LIOS in action. This is an excellent introduction to robotics for any classroom. Thanks [Oscar]!

Continue reading “L.I.O.S.: The Ten-ish Dollar Robot.”

Honey Bee Temperature Logger Tracks Internal Hive Movement

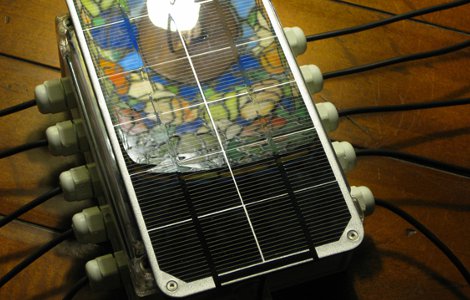
Apparently bees tend to use different areas of the hive throughout the year. All we know is not to mess with them. [Max Justicz], on the other hand, does exactly that at his high school. He built a whether resistant solar powered multi-point temperature logger to do such things. The logger is designed to track heat movement within the hive throughout the year. Bees can be tracked like this because they generate a good amount of heat, some even use it to kill off predators.

Building weather resistant electronics is no picnic. You have to deal with rubber O rings, cable glands and clunky waterproof connectors. [Max] shows the whole process of mounting the various components into the enclosure. A solar panel feeds an Ardunio Mega, charging electronics, and SD card shield. With a 1GB SD card this bugger is in for a long haul. The 6600mAh battery should keep it running excessively long though. We’d cut the fat a bit though and swap out that Mega for something less power hungry, but going super low power can get a bit fancy. That mega is powerful enough to incorporate every other bee project we have here.

[Max] has yet to install the logger in his high school’s apiary but will update with logs once he can furnish them. We can’t wait to see the patina it develops over the seasons.

Running Into The Form 1 Printer At Maker Faire

[youtube=http://www.youtube.com/watch?v=yxNqMg_dwJI&w=470]

The Form 1 resin printer Kickstarter met its funding goal in just about 8 hours, and after five days is on track to be the most successful Kickstarter to date. Being so successful meant we had to drop by the FormLabs booth at Maker Faire to see what the hubub is.

From the sample prints floating around the booth, the Form 1 printer has amazing resolution – a 3 inch tall statue of a Greek god had as many features as a life-sized statue.

In the video (both above the fold and after the break), [David Cranor] goes over the features and finishing process of objects made on the Form 1.

Continue reading “Running Into The Form 1 Printer At Maker Faire”

Test Your Project’s Mettle With A Protected Dummy Load

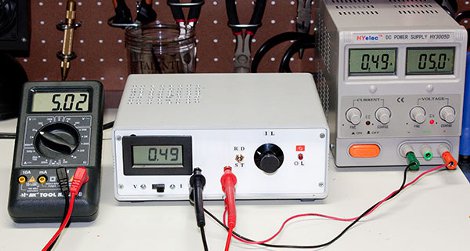
For a power hungry project the supply is sometimes a pretty big unknown. Whether stapling together a few different power supplies to meet a current requirement, or designing a system from the ground up: a big power supply can be quite a dangerous thing. It helps to have some kind of a dummy load to really shake down the electronics and get an idea of how hot things get or test stability before trusting the supply to run your stuff. [Paulo Oliveira] has constructed just such a thing, a slick looking adjustable constant current load.

Following the popular LM324 circuit from [David Jones] at EEVblog [Paulo] decided to make use of the two spare op-amps to provide both a thermal overload and a cooling fan circuit. We have seen other tweaks to [David]’s circuit in the past but through some resistors and MOSFETs [Paulo] can now load up to 7A (limited by resistor wattage). We would have used a really crazy server vacuum fan to make it genuinely frightening to push heavier loads. Thanks [Paulo]!

Mbed And A Few Resistors Runs Console, VGA, And PS/2

[Jordan] writes in to show us a project he has been working on called MbedConsole. Living up its name [Jordan] has managed to run a 640×480 VGA output, PS/2 port and console all from the mbed itself. We really mean from an mbed only; no extra hardware is required aside from a few resistors and connectors, a VGA monitor and PS/2 keyboard. The code is open source and links are included in the blog. There are even instructions for including your own graphics.

There are a few things to tackle still, like SD card support. Currently the PS/2 keyboard lights for caps-lock are not functional. [Jordan] would love to know what else we’d see going on something like this, with 400k of flash and 20k RAM left there certainly is a bit of room for some interesting stuff. One of his main goals is to get rid of the C interface and port an interactive shell over that could do something like BASIC or Forth (to give it that retro environment feel). We have seen the mbed in a handful of projects, what do you think?