A JavaScript Interpreter For ARM ‘micros

When programming a microcontroller to do your bidding, you only have two choices. You could write your code in a proper language such as C and cross-compile your source into a piece of firmware easily understood by a micro. Alternatively, your could load an interpreter on your microcontroller and write code via a serial connection. Interpreters are a really fast and easy method to dig in to the hardware but unfortunately most microcontroller interpreters available are based on BASIC or Forth.

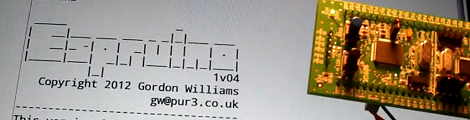
[Gordon] figured it’s not 1980 anymore, and interpreters for these relatively low-level languages aren’t a good fit with the microcontrollers of today. To solve this problem, he created Espruino, a JavaScript interpreter for the new batch of ARM development boards that have been cropping up.

Espruino is designed for the STM32VL Discovery board, although [Gordon] plans on porting his interpreter to the Arduino Due when he can get his hands on one. Installation is as easy as uploading any other piece of firmware, and even though [Gordon]’s STM32VL doesn’t have a USB port for a serial terminal, it’s a snap to connect a USB to TTL converter and get this interpreter working.

Espruino isn’t open source yet, only because [Gordon] would like to clean up his code and write a bit of documentation. He’d also like to make Espruino profitable so he can work on it full-time, so if anyone has an idea on how [Gordon] can do that, leave a note in the comments.


LED Illuminated Isomorphic Keyboard Looks As Good As It Sounds

Unlike the traditional ebony and ivory found on pianos, isomorphic keyboards arrange buttons on a grid. This makes every chord the same shape, and to transpose a piece it’s simply a matter of moving your fingers a few places to the left or right. [Brett Park] sent in an isomorphic keyboard he built loaded up with LEDs, and we’re thinking it the perfect instrument for musicians looking to move up from playing their MacBook.

The body of [Brett]’s keyboard is made out of a sheet of acrylic. After drilling 64 holes for each of the clear arcade buttons, [Brett] bent the sides of his hexagonal keyboard into a very sturdy-looking enclosure.

On the hardware side, [Brett] used a 64 button Arduino shield and a Sparkfun MIDI shield. The RGB LEDs behind each button are controlled via MIDI sysex messages generated outside the instrument, making it perfect for a little bit of visual feedback from whatever soft synth you desire.

In the videos after the break, you can check out the light patterns in action along with one of [Brett]’s improvs. Notice how all the chords are the same shape, and changing the key only requires [Brett] to move his hands slightly to the side.

Continue reading “LED Illuminated Isomorphic Keyboard Looks As Good As It Sounds” →

Jailbreaking The Kindle Paperwhite

The Kindle Paperwhite, Amazon’s newest e-ink reader featuring a touch interface with a higher contrast display, is now officially jailbroken.

[geekmaster], the geek master behind this hack, based his jailbreak off [Yifan]’s previous hack  to jailbreak the Kindle Touch. Installation is a snap, and only requires you to upload the data.stgz file to the root directory of the Paperwhite and restart the device. On the next boot, the Paperwhite will be jailbroken, allowing you to do tons of cool stuff with a tiny Linux device connected to an e-ink screen.

We’ve already seen a few really cool uses for jailbroken Kindles including a weather station display and a serial terminal for your Raspberry Pi. Cracking the newer and better Kindle Paperwhite means those e-ink projects you’ve been thinking about building just became much more attractive.

One word of warning from [geekmaster], though: USB downloader mode isn’t yet enabled. If you brick your device, you’ll need to connect your Kindle to a serial port. This shouldn’t be a problem for Hackaday readers, but it is something to watch out for.

Making A Nostalgic Apple Mouse Wireless

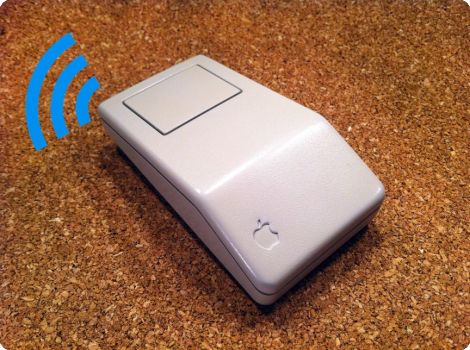
If you’ve got an old mouse sitting around that has that perfect retro look why not start using it again? We’d bet there’s just enough room in there to turn the input device wireless.

The hack does away with everything but the case. The guts from a brand new wireless laser mouse are used as replacements. For the most part this is a simple process of making room for the new board and laying it in place. It involves cutting off a few plastic case nubs, enlarging the hole on the bottom so that the laser has a clear line of sight to the desktop, and hot gluing the thing in place. The button cover had a bit of plastic glued in place so that it lines up correctly with the replacement mouse’s switch.

The only thing that didn’t work out well is the battery situation. The AA cell that the mouse needs was too big for the retrofit so it was swapped with an AAA. These have a lower capacity which means more frequent replacement.

[via Make]

3D Printing A Rocket Engine

Most any rocket engine you’d find on a spacecraft – save for solid or hybrid rockets – use an engine system that’s fairly complex. Because of the intense heat, the fuel is circulated around the chamber before ignition giving a motor its regeneratively cooled nomenclature. This arrangement leads to a few complicated welding and machining processes, but surprisingly these obstacles can be overcome by simply printing a rocket engine on a 3D printer.

The current engine is quite small, but still fueled just like any other proper rocket engine that makes it into Earth orbit. The fuel is propane, the oxidizer is NO2, and the entire device is ignited with an automotive spark plug. Of course this was an expensive proposition; a motor with 12 pounds of thrust cost somewhere in the range of four figures.

Printing a rocket engine has a few advantages over traditional manufacturing techniques. [Rocket Moonlighting] explains that traditional techniques (mills, lathes and other heavy equipment) are bound by labor, material, and time. The costs of printing a rocket engine are only bound by the volume of the finished piece, meaning the most expensive engine per unit of thrust is the one that will fit in your pocket; scaling up means more efficiency for less cost.

There are a few videos up after the break showing the engine in action at full throttle, a few start and restart tests, and a test that involved throttling the engine. It’s an extremely impressive piece of kit, and hopefully [Rocket Moonlighting] will release the CAD source so we can make our own.

EDIT: [RM] tells me his engine cost less than $2000 to make. If just 10 people wanted their own engine from a ‘group buy,’ the price would drop by more than half. If you’d like your own 3D printed rocket engine, you might do well to drop [Rocket Moonlighting] a line.

Continue reading “3D Printing A Rocket Engine” →

Try Out Your Assembly And BASIC Skills With A ZX Spectrum Project

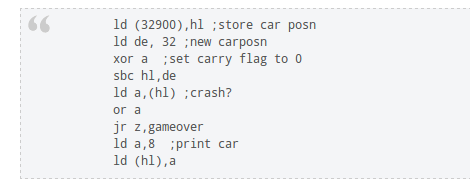
It can be really hard to warm up to coding in Assembly. But this tutorial looks to make it understandable and (almost) easy. It focuses on programming a game for the ZX Spectrum. But you won’t need the hardware on hand as you can just use the ZX Spin emulator as you work your way through the code.

Ostensibly this is a 30-minute tutorial but that’s a gross underestimate. We finished a cursory read of the tutorial and the building blocks are certainly clear and easy to understand. But we like to make sure we understand every line of code and plan to spread that out over the coming weekend.

The first chapter eases us into machine code by combining it with a bit of BASIC. You’ll see how to manipulate the ZX Spectrum memory and then pluck that value back out into the BASIC program. But once chapter 2 hits it’s pretty much all assembly from there on out. The nice thing is that as you go along you learn how the hardware works and there are quite a few references to pages in the manual so you can do some extra learning along the way.

[Thanks Mathilda]

Malicious Raspberry Pi Power Strip Looks A Bit Scary

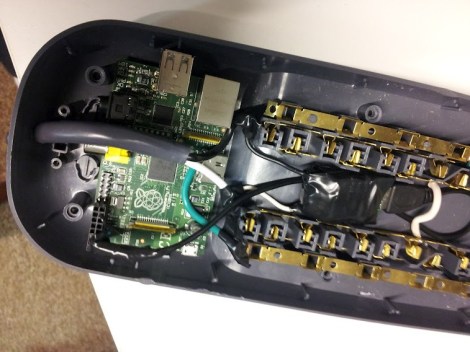
What you see here is a Raspberry Pi shoehorned into a power strip. The idea is to leverage the power and low-cost of this board into a stealthy network observation device. It packs a similar punch as the Power Pwn but should cost at least $1100 less!

The fact that when you plug your Ethernet into this ‘surge protector’ it starts sniffing your traffic doesn’t really scare us. It’s the mains wiring that traverses the RPi itself that’s a bit unnerving. Call us overly-protective, but we like to see some shielding between our high-voltage and low-voltage components. But that aside, the rest of the hack is pretty solid. That item wrapped in electrical tape is a power converter for the board itself. It’s not shown here, but the NIC is patched into the surge protector’s RJ-45 connector. The one thing that might be nice to include is a WiFi nub so that you can access the strip wirelessly. This would open the door for other snooping items, like a small microphone.