Hackaday Store: It Exists Again

We used to have a store. Actually, it was just me, pumping out shirts and stickers from my garage.  However, I found that over time, I wasn’t particularly happy with the quality of the shirts. The vinyl would crack over time, and I wasn’t the fastest person in the world to get an order out the door. I shut down the store because I didn’t want to too poorly in the name of hackaday.  I’ve had TONS of emails asking me to turn it back on.

Today, we’re turning on another store. It isn’t fancy. It isn’t amazing. It should, however, provide higher quality products than we had before, and more different products to choose from. I’ve put shirts, coffee mugs, and stickers in so far. The graphics were all done correctly for each format, so they should turn out very nice.When you buy Hackaday merchandise, you help ensure Hackaday will stick around as long as possible.

Now, lets talk a little bit about where we should go from here.
Continue reading “Hackaday Store: It Exists Again”

Grab Your Iron And Add GameCube Back To The Wii

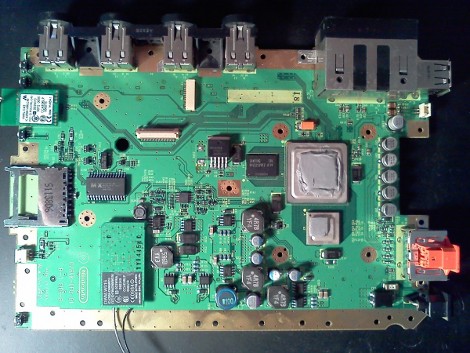
One of the really cool things about the Nintendo Wii when it was first introduced was the ability to play GameCube games on it. This made it a no-brainer for a lot of folks to upgrade. But as the heyday of legacy systems fades into history, Nintendo decided this was no longer a selling point and stopped populating those components. The good new is, if you don’t mind a lot of PCB soldering you can add your GameCube bits to a modern Wii motherboard.

[Deadlyfoez] launched a raffle to raise enough money to buy a new version of the hardware (we guess the raffle prize is the modded console). He then proceeded to solder on four GameCube controller ports and a memory card reader. There are also a number of passive surface mount components that need to be added. But as the video after the break shows, once in place the functionality reappears on the software side.

Continue reading “Grab Your Iron And Add GameCube Back To The Wii”

Arduino Tells You How Rough Your Last Mountain Bike Ride Was

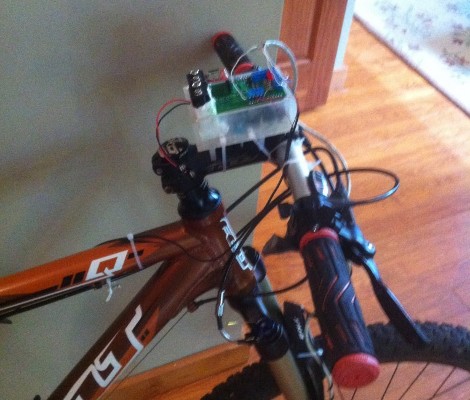
If you want to see what kind of abuse you’re causing your body when out on those single-track rides this system is just the thing. It’s an Arduino data logger that [Wdm006] takes along on the rides with him. When he gets back home, a Python scripts captures the data dump and graphs it. It may sound like a neat trick, but he’s got something planned for that information.

The enclosure mounts to the stem of his bike. It houses an Arduino board with a data logging shield of his own design. That shield holds an SD card for storage, and breaks the other pins out as screw terminals. Right now there’s an accelerometer on the front fork, and some method of recording wheel speed. This is the research phase of an anti-lock brake system (ABS) he plans to build for mountain biking. No word on what hardware he’ll use for that, but we can’t wait to see how it comes out.

LayerOne Badges Stop Bullets; Drive Away

We love badges. And we’ve really got to thank [Charliex] for taking the time to write a huge post about this year’s LayerOne badges, especially since they’ve got their backs up against the deadline for pulling everything together in time.

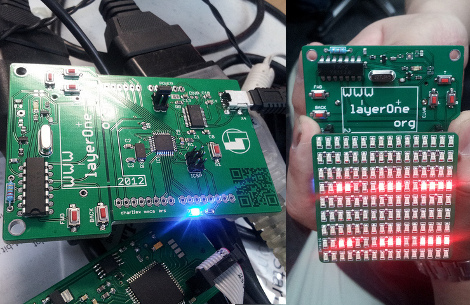
Here it is, the stock badge on the left, with an add-on shield on the right. Now the original intent was to make this badge the chassis of an RC car. [Charliex] chewed through his development time trying to source toy cars that could be gutted for parts that would mount easily on the badge. This looked promising at first, but turned out to be folly. Instead what we have here is an Arduino compatible board with an RF transmitter which can be cut off and used separately if you wish. Attendees will be able to use the badge to take control of the toy cars (cases of them have been shipped to the conference), with the option to use the USB functionality to facilitate automation.

So what about stopping bullets? There is a bug in the module [Charliex] used to export the board design from Eagle. They came back from the fab house as 0.125″ substrate. That’s pretty beefy!

The conference is this weekend… better get on that!

Hacking Color And Battery Life On A Solar Powered Garden Light

Give your garden lights a little bit more life by changing out the LEDs. In the process, you can also choose a different color if you like. It really is as simple as cracking it open and replacing the stock LED, but a bit of a change may also prolong the stored charge.

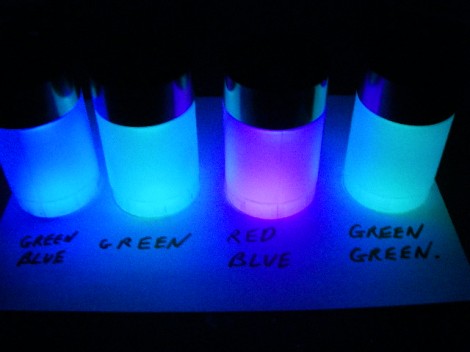
These garden lights consist of a small solar cell and an LED, both controlled by a small PCB powered from a NiMH rechargeable battery. Sure, you could try to put in a battery that has more potential, but if you replace the single LED with two of them in series, it drops the current consumption and increase the battery life. Just make sure to use super bright LEDs and the intensity change will not be all that noticeable. That comes partly from the fact that our eyes don’t detect intensity changes as well when a light is already very bright. And since it’s two LEDs, mixing colors is an option as we see above.

[Thanks Ken]

Cemetech’s Ultimate Calculator V2

[Christopher] piped up in our comments on a recent post about using laptop touch pads in other things, noting that he had done this on his Ultimate Calculator Version 2. What he’s done is upgraded his TI-83+ calculator to house a number of improvements and customizations. It now has a stronger RGB backlight so he can illuminate his screen in whatever color strikes his mood. He also integrated a PS2 port so he could use an external mouse/ keyboard. What brought this to our comments though, was the embedded laptop touchpad on the back that is also fully functional. He topped it all off with a rather pleasing paint job as well.

The funny thing is, we caught a glimpse of this thing in a previous post about networking these calculators.

Building A Travel Trailer From The Ground Up

While it may only be [ioan]’s first ‘real build’, we’re loving his DIY teardrop travel trailer built from the ground up.

The trailer started its life as a Super Duty Harbor Freight utility trailer that [ioan] managed to put together in a day. After mounting a wooden frame on the utility trailer, [ioan] fabricated the body of the trailer out of 1/2 inch plywood for the exterior, hard foam as insulation, and gorgeous 5mm plywood for the interior. To finish off his build, [ioan] cemented aluminum sheets to the exterior for a wonderful Airstream aesthetic.

[ioan] even went so far as to install a small kitchen in the back of his trailer that includes a small propane stove and (a limited supply of) running water. It’s an excellent build that really shows off his craftsmanship, and something we wouldn’t mind spending a weekend in.

[ioan] put up an Instructable of his build that showcases the construction including all the electrical work of wiring up his trailer with LED lights and 12 volt power jacks.