Linear Motor Can Be Built From Trash

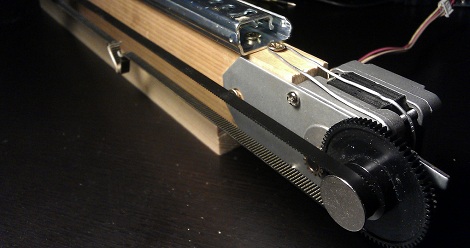
[Raul] built a cheap linear actuator out of a drawer slide and a surplus flatbed scanner.

A few builds we’ve seen, like the PCB drill press or the horribly inefficient thermostat, used linear actuators as key components of their builds. These linear actuators are fairly expensive compared to other parts we usually have lying around so going the homebrew route to reduce costs is always a welcome idea.

The first step of [Raul]’s build is to mount a drawer slide to a piece of wood. A stepper motor is attached to one end of the actuator and a timing belt is strung along the length of the assemblage. After a bracket is connected the drawer slide and the belt, you’ve got a very inexpensive linear motor.

In our days of dumpster diving, we can’t count the number of times we’ve passed up on drawer slides in unwanted furniture. Stepper motors, gear trains and timing belts from old ScanJets can be found for pocket change any day of the week. For cheap and accurate linear motion, we couldn’t come up with a build that does better than [Raul]’s.
Workbench Overhead Camera Boom Made From PVC

pvc_overhead_camera_ boom

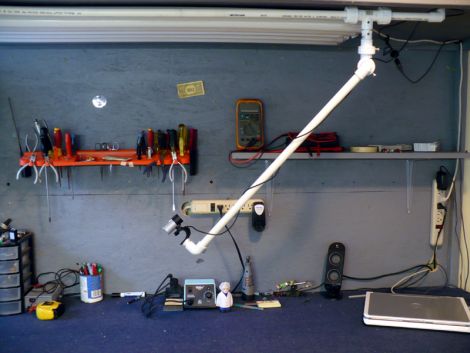
It looks like [Dino] is getting settled into his new digs, and while the moving process has kept him pretty busy, he’s slowly but surely getting his workshop area set up. One thing that he really wanted from his new bench was a better way to record video, for both his Hack a Week series as well as broadcasting over Ustream.

He bought a nice little Hi-Def web cam for making videos and set out to build a camera boom for his bench. The boom is constructed mostly from PVC piping along with some other odds and ends for mounting. In the video below, he walks through the construction step by step, making it easy for anyone to follow along and build one of their own.

The boom looks like it works very well, and is a bargain at under $40. It articulates every which way giving him complete coverage of his workbench, and makes it easy to film whatever he’s working on – big or small.

Continue reading “Workbench Overhead Camera Boom Made From PVC”

Improving A Cheap Espresso Machine

For those of us that would like a good cup of coffee but don’t want to put up with the ‘burnt butt’ taste of Starbucks and don’t have a decent coffee shop nearby, we’ve had very few options. Most of us have been made to suffer with an el-cheapo espresso machine. [Joe] sent in a great build that improves these el-cheapo models and brings them up to the quality we would expect from their more expensive brethren.

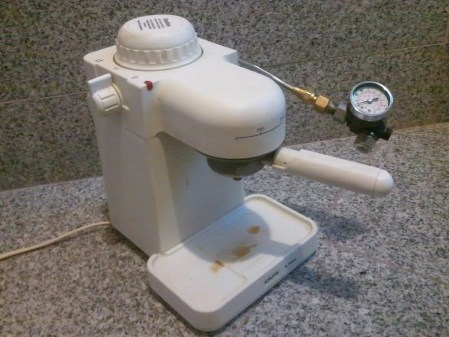
For the best pull from an espresso machine, the great [Alton Brown] says 200° F water must be forced through the grind at around 10 PSI atm. [Joe]’s espresso machine can’t build up pressure because the heating element is only active when the lever is in the ‘brew’ or ‘froth’ position. To build up pressure in the water reservoir, [Joe] simply added a pressure gauge to the frothing attachment. When the gauge reads the necessary 10 atmospheres, just move the lever over to the ‘brew’ position and enjoy a nice cup of espresso.

[Joe] has already tested the pressure relief valve of his espresso machine. With the gauge in the way, [Joe] can’t make use of his frother, but a secondary valve could easily remedy that. [Joe] hasn’t published his espresso hack anywhere, but he did email us some pics of his build. We’ve embedded them as a slideshow after the break. Check out the pressure gauge on the frothing attachment and the pressure relief valve below.

Continue reading “Improving A Cheap Espresso Machine”

Upgrading An Old Super Scope

rechargeable_super_scope

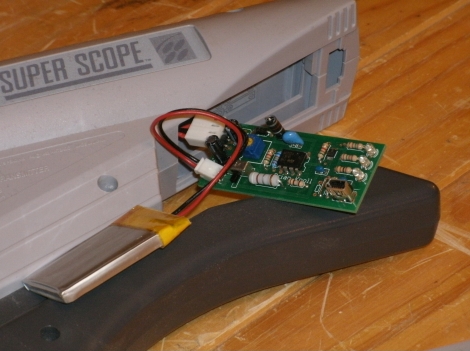
[Brian Knoll] still uses his Super Nintendo with relative frequency, and he just can’t get enough Super Scope action. If you never owned one, the Super Scope can be a ton of fun, but it’s also an incredible battery hog. It eats through AA batteries by the caseful, so [Brian] wanted to make the switch to rechargeable cells. Since NIMH AA batteries just don’t cut it in the Super Scope, he put together a rechargeable solution of his own.

He started off by calculating what sort of battery he would need for 8 hours of game play, then he started work on designing his circuit. The board he built contains both a DC/DC converter to provide the 9V required by the Super Scope, as well as built-in LiPo charger. He had his board made by BatchPCB, and after working through a small production error, he put everything together and gave his revamped scope a shot.

Things worked great, and while he says that he really should have built a low-voltage shutoff into his circuit, he is very happy with the results.

Tinywrench Controls Motors With ATtiny24 Chips

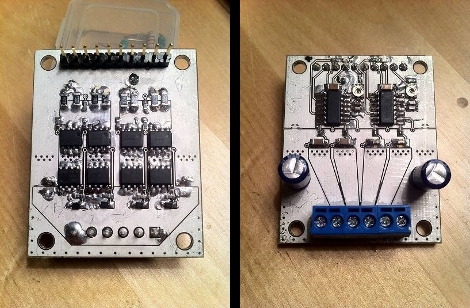
Tinywrench is [Tanjent’s] take on a motor controller board. It aims to replicate all of the functions that a standalone motor controller chip offers at as low a cost as possible. Early results are in. It works, and as seen can be assembled for about $8.

The top of the device offers a terminal block for connecting motors, ground, and 24V input. A pin header on the bottom has all the connections you would expect to find with a stepper motor driver board. Looking back on top there’s also a pair of ATtiny24 chips, each with its own trimpot for balancing the constant current output. Hiding on the underside of the board are two H-bridges built using high and low-side MOSFETs along with some diodes for protection, and various passive components for driving them.

As it stands, each of those H-bridges can handle around 9 amps which should be more than enough for projects with small motors. [Tanjent] mentions that one of the main advantages of working with this instead of a single motor-driver chip is that if you fry one of the MOSFETs you can replace it instead of trashing the entire board.

The Zigroller Balance Bot

The Zigroller is a Zigbee remote-controlled balance bot.  Although balance bots have been featured on [HAD] before, the Zigroller appears to be well-built and the project is well documented.  Besides a section on hardware, the software for this build is documented here.  The theory behind a balancing bot like this is given in this [MIT] paper if you’d like some more background.

The roller itself was conceived as a project for a UW class this summer.  The class was about control theory, so the electronics and mechanical setup was copied off of the [ArduRoller] project.  In order to keep this project from influencing the control code of this ‘bot, it’s claimed that the code was not looked at while writing the new software. The process for building the remote control assembly is nicely documented and is an original creation for this project. Check out a video of it in action after the break! Continue reading “The Zigroller Balance Bot”

An Interview With Bre Pettis, Founder Of MakerBot Industries

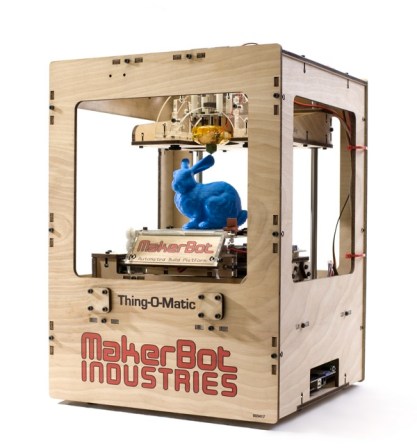
For those of you that don’t know, the Makerbot is a 3D printer created by Bre Pettis. It is probably the best-known 3D printer that you can buy at a price point meant for the hobbyist. Although this article doesn’t go into how the MakerBot is made, it focuses instead about the business itself and the man behind it. Bre was a hobbyist maker just like many of our readers, but decided to turn his passion into a successful business.

Although not all businesses are a success, Bre has made quite a start at becoming one. His company now employs 50 people and is currently hiring (like this posting for a “Web Warrior”) and has just secured $10 million in venture capital funding! Check out the full interview for all the details. It may inspire others to go from “hobby maker” to “professional.”

For other 3D printing-related posts, check out this one about the RepRap printer which is capable of replicating itself. For other ways to make your own parts, this rotomold machine may be of interest or this semi-DIY CNC router.