Resurrecting The Optigan Disc Format

optigan

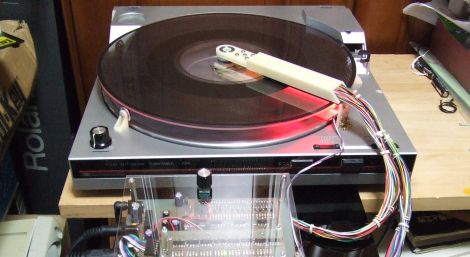
The Optigan and Orchestron were a pair of electronic organs built by Mattel in the 1970s which used swappable optical discs to store instrument information. The discs can still be found today, but the organs are extremely scarce, much to [Gan’s] dismay. After researching the organs for a bit, he decided he could probably build his own MIDI-compatible interface for the audio discs.

The discs have audio waveform data printed on them, which can be read using an LED on one side of the disc and an optical transistor on another. After successfully prototyping a reader that could interpret one of the disc’s audio tracks, he constructed a device to read all of the tracks simultaneously, just like the original organs.

His makeshift turntable was constructed on top of an old record player using acrylic discs and toy car wheels to keep things steady. Once the disc is placed on the turntable, he sets his reader in place, and via some custom circuitry, he is able to play the discs using his much more modern keyboard. It sounds pretty decent as you can see in the video below, though he does admit he would like to tweak a few things to make it sound even better.

[thanks Bryan]
Continue reading “Resurrecting The Optigan Disc Format”

Google ADK Project Shows Just How Easy It Is To Use

first_adk_project

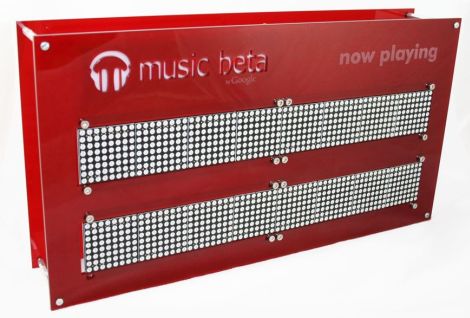
[yergacheffe] was able to get his hands on a shiny new Google ADK board about a week before it was announced at I/O, and got busy putting together a neat project to show off some of the ADK’s features. His idea was to meld together the ADK and Google’s new music service, two items he says complement each other very well.

He had a handful of LED matrices left over from last year’s Maker Faire, which he decided to use as a Google music metadata display. The base of the display is made from laser-cut acrylic, with a few spare ShiftBrites lighting up the Google music beta logo.

He says it took literally just a couple lines of code to get his Android handset to talk with the display – a testament to just how easy it is to use the ADK.

Pretty much anyone can walk up, attach their phone, and see their current music track on the display with zero fuss, which you can see in the video demo below.

Continue reading “Google ADK Project Shows Just How Easy It Is To Use”

Destroying An Arduino’s EEPROM

We’ve seen projects test the lifespan of an EEPROM before, but these projects have only tested discrete EEPROM chips. [John] at tronixstuff had a different idea and set out to test the internal EEPROM of an ATmega328.

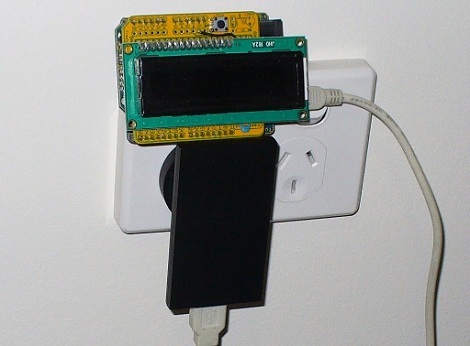
[John]’s build is just an Arduino and LCD shield that writes the number 170 to memory on one pass, and the number 85 on the next pass. Because these numbers are 10101010 and 01010101 in binary, each bit is flipped flipped once each run. We think this might be better than writing 0xFF for every run – hackaday readers are welcomed to comment on this implementation. The Arduino was plugged into a wall wart and sat, “behind a couch for a couple of months.” The EEPROM saw it’s first write error after 47 days and 1,230,163 cycles. This is an order of magnitude better than the spec on the atmel datasheet, but similar to the results of similar experiments.

We covered a similar project, the Flash Destroyer, last year, but that tested an external EEPROM, and not the internal memory of a microcontroller.

Check out the hugely abridged video of the EEPROM Killer after the break.

Continue reading “Destroying An Arduino’s EEPROM”

Home Made BlinkM Units

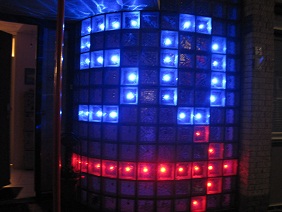
[Stephen] wrote in to show us this fun LED wall he constructed in his house. He says he was inspired by this project, but found the cost of the BlinkM units from sparkfun to be out of his price range. He really liked how they worked though, so he downloaded the schematic and firmware and built his own. He was able to fabricate 130 of his own for roughly 250 euros as opposed to the 1,452 euro price tag his sparkfun shopping cart had. That’s not a bad deal at all if you’re willing to invest the time in making your own PCBs and assembling the units. You can follow along on his site to see the entire construction process, as well as some pictures of his glass wall in action. The videos, however, aren’t loading for us. Great job [Stephen]!

Optimizing Code For PWM Efficiency

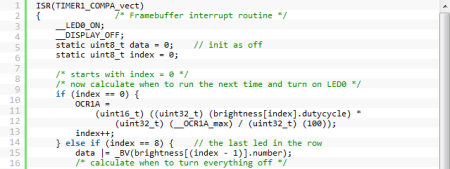
For some projects, it’s okay to have a microcontroller twiddling it’s thumbs most of the time. When a project requires the cpu to do just one thing over and over, there’s no loss with inefficient code – it either works or it doesn’t. However, if a project requires a microcontroller to do several things at once, like reading sensors, dimming LEDs, and writing serial data out, cpu utilization can become an issue. [Robert] wasn’t happy with the code he used to control a string of LEDs, so he rewrote his code. With the old implementation, [Robert]’s code used 60% of the cpu time. With the new and improved code, the cpu was only busy 8% of the time.

The code works by using a hardware timer to trigger an interrupt. After calculating the next time it should run again, and changing the state of the data line, the code just sits quietly until it’s needed again.

It’s not a pretty hack, or even one you can hold in your hands, but [Robert]’s determination in getting a μC to do what he wants is admirable.

Japanese Maid Mods A Furby

This video has been floating around the web recently and we thought that some of you might enjoy it. After a quick google search, we found out that this is [Julie Watai], a singer/model who also enjoys hardware modification. In this video, she’s doing a tutorial on how to circuit bend furbies. No, we have no idea why she is dressed like a maid.  This immediately brought to mind that Bjork video we saw a few years ago. Enjoy.

Bluetooth Media Remote In An N64 Controller

[Phik] wrote in to share his very first microcontroller project with us. He built a bluetooth remote in an old Nintendo 64 controller to control an audio application on his computer. He had been building up the individual modules with the controller in mind for some time, but initially had no idea what kind of enclosure to put it in. After a failed attempt at stuffing it into an XBox controller(surely there was enough space), he realized he had a broken N64 controller lying around that he cold use. We think he did a fantastic job of mounting it, it looks almost like a commercial product. He documented the construction and testing of each individual module. You can find each of those broken into their own post on his site by checking out the archives. Great job [Phik], especially for your first project!

Continue reading “Bluetooth Media Remote In An N64 Controller”