DIY Softboxes Light Your Photos On The Cheap

diy_softboxes

Softboxes are often considered a must-have piece of equipment when doing any sort of portrait or studio photography. While they are not the most expensive photography accessory, they can be built far cheaper than you would pay for an off the shelf model.

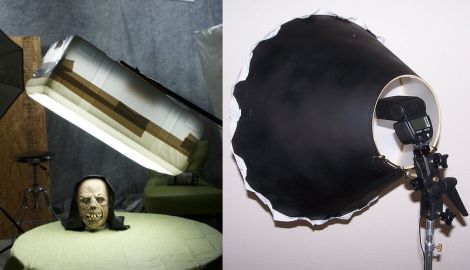
[Don] needed a softbox for his studio, and he ended up constructing a fairly nice one out of a styrofoam cooler. He mounted an outdoor light receptacle inside the cooler after laying down a reflective backing, bolting everything to a piece of plywood situated on the back of the cooler. He stretched some white cloth over the front to diffuse the light, and then mounted it on a light stand. You can see a video of the construction process below, as well as additional softbox-lit images on his site.

[Aud1073cH] had a similar need for a softbox, but went about his construction a bit differently. He grabbed a lampshade and a white dress shirt at a thrift store, stretching the shirt over the bottom opening before securing it with Velcro. He mounted the lampshade on a light stand, inserting his camera’s speed light through the smaller lampshade opening. As you can see in his photostream, the softbox does a great job at softening the shadows in his pictures.

Continue reading “DIY Softboxes Light Your Photos On The Cheap”
Salvaged Coil Magnetizes Tools On Demand

magnetizing_wand

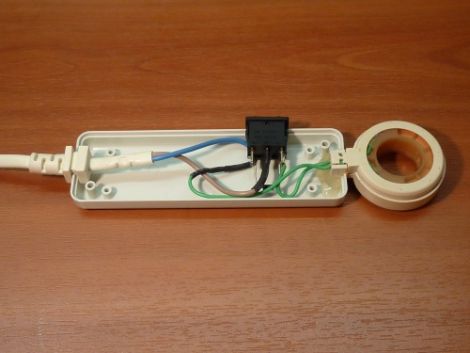
When working in hard to reach areas, magnetized tools can mean the difference between wrapping things up quickly and spending way too much time blindly grasping for dropped screws. [Damir] wrote in to share a handy little contraption he built which allows him to magnetize and demagnetize his tools as needed.

While rubbing a magnet against the tip of a screwdriver will impart a weak and temporary magnetic field, he felt that a stronger more permanently magnetized tool was far more useful. It is pretty well known that subjecting metal to a direct current magnetic field will magnetize the item, and an alternating magnetic field will demagnetize the same object. [Damir’s] wand will perform either task with the simple flip of a switch.

He salvaged the motor coil from a broken washing machine and mounted it in a project box, along with a single-pole changeover switch. A small diode is used to perform rectification on the AC input, providing the DC current required for magnetizing his tools.

Every once in awhile we find the need for magnetized tools, so we think this would be great to have around the workshop.

Check out a quick video demo of the magnetizing wand after the jump.

Continue reading “Salvaged Coil Magnetizes Tools On Demand”

Receipt Racer Wastes A Lot Of Paper

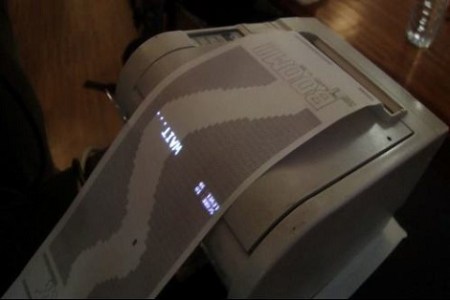
[Joshua Nobel] and the team at undef came up with a receipt printer game for the OFFF 2011 festival in Barcelona.

The game is a small openFrameworks app that prints a maze on a thermal printer. A ‘car’ is guided through the maze with input taken from a DualShock 3 controller. The game is limited to a maximum distance of 50 meters, the length of the roll of paper. We wondered about the waste of paper this would be until undef pointed out, “ecologically it’s pretty much a disaster, just like any real car.”

The undef team tried to use the printer for the entire visual representation of the game but that didn’t quite work out until [Joshua Noble] came up with a ‘beamer’ to project the car and score onto the paper. We’re not quite sure what the ‘beamer’ is, but everything syncs up and the resulting game is quite nice.

The game itself reminds us of a certain flash game, but that can’t be where the original idea came from. Check out the Receipt Racer gameplay video after the break.

Continue reading “Receipt Racer Wastes A Lot Of Paper”

Equipment Needed To Get “Started” In Electronics

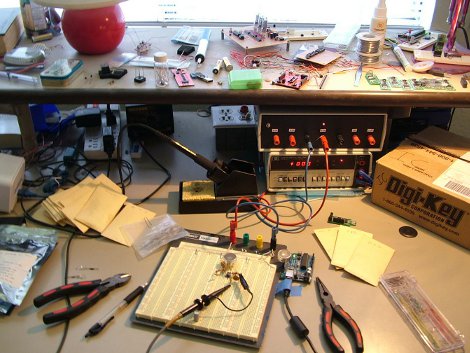
[Kenneth] is a Mechanical Engineer who likes to dabble in electronics. Besides providing us with an excellent picture of his workbench, he has put together a list of things that you’ll need as you learn to work with electronics. A beginner electronics kit from one of a number of different sources may work for some, but others may not be interested in a kit.

[Kenneth] gives links and recommendations for categories of: books, electrical equipment, development tools, components, digital electronics, and analog chips. As he puts it, this post is a “gigantic list of everything I would buy right now to replace my entire workshop if mine were to disappear.”  This is a great list of things you may need if you’re starting out.  If you have some experience, this list may introduce you something new. Check out some of [Kenneth’s] other projects like his cloud chamber or the Chumby webserver that he made.

Electronic Cufflinks For The Discerning Hacker

icufflinks

[Phillip Torrone] gave us a heads up about a project he and [Limor Fried] along with [Mike Doell] have just wrapped up. Their aptly-named “iCufflinks” softly pulsate with light the same way in which you see many Mac products do.

The cufflinks are made from machined aluminum and have the ubiquitous “power symbol” milled into the face. Inside the cufflinks, you will find a small circuit board and a battery, which powers the device for up to 24 hours. The team reverse-engineered the soft LED pulse found in Mac products in order to deliver the exact same visualization in their cufflinks.

Ignoring for a minute, the name and the inspiration for the product, we think they are pretty darn cool. There’s nothing like a set of softly glowing cufflinks to spark conversation at any social gathering.

Like anything else you’ll find on Adafruit.com, the cufflinks are completely open source, so you can feel free to tweak and remix the design any way you’d like.

Continue reading to see a video of the cufflinks in action.

Continue reading “Electronic Cufflinks For The Discerning Hacker”

Mini Google Street View Car Built From Lego

lego_street_view

[Mark] was playing around with a small GPS sensor when a light bulb lit over his head. He imagined it would be pretty cool to replicate one of Google’s Street View cars at a fraction of the scale using Lego NXT parts. He figured it would be easy enough to rig a few cameras to a remote controlled car, recording images and GPS coordinates as it went along.

The mini Street View car is controlled by a single NXT module that receives commands from a PS2 controller via a PSPNx sensor he purchased. A trio of cameras have been attached to the car, which are meant to take pictures in all different directions when triggered by his remote. A handful of additional motors are also used for driving the car, steering, and for activating the shutter release on the cameras.

The car worked decently during testing, but [Mark] says there is still plenty of room for improvement. He is having issues reliably triggering all cameras at the moment, but we’re sure he’ll have it sorted out soon enough.

Keep reading to see a video of his mini Street View car in action.

Continue reading “Mini Google Street View Car Built From Lego”

Arduinos…. In…. Spaaaaaace…..

Since 2007, [Adam Kemp] has been leading a team of students from Thomas Jefferson High School, guiding them through the process of designing and building a small satellite that NASA selected for launch early next year.

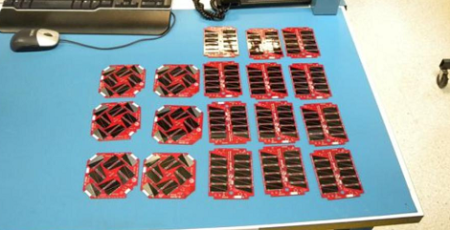
The CubeSat, officially named TJ³Sat, uses commercial, off-the-shelf components for nearly all its systems. The team ran into a problem interfacing the FM430 Flight Module (PDF warning), so [Adam] designed an Arduino-based replacement. Based on an ATMEGA328, the entire board is a drop-in replacement for the FM430 Flight Module. On July 1st, the TJ³Sat will begin testing at Orbital Sciences Corp. to make sure the entire satellite is up to snuff.

The TJ³Sat’s payload will take data from the ground controllers and using a TextSpeak module convert serial data into spoken voice. This audio will then be transmitted over amateur radio frequencies and will be picked up by hams all over the world. We’d like to wish the students at Thomas Jefferson High a hearty congratulations for being the first High School to build a satellite and hope the testing and launch go as planned.