3D Printer Gets A Big Resolution Improvement

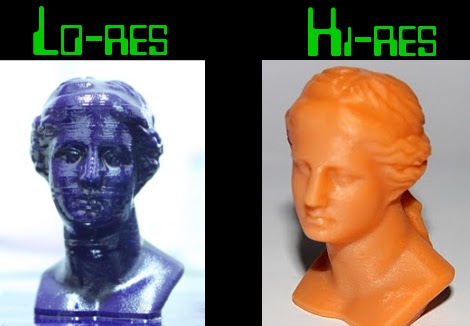
[Jose Carlos Veloso Junior] has been working on his 3D printer to improve the resolution. We looked in on his project back in October when he was printing the blue busts like the one seen above.

We were impressed by the resolution he was able to achieve back then, using liquid resin that is cured with visible light. The resin creates a thin layer on a glass tray, and is cured when a projector shines precisely positioned light from below. The cured resin is then lifted on the Z-axis, and the next layer in the printing process is hardened by the projector’s light.

Well, this newest rendition far outperforms the initial iteration. The bust on the right looks like it’s been hand-buffed to remove the layer lines, but it actually just came off of the printer. [Jose] made a video of the new equipment in action, which you can watch after the break. He’s keeping most of the juicy bits to himself but he did tell us that the improvement he achieved were due to multiple changes in the process. He tweaked the software to use a more precise curing time, the resin formula has been improved, the ability to isolate pixels without hardening resin around them has been stepped up, and he’s made changes to the way the printer is calibrated and how it lifts the hardened model.

This is fantastic. Kudos to you sir!

Continue reading “3D Printer Gets A Big Resolution Improvement” →
Kinect Produced Autostereograms (Magic Eye Pictures)

[Kyle McDonald], working collaboratively with [Golan Levin] at the Studio for Creative Inquiry, has come up with an application that can produce autostereograms. These are pictures that appear to be three-dimensional thanks to a visual illusion created by forcing your eyes to adjust focus and vergence differently than they normally would. The program is called ofxAutostereogram and it comes with a couple of examples. Both are show in [Kyle’s] video (embedded after the break), starting with a depth image of a shark. This combines with a texture tile, then is processed through the openFrameworks software in the package to produce the final image.

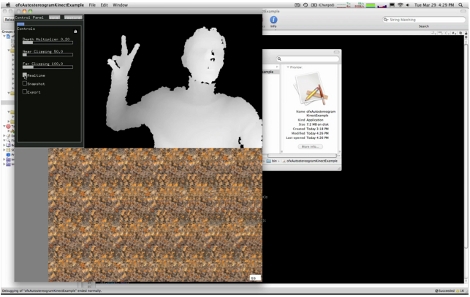
If that’s all it did you might find it rather unimpressive… these images have been around for some time although they were never so easy to produce on your home computer. But the second example is a pretty fantastic one. You can use a depth image from a Kinect as the starting point. As seen above, there is a preview window where you can adjust the clipping planes in order to include the correct depth. This also allows you a preview of your pose. Once it’s just right, snap a pick and process it through the software.

Continue reading “Kinect Produced Autostereograms (Magic Eye Pictures)” →

Transmitting Power And Data Through Thick Metal Enclosures

So let’s say you have a submarine, or a nuclear containment chamber which has walls made of thick metal. Now let’s say you want to transmit power or data through this wall. Obviously you’re not going to want to drill a hole since this wall is either keeping seawater out, or potential contamination in, but wireless signals aren’t going to travel well through dense metal. [Tristan Lawry’s] entry in the Lamelson-MIT Rensselaer Student Prize seeks to address this issue by using ultrasound waves to transmit data and power.

In the video after the break [Tristan] speaks briefly about his project, then demonstrates the transmission of power and digital audio simultaneously through a two-inch thick steel plate. This is accomplished with a set of piezo transducers attached to both the inside and outside of the plate. Communications originate by feeding electricity to one transducer, which sends ultrasonic vibrations through the material to be received by its counterpart on the other side. It’s easy for us to understand data transmission conducted in this manner, after all that’s how the knock block receives information. What we don’t understand is how it can “transfer large amounts of electrical power”. If you can explain it in layman’s terms please do so in the comments.

Continue reading “Transmitting Power And Data Through Thick Metal Enclosures” →

I Can Has Hackz?

AFTR NARROWLY AVOIDIN TEH AQUIZISHUN BY AOL FEW YEERS AGO, HACKADAI HAS DECIDD IT IZ TYME 2 PARTNR UP WIF TEH CHEEZBURGER NETWORK.
THOUGH U CUD NOTICE SUDDEN AN SHARP INCREASE IN KITTEHS LOCATD IN R POSTS, WE WILL STRIV 2 CONTINUE DELIVERIN TEH HIGHEST QUALITY HACKZ WE CAN FIND ON TEH NET. WE EXPECT DAT DIS NEW POSISHUN SHUD HALP PLANT US FIRMLY IN DA HEARTS AN SOULS OV TEH GENERAL POPULACE AN HALP MAK HACKIN MOAR ACCEPTABLE 2 TEH MAINSTREAM.

PLZ CONTINUE 2 SUBMIT UR TIPS AS WELL AS ANY CUTE PICTUREZ U CUD HAS OV KITTEHS OR DAWGGIEZ. COMBININ TEH 2 WILL GIT U BONUS POINTS.

aaaaand, that’s it.  Enjoy your April first and rest assured that the following posts will all be LEGITZ.

Thanks For Ruining A Good Thing, Or TRYING To!

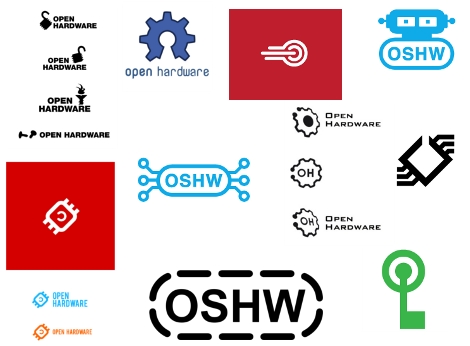
It seems that there has been some shenanigans happening with the OSHW logo voting page as some are using scripts to game the system for their favorite design. Why? Who knows…  How? Well one of the advocates of OSHW [Bill Porter] set about figuring that out, and things should be patched up now, though that still leaves 3,122 faulty votes to weed out on the final day (April 5th).

While it is hard to imagine how someone would be so attached to a logo to write a script just to game votes,  its not that surprising considering that we can be a pretty outgoing bunch when it comes to certain topics. Organizers are asking if you’re one of the listed IP addresses, and had good intentions to fess up, and tell which logo(s) you voted for to make the process easier. If not, well, “this is not going to stop everyone’s good efforts.”

If you’re just now getting wind of the OSHW logo voting check out our previous article highlighting this event, and to get more details.

DIY Camera Stabilizer Keeps Your Video Shake Free On The Cheap

diy_camera_stabilizer

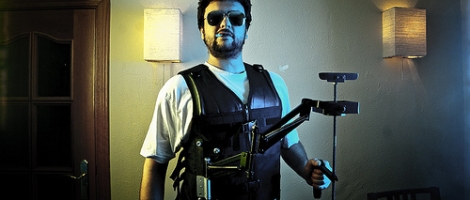
Commercial vest-based camera stabilizer systems are quite expensive, sometimes bearing price tags in the $700-$800 dollar range. Photographer [Miguel Vicente] has a pretty well-stocked workshop and decided there was no way he would shell out that much cash for a rig, so he simply built his own.

“Simply” is a bit of a misstatement, to be honest. The system looks relatively complex, judging by the build videos embedded below. Constructed of steel tubing, custom-built springs, and a really snazzy vest, the rig is adjustable in almost every direction. He has tested its capacity up to 2.5 Kg (roughly 5.5 pounds), though he says it’s pretty unruly to manage at that weight. [Miguel] says that 1.5 Kg (3.3 pounds) is a far more reasonable limit, and that the stabilizer works quite well at or below that weight.

While it looks pretty good to us, he says that there are plans to improve the design even further. One particular point that he wants to address is the ability for the stabilizer to accept asymmetric camera setups, i.e. cameras with attached lighting and microphones.

Stick around to see a short “highlight” film of the build process, as well as a video featuring a more thorough documentation of the stabilizer’s construction.

Interested in more DIY camera equipment?  Check out this overhead camera dolly and this DIY gimbal mount we featured a short while back.

[via Make]

Continue reading “DIY Camera Stabilizer Keeps Your Video Shake Free On The Cheap” →

R/C Car Controlled By An IPad Or Kinect

ipad_kinect_rc_control

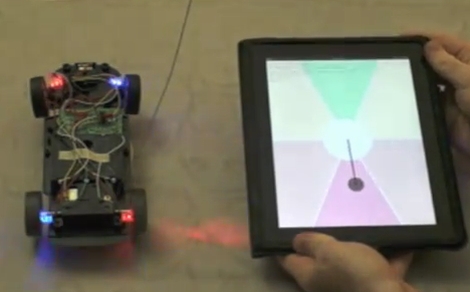
R/C cars can be tons of fun, but sometimes the fun runs out after awhile. [Gaurav] got bored of steering around his R/C car with its remote, so he built an interface that lets him control the car using two different motion-detecting devices.

He built an HTML5 application for his iPad, which allows him to steer the car around. As you can see in the video below, the application utilizes the iPad’s tilt sensor to activate the car’s motors and steering depending on where on the screen he has moved the guide marker.

The second steering method he devised uses his Kinect sensor to track his movements. His hand gestures are mapped to a set of virtual spaces similar to those which the iPad uses. By moving his hands through these areas, the Arduino triggers the car’s remote just as it does with the iPad.

The actual remote control interface is achieved by wiring the car’s remote to an Arduino via a handful of opto-isolators. The Arduino is also connected to his computer via the serial port, where it waits for commands to be sent. In the case of the iPad, a Python server waits for commands to be issued from the HTML5 application. The Kinect’s interface is slightly different, with a C# application monitoring his movements and sending the commands directly to the serial port.

Check out the video below to see the car in action, and swing by his site if you are interested in grabbing some source code and giving it a try yourself.

Continue reading “R/C Car Controlled By An IPad Or Kinect” →