Building A UV Exposure Box

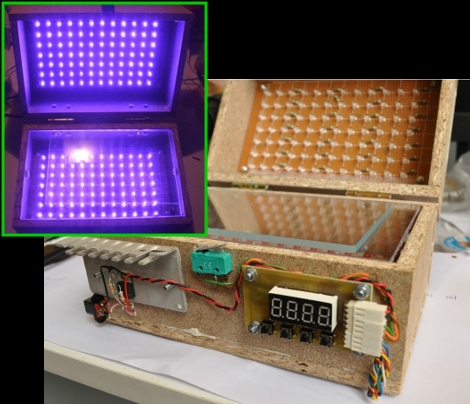
There are two methods of using etchant resist when making circuit boards. We use the toner transfer method that requires ironing on laser toner to the copper, but you can also use chemical resist that reacts to ultraviolet light. [Bogdan] decided to start doing more of the latter so he built a UV exposure box to make the process easier.

It is possible to use flourescent light bulbs for this, but he decided to use UV LEDs, a method we’ve also seen before. But there’s always room to innovate, and [Bogdan] built-in a couple of nice features that are new to us. Because the UV light can be bad for your eyes, he included a set of red visible-light LEDs on the bottom half of the box that are used to align two layers of exposure mask when making double-sided boards. There’s also a switch that automatically shuts off the UV light when the box is opened. And as the coup-de-grace, he added a programmable timer to regulate the exposure, using his newly created box when etching the PCB for it.
Waterproof DIY Momentary-push Switch

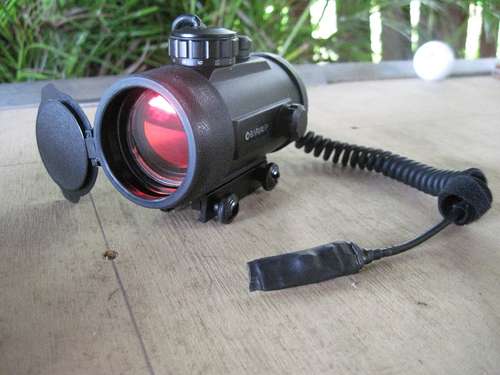
[Patman2700] has a nice scope for his paintball gun that uses a red dot instead of cross-hairs. The problem is that he kept forgetting to turn it off which ended up running the batteries down frequently. His solution to the problem was to get rid of the toggle switch used to turn it on and replace it will a home-made momentary push button switch. Now he presses the switch to aim and doesn’t waste juice when he’s running around, trying not to get pelted with paint.

Since this is used outside he wanted it to be water-tight. The switch is built using materials we’ve seen in previous diy switches; adhesive-backed copper sheets for conductors, foam to keep them separated until pressed, and plastic as a support. Copper is applied to the plastic base, with a ring of foam separating the base from the second layer of copper. When squeezed, the two layers of copper come in contact to complete the circuit. To make it work a bit better [Patman2700] added a dab of solder in the center of the bottom copper layer so there is less distance between conductors, and used extra foam to build up a bump in the center of the assembly for a better ‘button’ feel. The whole thing is encased in shrink-wrap with the seams sealed with super glue to keep moisture at bay.

Rodent-based Power Generation

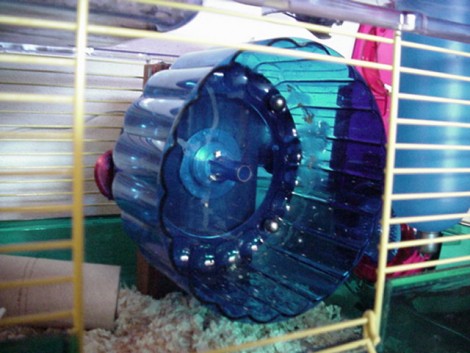
Your hamster lives to good life, with food delivery and a maid service that cleans up after him. [DanF] helped to brighten up this hamster’s life even more by improving its exercise equipment and giving it a small night-light as well. This project adds a low RPM alternator to the hamster wheel.

The first part of the process was to reduce energy lost to friction by fitting the wheel with a bearing. From there a ring of permanent magnets was added which will pass by a stationary coil and induce a current. It works, but unfortunately there’s not enough power generated to charge a battery. That means the light is only on when the hamster is running. But maybe you can figure out a way to use a super-capacitor like we saw in that exercise bike hack.

One nice finishing touch to the setup is a bicycle computer to track how much time was sent on the wheel, and the distance traveled.

[Thanks Dizzy]

New Dynamic Duo, Arduino And Eclipse

There are a lot of solutions to programing an Arduino: the default avr-g++, Studio, etc. But [Sandeep] let us know about using one of the more powerful IDEs out there, Eclipse, to do the same. We’ve already outlined why Eclipse is a great IDE but now the fact that you can use it in your MCU based projects adds to its usefulness and already large feature list. However, don’t be turned off by [Sandeep’s] tutorial. While it is aimed at people who are completely new to setting up an IDE and working with an AVR, the tips certainly can benefit even the most experienced hacker.

Plantenna: The Plant Antenna

The back story behind [Mike] experimenting with plants as AM radio transmission antennas antennae is rather interesting and worth the short read. But for those who just want the facts, [Mike] took an ATMega324, modified the PWM output into a sinusoidal AM signal (using a simple form of RLC circuitry), and connected the circuit to a plant no plants were harmed in the making of this project. The results? Well we’re not ones who would spoil the surprise, you’ll have to see for yourself in the video after the jump.

Continue reading “Plantenna: The Plant Antenna” →

Using A Cellphone LCD As Auxiliary Linux Display

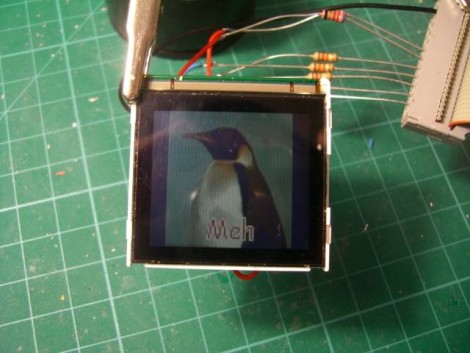
[Neil] is driving this Siemens A60 LCD using a parallel port on his Linux box. He likes this module because it has an integrated LED back-light, controller IC, and the pads are large enough for a human to solder. He notes that the screen runs on 2.9V, which matches the forward voltage of the LEDs used as back-lights. This means it is possible to use one f the LEDs as a shunt to drop  incoming voltage down to a safe level for the controller. In fact, that’s what he did. The data lines are connected to the parallel port along with some current limiting resistors. The LEDs are connected with resistor calculated for maximum brightness, with the output from the LED used as the source voltage for the LCD controller chip.Whether you want to use one of these screens with a PC or something else, the code that [Neil] worked out should provide the information necessary to do so.

The Nokia cellphone LCD post inspired [Neil] to send in a tip about this project. If you’ve got well documented hacks that you’re just sitting on why not let us know about them?

More EL Chemistry: Luminescent Ink

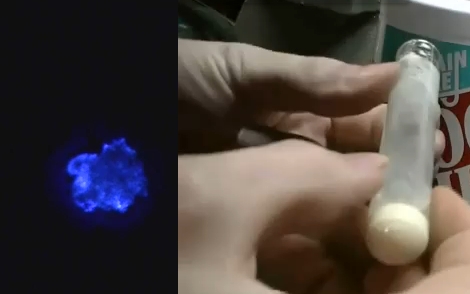
[Jeri Ellsworth] continues her experiments with electroluminescence, this time she’s making EL ink. The ink she’s looking for is Zinc Sulfate in a solution. The process she chose is to re-dope some glow powder so that it can be excited by the field around an AC current. In her video (embedded after the break) she talks about the chemical properties she’s after by detailing a cubic lattice of zinc and sulfur atoms with an added copper atom (adding that atom is a process called doping).

The quick and dirty synopsis of the experiment starts by washing the glow powder with dish soap to acquire zinc sulfide crystals. Then she combined copper sulfate and zinc shavings from the inside of a modern penny to yield copper metal and zinc sulfate suspended in solution. That was mixed with the zinc sulfide from the glow powder washing and doped with a little more copper sulfate. The excess liquid is poured off, the test tube is capped with glass frit, and the whole thing hits the kiln to start the reaction. The result glows when excited by alternating current, but could have been improved by adding chlorine atoms into the mix.

We’re excited every time we see one of [Jeri’s] new chemistry hacks. We’d love to see more so if you’ve come across interesting chemistry experiments during your Internet travels, please let us know about them. Just make sure you have some idea of what you’re doing when working with chemicals… safety first.

Continue reading “More EL Chemistry: Luminescent Ink” →