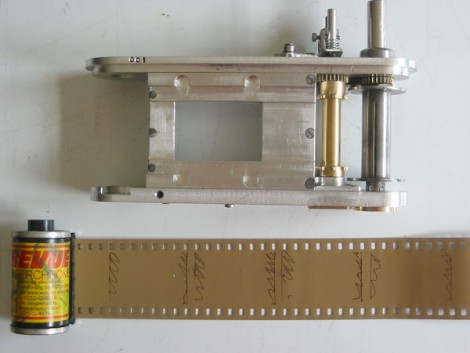
Machining An SLR Camera From Scratch

It took us a while to stop drooling long enough to write about this amazing machining project. [Denis MO] made a single-lens reflex camera from scratch. The banner image above is not the finished product, but just one step in the production chain. [Denis] has been thinking about doing this project for 25 years and finally took the plunge. From the start, the only parts he planned on NOT making himself were the screws, ball bearings, shutter, curtain fabric, and interchangeable lenses. Everything else is his own creation based off of his own design. Spend some time looking over his project. There’s plenty of information and images of both the machining process, and the drawings he mocked up in the design process. We’ve also included a pic of the finished camera and the contact sheet from his test roll of film after the break.
Continue reading “Machining An SLR Camera From Scratch” →

Propeller Platform Prototyping Board Gets An Upgrade

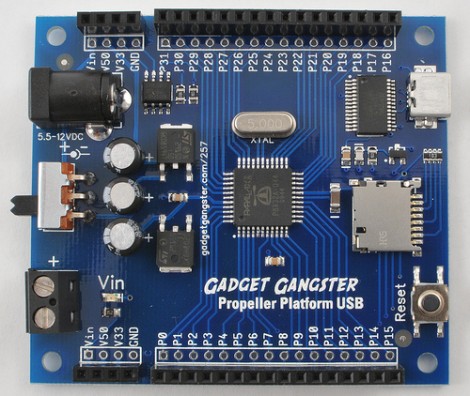
[Nick] over at Gadget Gangster has a new version of his prototyping hardware for Propeller microcontrollers, called the Propeller Platform USB. A little more than a year ago we looked at the last version which was larger, used a DIP processor, and came unassembled. The new version does come assembled because of the migration to surface mount components (which may take some of the fun out of it if you just love soldering kits). This not only reduces the board footprint, but makes room for more goodies. As the name implies, there’s now a mini-USB socket with a USB to UART bridge, a microSD card slot as been added, and the onboard EEPROM has been doubled. This is a nice hardware upgrade but the price has been upgraded by $25 as well. No worries, it’s open source so you can roll your own if you have the parts on hand.

Hacking TVs In 1954

shaddap already!

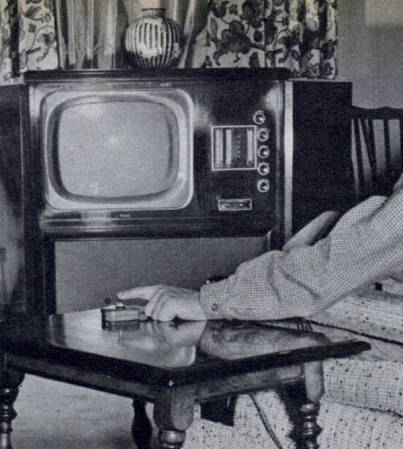
This gem was published in Mechanix Illustrated magazine in may of 1954. AT that time, a remote control was the stuff of science fiction. This article shows the modern man how to modify his television to include a fancy button to stop all noise. This button, affectionately labelled the “SHADDAP” was marketed as a way to relieve the pain of long winded commercials. Basically, it cut the connection to the speaker, nothing super fancy. Is that an altoids tin as an enclosure?

[via BoingBoing]

Cheap And Easy SMS Via GSM For Your MCU

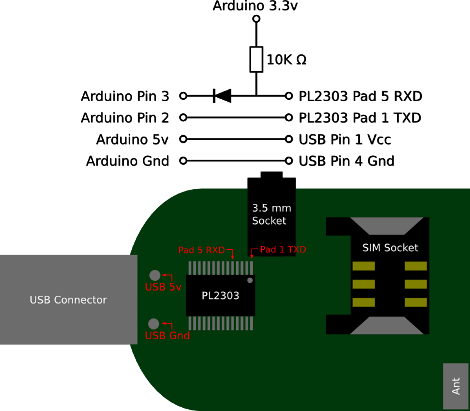
Non acronym version of the title: send and receive text messages via cell phone communication towers using an Arduino or other microcontroller. “We’ve been doing that for years!” you cry, well yes, technically. But [Fincham] lays it outs simply; commercial offerings are expensive and finding a cell phone that uses RS232 now a days is getting difficult, so a new way of doing the same old is necessary. The good news is USB GSM modems are readily available, cheap, and only require a few interface pins to get them talking with an Arduino. In fact, the image above is all you need.

Data Confirmation With RF Communications

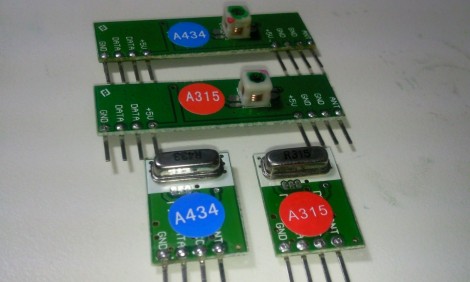
[Rafael] built a system that uses radio frequency for communications. The code he was using with the inexpensive receiver/transmitter pairs already had some error correction but from time to time an entire message would be missed by the receiver. He set out to make these RF communications more robust.

A little more than a year ago we looked at using these same transmitters with an Arduino. [Rafael] has a similar setup but since they are unidirectional he chose to use two pairs for bidirectional communication (each operating at a different frequency to avoid interference). On one end, a computer transmits data to the Arduino which is in a remote location. His confirmation protocol relies on a randomly generated message identifier. The computer will continually transmit the same message. The Arduino continually receives these messages, comparing them with the last successfully received message. If they match, it is considered a successful data transfer and the Arduino transmits a confirmation back to the computer which then starts transmitting the next message.

This isn’t an application-specific protocol. For demonstration purposes [Rafael] built a quick home automation setup that uses it to operate a house lamp.

3D Printing With LEGO

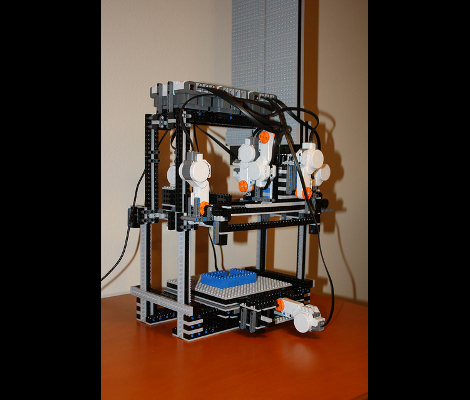
With 2400 LEGO bricks and a lot of patience, [Will Gorman] built a LEGO 3D printer. It’s similar to a RepRap or a Makerbot, but instead of extruding plastic, it uses pre-extruded building blocks (aka LEGO bricks).  The grey wall extending far above the unit itself is a feed magazine which holds the raw material. A Java application takes an MLCad file and translates it into building instructions for the printer. Those instructions are then sent to the device via USB. See it happen after the break.

Now this just needs to be combined with the LEGO sorting machine for an inexhaustible supply of bricks.

Continue reading “3D Printing With LEGO” →

Data Plotting For The Visually Impaired

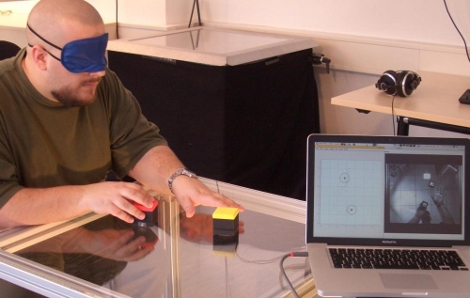
This setup helps to represent data in a meaningful way to for visually impaired people. It uses a combination of physical objects to represent data clusters, and audio feedback when manipulating those objects. In the video after the break you’ll see that the cubes can orient themselves to represent data clusters. The table top acts as a graphing field, with a textured border as a reference for the user. A camera mounted below the clear surface allows image processing software to calculate the locations for the cubes. Each cube is motorized and contains an Arduino and ZigBee module, listening for positioning information from the computer that is doing the video processing. Once in position, the user can move the cubes, with modulated noise as a measure of how near they are to the heart of each data cluster.

The team plans to conduct further study on the usefulness of this interactive data object. We certainly see potential for hacking as this uses off-the-shelf components that are both inexpensive, and easy to find. It certainly reminds us of a multitouch display with added physical tokens.

Continue reading “Data Plotting For The Visually Impaired” →