Procedurally Generating Marble Runs

Marble runs are somehow incredibly soothing to play with and watch, with the gentle clack of the marbles and the smooth, predictable motion. Sadly for some, they never quite got enough time to enjoy them in school. Luckily, [Fernando Jerez] is here with a way to procedurally generate marble runs you can actually play with!

[Fernando] does a great job of explaining the mathematical process of generating the marble runs, using the method of random space filling curves. A maze is drawn on a grid, with points on the grid acting as walls. Each grid cell is then given a value based on points on its corners, and these values then translate into directions of travel. This creates a path through the maze. Scaling this path along the Z-axis, and then replacing the path with a marble track creates the run. It’s then a simple matter of adding a shaft to the loop with a screw to drive marbles back to the top of the run, and you’re all set!

With both animated explanations and actual 3D printed marble runs, [Fernando] demonstrates the concept well. We’d love to print a few runs of our own, and we can’t help but think there’s other great applications for the mathematics behind this concept. If you’re wise to it, drop it in the comments. Otherwise, check out these exquisite creations we’ve featured before!

DIY Monochrome LCD Hack Doesn’t Go As Planned

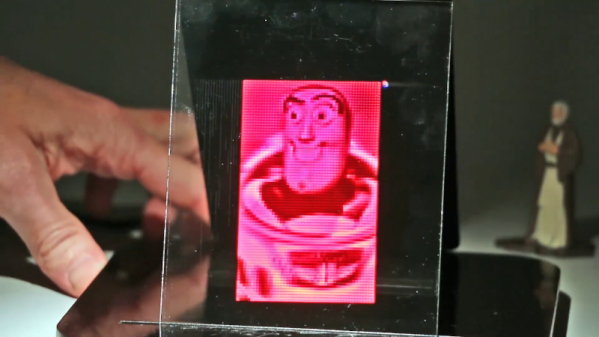
Manufacturers of low-cost 3D printers that use the masked stereolithography (MSLA) process are able to build their machines so cheaply because they’re using repurposed smartphone or tablet LCD panels to mask off the UV backlight. Considering the quality you get out of even the entry-level MSLA resin printers, we certainly aren’t complaining about this bit of thrift. But as [Jan Mrázek] explains in a recent blog post, there’s certainly room for improvement.

The problem is that those repurposed LCD panels are, as you’d expect, color displays. After all, even the bottom of the barrel mobile devices moved away from monochrome displays decades ago. But in this case, that’s not what you really want. Since the printer operates on a single wavelength of light, the color filters inside the LCD are actually absorbing light that could otherwise be curing the resin. So an MSLA printer with a monochrome screen would use less energy and print faster. There’s only one problem: it’s not very easy to find high-resolution monochrome displays in the year 2020.

So [Jan] decided to see if he could take a replacement screen intended for his Elegoo Mars MSLA printer and convert it from color to monochrome by disassembling it and manually removing the color filters. If this sounds a bit crazy, that’s because it is. Turns out taking apart an LCD, modifying its internal layout, and putting it all back together in working order is just as difficult as you’d think.

But it was still worth a try. [Jan] pulls the display apart, removes the liquid crystals, scrapes off the color filters, and then puts it all back together again. His first attempt got him a monochrome display that actually worked, but with debris trapped inside the screen, the image was too poor to be useful. He tried again, this time trying harder to keep foreign material out of the crystals. But when he got it back together a second time, he found it no longer functioned. He thinks it’s possible that his attempt to clean up the inside of the display was too aggressive, but really there are so many things that could go wrong here it’s hard to pin down just one.

Long story short, manually creating monochrome displays for low-cost MSLA printers might not be a viable option. Until a better solution comes along, you might be interested in seeing some slightly less invasive ways of improving your resin print quality.

A 3D-Printed Bass Guitar

A visit to the hardware hacking area of the recent Hacker Hotel hacker camp in the Netherlands would bring plenty of interesting pieces of hardware to delight the eye. Among them though was one to delight the ear, and on hearing it we asked whether its creator could put it online so we could share it with you. [XDr4g0nX]’s bass guitar is 3D printed, and while it still contains some non-3D-printed parts it’s still a very effective musical instrument.

This is not the first model he’s produced, he told us, an earlier guitar was entirely 3D-printed but proved not to be rigid enough. Tuning such an instrument merely resulted in its bowing out of shape and becoming unplayable as well as out of tune. This one has hefty steel bars for rigidity, though it uses a Yamaha neck rather than 3D-printing the whole instrument.  The main body of the instrument has to be printed in multiple parts and epoxied together, which he’s done without some of the ugly seams that sometimes disfigure prints of this nature.

Having heard it, we’d be hard pressed to tell it wasn’t a more traditional guitar, but then again since people have made guitars from all kinds of scrap it’s not the first home build we’ve encountered.

$80 Dual Extrusion Kit Might Work With Your 3D Printer

[Teaching Tech] sprung about $80 or a kit to add dual extrusion to his 3D printer, plus another $20 for an accessory kit. He did get it to work well, but it wasn’t without problems which he covers in the video below.

The design of the head uses a servo to swing two hot ends to — in theory — the same point. Each hot end has an ooze shield, so you don’t need to deal with that in your G-code by building a priming tower. However, there are some requirements for your printer.

Continue reading “$80 Dual Extrusion Kit Might Work With Your 3D Printer”

OpenAstroTracker Turns Your DSLR Into An Astronomy Instrument

If you want to take beautiful night sky pictures with your DSLR and you live between 15 degrees and 55 degrees north latitude you might want to check out OpenAstroTracker. If you have a 3D printer it will probably take about 60 hours of printing, but you’ll wind up with a pretty impressive setup for your camera. There’s an Arduino managing the tracking and also providing a “go to” capability.

The design is over on Thingiverse and you can find code on GitHub. There’s also a Reddit dedicated to the project. The tracker touts its ability to handle long or heavy lenses and to target 180 degrees in every direction.

Continue reading “OpenAstroTracker Turns Your DSLR Into An Astronomy Instrument”

Printing Liquid Concrete

In the world of additive manufacturing, there’s always need materials being added to the list of potential filaments to use for printing objects. A method of rapid liquid printing of concrete designed by [Anatoly Berezkin] of Stoneflower 3D makes it possible to print a large variety of shapes from concrete while avoiding the negative effects of fast dehydration. The technique is based on an approach to printing polyurethanes, developed by MIT in 2017. This technique requires physically drawing a 3D object within a gel suspension using a chemical curing process. The gel allows gravity to not affect the printing process, as well as helping out with the curinng. Berezkin, an engineer and hobbyist working out of his garage, has published other work including print heads, ceramic printing, and micro printing sets.

One might be skeptical of whether the weight of the material could cause potential collapse during the printing process, or whether it is simply unrealistic to print objects given the time needed for the concrete to dry. Their demo shows the process being done in household items – bowls and tupperware – combining affordable items such as clay, concrete, and sand for the matrix and mortar. The viscous clay is strong enough to act as a good scaffold for keeping the concrete structure in place as it is being printed. As their video demonstrates, at least for simply objects, the process seems relatively fast.

RLPC doesn’t require toxic chemicals or proprietary components such as gels and suspensions. Its immersion of the final printed object in a humid environment is also superior to the standard process of liquid deposition for hardening concrete. Moreover, the process simply requires clay or retarded mortar for the matrix and mortar paste for turning into concrete. It’s advertised as eco-friendly, but just the simplicity of the materials needed for the matrix and mortar make this a promising technique.

Continue reading “Printing Liquid Concrete”

Multiple 3D Printers, And One Pi To Rule Them All

If you’ve got a desktop 3D printer, there’s an excellent chance you’ve heard of OctoPrint. This web front-end, usually running on a Raspberry Pi, allows you to monitor and control the printer over the network from any device that has a browser. But what if you’ve got two printers? Or 20? The logistics of each printer getting its own Pi can get uncomfortable in a hurry, which is why [Jay Doscher] has been working on a way to simplify things.

Leveraging the boosted processing power of the Raspberry Pi 4 and some good old fashioned Linux trickery, [Jay] is now controlling multiple printers from a single device. The trick is to run multiple instances of the OctoPrint backend and assign them to virtual network interfaces so they don’t interfere with each other. This takes some custom systemd unit files to get up and running on Raspbian, which he’s been kind enough to include them in the write-up.

But getting multiple copies of OctoPrint running on the Pi is only half the battle. There still needs to be a way to sort out which printer is which. Under normal circumstances, the printers would be assigned random virtual serial ports when the Pi booted. To prevent any confusion, [Jay] explains how you can use custom udev rules to make sure that each printer gets its own unique device node. Even if you aren’t trying to wrangle multiple 3D printers, this is a useful trick should you find yourself struggling to keep track of your USB gadgets.

If you’re wondering why [Jay] needs to have so many 3D printers going at the same time, we hear they’ve been keeping rather busy running off parts for commissioned copies of his popular projects. Something to consider the next time you’re wondering if there’s a way to make a happy buck out of this little hobby of ours, folks.