Casting A 3D Printed Extruder Body In Aluminum

Creating 3D prints is great, but sometimes you need something more durable. [Myfordboy] printed a new 3D printer extruder in PLA and then used the lost PLA method to cast it in aluminum. You can see the results in the video below.

The same process has been used for many years with wax instead of PLA. The idea is to produce a model of what you want to make and surround it with a material called investment. Once the investment sets, heat melts the PLA (or wax) leaving a mold made of the investment material. Once you have the mold, you can place it in a frame and surround it with greensand. Another frame gets a half pipe placed and packed with greensand. The depression made by this pipe will provide a path for the metal to flow into the original mold. Another pipe will cut a feeder into the greensand over this pipe.

Continue reading “Casting A 3D Printed Extruder Body In Aluminum”

ERRF 18: New Products Make Their Debut

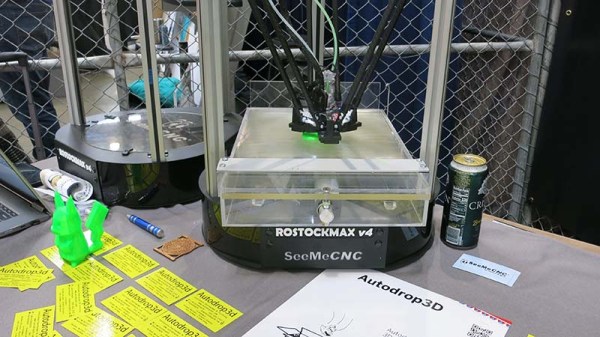
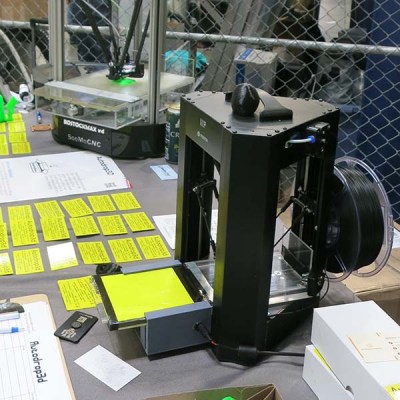
While ostensibly the purpose of the recent East Coast RepRap Festival (ERRF) was to celebrate the 3D printing community and culture, it should come as no surprise that more than a few companies decided to use the event as an opportunity to publicly launch new products. Who can blame them? It’s not as if every day you have a captive audience of 3D printing aficionados; you might as well make the best of it.

Many creations were being shown off for the first time at ERRF, and we surely didn’t get a chance to see them all. There was simply too much going on at any given time to be sure no printed stone was left unturned. But the following printers, filaments, and accessories caught our attention long enough to warrant sharing with the good readers of Hackaday.

Keep in mind that much of this information is tentative at best, and things could easily change between now and when the products actually go on sale. These events serve as much as a sounding board for new products as they do a venue for advertising and selling them, so feedback received from show attendees may very well alter some of these products from what we saw at ERRF.

Continue reading “ERRF 18: New Products Make Their Debut”

Supersize DIY R/C Servos From Windscreen Wipers

We’re all familiar with the experience of buying hobby servos. The market is awash with cheap clones which have inflated specs and poor performance. Even branded servos often fail to deliver, and sometimes you just can’t get the required torque or speed from the small form factor of the typical hobby servo.

Enter [James Bruton] and his DIY RC servo from a windscreen wiper motor. Windscreen wiper motors are cheap as chips, and a classic salvage. The motor shaft is connected to a potentiometer via a pulley and some string, providing the necessary closed-loop feedback. Instead of using the traditional analog circuitry found inside a servo, an Arduino provides the brains. This means PID control can be implemented on the ‘duino, and tuned to get the best response from different load characteristics. There’s also the choice of different interfacing options: though [James]’ Arduino code accepts PWM signals for a drop-in R/C servo replacement, the addition of a microcontroller means many other input signal types and protocols are available. In fact, we recently wrote about serial bus servos and their numerous advantages.

We particularly love this because of the price barrier of industrial servomotors; sure, this kind of solution doesn’t have the precision or torque that off-the-shelf products provide, but would be sufficient for many hacks. Incidentally, this is what inspired one of our favourite open source projects: ODrive, which focuses on harnessing the power of cheap brushless motors for industrial use.

Continue reading “Supersize DIY R/C Servos From Windscreen Wipers”

ERRF 18: Slice Engineering Shows Off The Mosquito

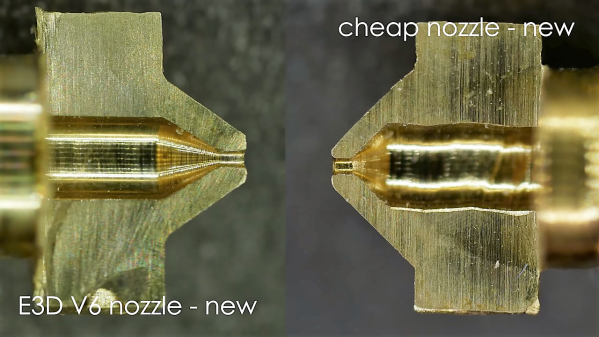
With few exceptions, it seemed like every 3D printer at the first inaugural East Coast RepRap Festival (ERRF) was using a hotend built by E3D. There’s nothing inherently wrong with that; E3D makes solid open source products, and they deserve all the success they can get. But that being said, competition drives innovation, so we’re particularly interested anytime we see a new hotend that isn’t just an E3D V6 clone.

The Mosquito from Slice Enginerring is definitely no E3D clone. In fact, it doesn’t look much like any 3D printer hotend you’ve ever seen before. Tiny and spindly, the look of the hotend certainly invokes its namesake. But despite its fragile appearance, this hotend can ramp up to a monstrous 500 C, making it effectively a bolt-on upgrade for your existing machine that will allow you to print in exotic materials such as PEEK.

We spent a little time talking with Slice Engineering co-founder [Dan], and while there’s probably not much risk it’s going to dethrone E3D as the RepRap community’s favorite hotend, it might be worth considering if you’re thinking of putting together a high-performance printer.

Continue reading “ERRF 18: Slice Engineering Shows Off The Mosquito”

3D Printed Arduino Bot Is Limbo Master

As if we didn’t have enough to worry about in regards to the coming robot uprising, [Ali Aslam] of Potent Printables has recently wrapped up work on a 3D printed robot that can flatten itself down to the point it can fit under doors and other tight spaces. Based on research done at UC Berkeley, this robot is built entirely from printed parts and off the shelf hardware, so anyone can have their own little slice of Skynet.

On display at East Coast RepRap Festival

The key to the design are the folding “wings” which allow the robot to raise and lower itself on command. This not only helps it navigate tight spaces, but also gives it considerable all-terrain capability when it’s riding high. Rather than wheels or tracks, the design uses six rotors which look more like propellers than something you’d expect to find on a ground vehicle. These rotors work at the extreme angles necessary when the robot has lowered itself, and allow it to “step” over obstructions when they’re vertical.

For the electronics, things are about what you’d expect. An Arduino Pro Mini combined with tiny Pololu motor controllers is enough to get the bot rolling, and a Flysky FS-X6B receiver is onboard so the whole thing can be operated with a standard RC transmitter. The design could easily be adapted for WiFi or Bluetooth control if you’d rather not use RC gear for whatever reason.

Want to build your own? All of the STL files, as well as a complete Bill of Materials, are available on the Thingiverse page. [Ali] even has a series of videos on YouTube videos walking through the design and construction of the bot to help you along. Outside of the electronics, you’ll need a handful of screws and rods to complement the 50+ printed parts. Better start warming up the printer now.

As an interesting aside, we got a chance to see this little critter first hand at the recent East Coast RepRap Festival in Maryland, along with a number of other engineering marvels.

Continue reading “3D Printed Arduino Bot Is Limbo Master”

3D Printed Upgrade For Cheap Foam Glider

We know you’ve seen them: the big foam gliders that are a summertime staple of seemingly every big box retailer and dollar store in the world. They may be made by different companies or have slight cosmetic differences, but they all adhere to the basic formula: a long plastic bag containing the single-piece fuselage and two removable wings and a tail. Rip open the bag, jam the wings into the fuselage, and go see if you can’t get that thing stuck on a roof someplace.

But after you toss it around a few times, things start to get a little stale. Those of us in the Hackaday Collective who still retain memories of our childhood may even recall attempting to augment the glider with some strategically attached bottle rockets. But [Timothy Wright] has done considerably better than that. With the addition of a 3D printed “backpack”, he managed to add not only a motor to one of these foam fliers but an RC receiver and servos to move the control surfaces. The end result is a cheap and surprisingly capable RC plane with relatively little work required.

[Timothy] certainly isn’t claiming to be the first person to slap a motor on a foam glider to wring a bit more fun out of it, but his approach is very slick and of course has the added bonus of being available for other grownup kids to try thanks to the Creative Commons license he released the designs under. He mentions that variations in the different gliders might cause some compatibility issues, but with the generous application of some zip ties and tape, it should be good to go.

This particular hunk of foam might not set any altitude or distance records, and it certainly won’t be carrying you aloft, but it’s a pretty approachable summer project if you’ve got some RC gear laying around.

Continue reading “3D Printed Upgrade For Cheap Foam Glider”

Tinkercad Coding Tricks To Automate Modeling

If you want to do a quick design for 3D printing, Tinkercad is pretty easy to use. Although it was briefly in danger of going out of business, it was bought by AutoDesk who have made a lot of improvements. It is possible to program and simulate an Arduino in the same tool — which always strikes us as an odd juxtaposition. However, [Chuck] shows us in the video below how you can use the same Codeblocks to automate Tinkercad 3D modeling thanks to a beta feature in the software. Think of it as a GUI-based OpenSCAD in your browser.

You have to start a Codeblocks project, and when you do you can pick a starter design or just press the button for a new design to get a blank slate. The blocks look like other Scratch-related programming languages. You can create variables, repeat groups of commands, and create items. [Chuck] mentions the starter codes have no comments in them, which is a fair critique. There is a comment block you can use.

Continue reading “Tinkercad Coding Tricks To Automate Modeling”