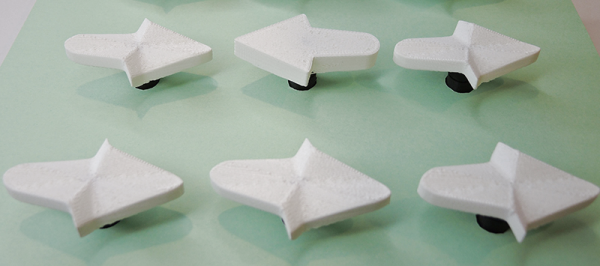
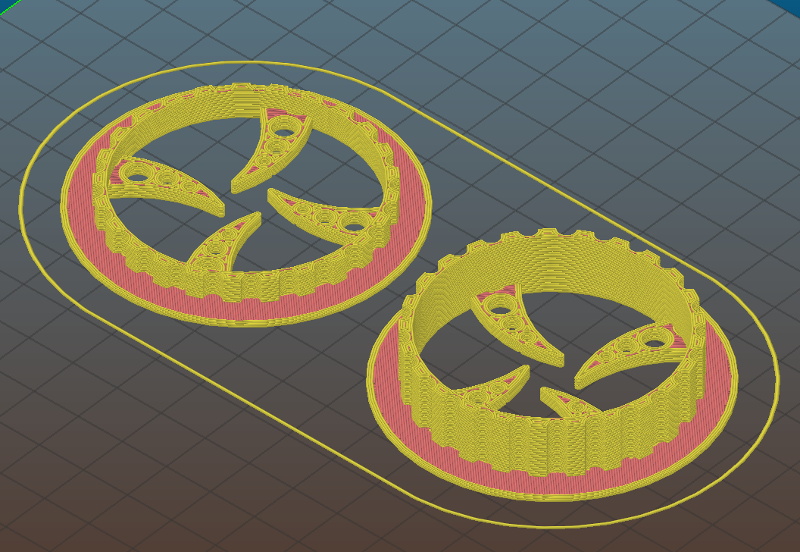
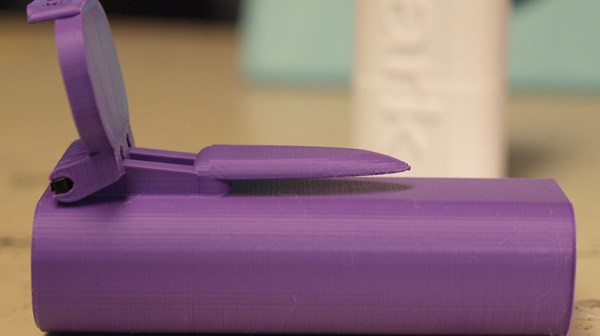
Last year, mathematician and professional optical illusionist [Kokichi Sugihara] came up with an arrow that only points one way. Technically, it’s ‘anomalous mirror symmetry’, but if you print this arrow and look at it juuuussst right, it appears this arrow only points one way.
[Ali] had the idea to turn this arrow illusion into something motorized, and for that he turned to 3D printing. The models for the illusion arrows were already available, but there had to be a way to turn a single arrow into an art installation. For that, you just need a few 9g servos. [Ali] slightly modified his servos so they would turn a full 180 degrees, and designed a magnetic mount to allow easy swap-out of these arrows.
The servos are attached to a 3D printed frame with heat-staked threaded inserts, and driven by a Pololu servo driver. The effect is great, with multiple arrows twisting and turning but still only appearing to point to the right. [Ali] put together two videos of this arrow illusion, one that’s effectively a build guide, and of course all the STLs are available in a link in the description.
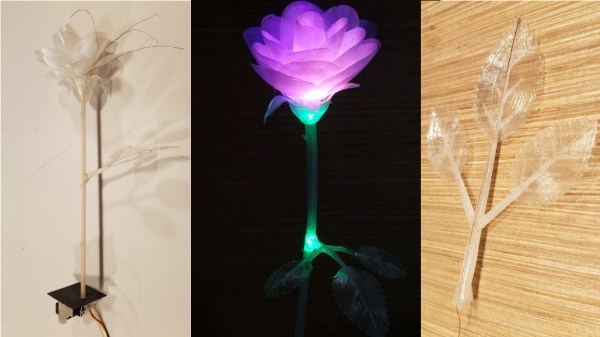
Inspiration runs on its own schedule: great ideas don’t always arrive in a timely manner. Such was the case with [Daren Schwenke]’s notion for creating a 3D-printed blooming rose for his valentine, a plan which came about on February 13. Inspired by [Jiří Praus]’s animated wireframe tulip, [Daren] figured he could make a rose from clear printed petals colored by RGB LEDs. 24 hours seemed tight but sufficient, so he diligently set to work, but – after a valiant effort – finally had to extend the schedule. It’s now more than a month later, and tweaks to the design continue, but the result is nothing short of spectacular.
We first saw a discussion of the idea over on Hack Chat, and followed as it evolved into a project on hackaday.io. There, you can read the full details of the trials and tribulations that had to be endured to make this project happen. From a printer that wouldn’t boot, through testing PLA, TPU, and nylon filament, trying a number of different approaches for springs and hinges to operate the petals, and wiring the delicate DotStar LEDs with magnet wire, you can get a really good sense of the amount of experimentation it takes to complete a project like this. If you know anyone who still thinks 3D printing is as easy as clicking a button, send them over to read the logs on this project.
An early try at forming PLA petals
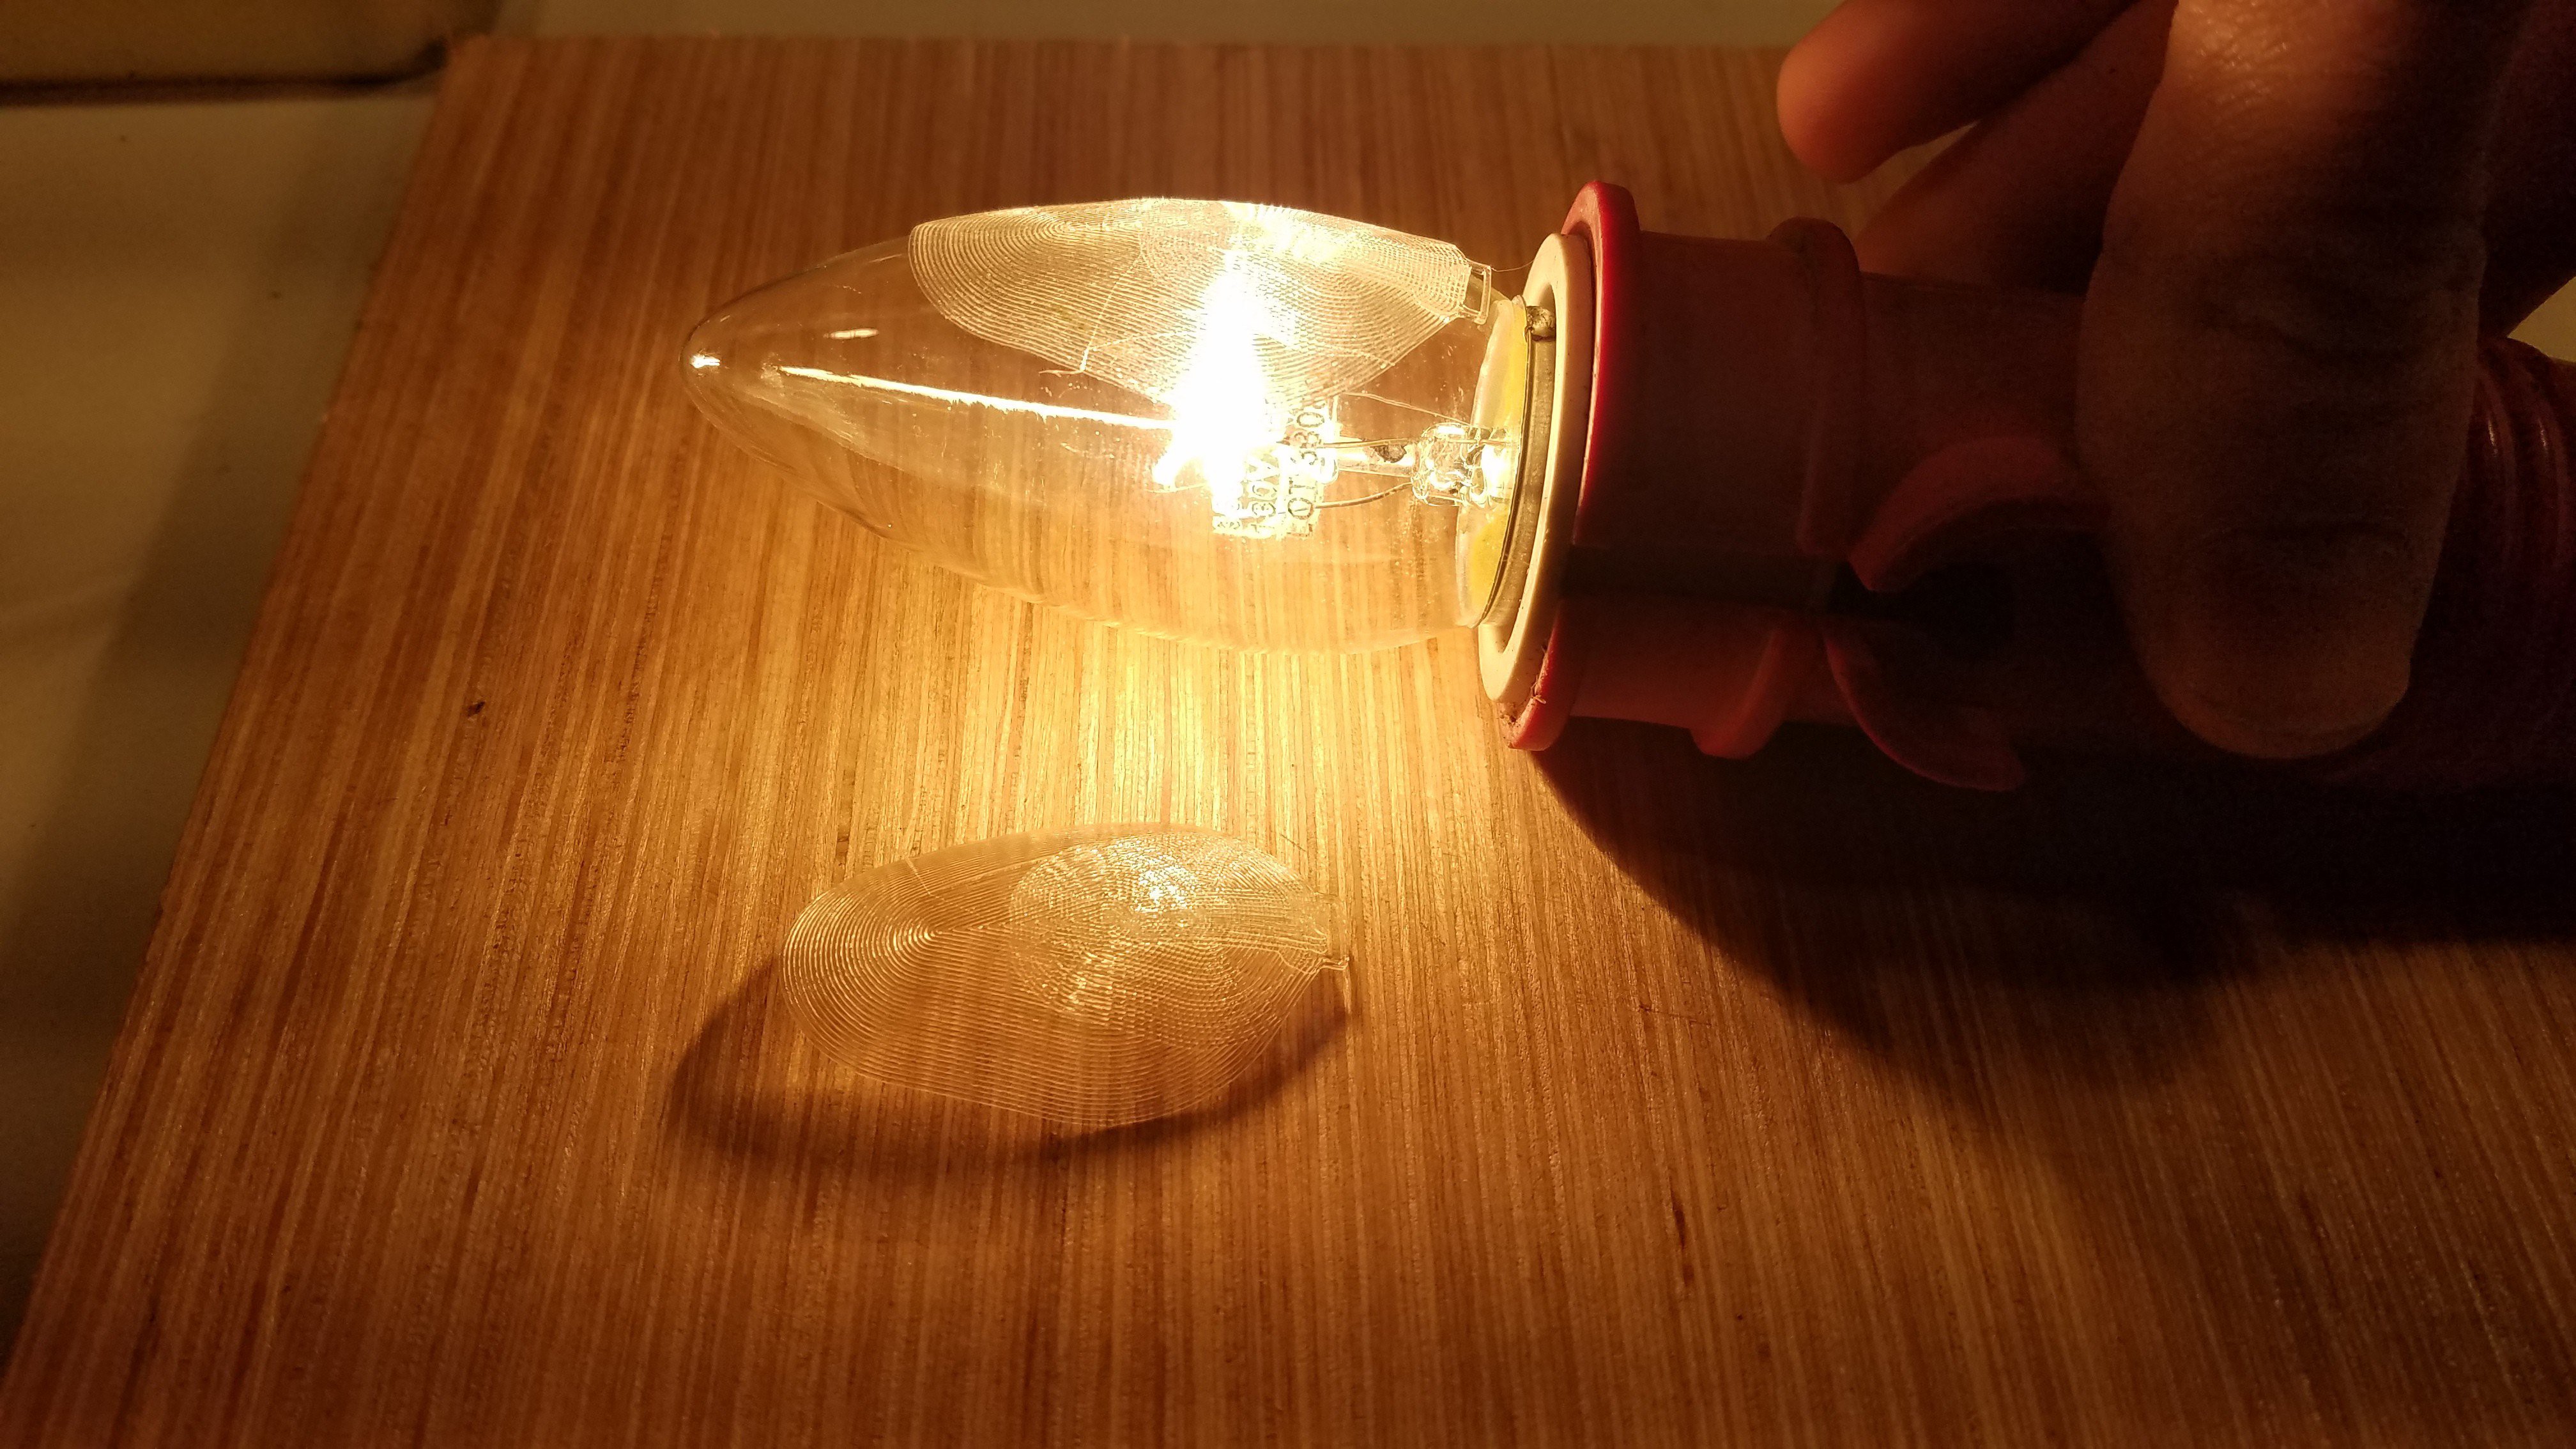
What finally materialized is a terrific combination of common hacker technologies. The petals are printed flat in nylon, then formed over a hot incandescent chandelier bulb. The stem and leaves are also printed, but the side stem has a piece of magnet wire embedded in the print as a capacitive touch sensor; when the leaf is touched, the rose blossom opens or closes. Magnet wire for the LEDs and a connecting rod for the mechanics run through the main stem to the base, where a 9g servo is responsible for controlling the bloom. The whole thing is controlled, naturally, with an Arduino. To move the project along a little more quickly, [Daren] enlisted the help of another Hack Chat denizen, [Morning.Star], who did an amazing job on the software without any access to the actual hardware.
Be sure to check out the video of the rose in action, after the break.
When you really start fine-tuning your 3D printer, you might start to notice that even the smallest things can have a noticeable impact on your prints. An open window can cause enough of a draft to make your print peel up from the bed, and the slightly askew diameter of that bargain basement filament can mess up your extrusion rate. It can be a deep rabbit hole to fall down if you’re not careful.
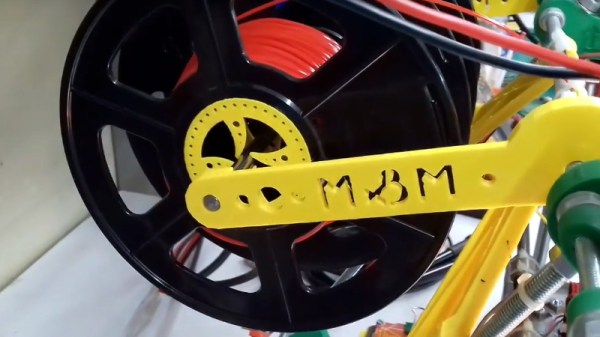
One element that’s often overlooked is the filament spool; if it’s not rotating smoothly, the drag it puts on both the extruder and movement of the print head can cause difficult to diagnose issues. For his custom built printer, [Marius Taciuc] developed a very clever printable gadget that helps the filament roll spin using nothing but the properties of the PLA itself. While the design might need a bit of tweaking to work on your own printer, the files he’s shared should get you most of the way there.
All you need to do is print out the hubs which fit your particular filament spools (naturally, they aren’t all a standard size), and snap them on. The four “claws” of the hub lightly contact a piece of 8 mm rod enough to support the spool while limiting the surface area as much as possible. The natural elasticity of PLA helps dampen the moment that would result if you just hung the hub-less spool on the rod.
The STL files [Marius] has provided for his low-friction hubs should work fine for anyone who’s interested in trying out his design, but you’ll need to come up with your own method of mounting the 8 mm rod in a convenient place. The arms he’s included are specifically designed for his customized Prusa Mendel, which is pretty far removed from contemporary desktop 3D printer design. Something to consider might be a piece of 8 mm rod suspended over the printer, with enough space that you could put a couple spools on for quick access to different colors or materials.
We often think of 3D printing as a way to create specific components in our builds, everything from some hard-to-find little sprocket to a custom enclosure. More and more of the projects that grace the pages of Hackaday utilize at least a few 3D printed parts, even if the overall build itself is not something we’d necessarily consider a “printed” project. It’s the natural progression of a technology which at one time was expensive and complex becoming increasingly available to the maker and hacker.
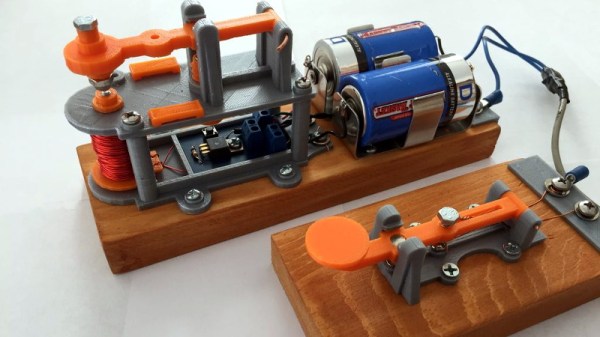
But occasionally we see 3D printing used not to create new devices, but recreate old ones. A perfect example is the almost entirely 3D printed telegraph system created by [Matt]. Projects like this help bring antiquated technology back to a modern audience, and can be an excellent educational tool. Showing someone a diagram of how the telegraph worked is one thing, but being able to run off a copy on your 3D printer and putting a working model in their hands is quite another.
[Matt] acknowledges that he’s hardly the first person to 3D print a telegraph key, but says that he’d never seen the complete system done before. The key is perhaps the component most people are familiar with from film and old images, but alone it’s really nothing more than a momentary switch. To actually put it to use, you need a telegraph sounder on the receiving end to “play” the messages.
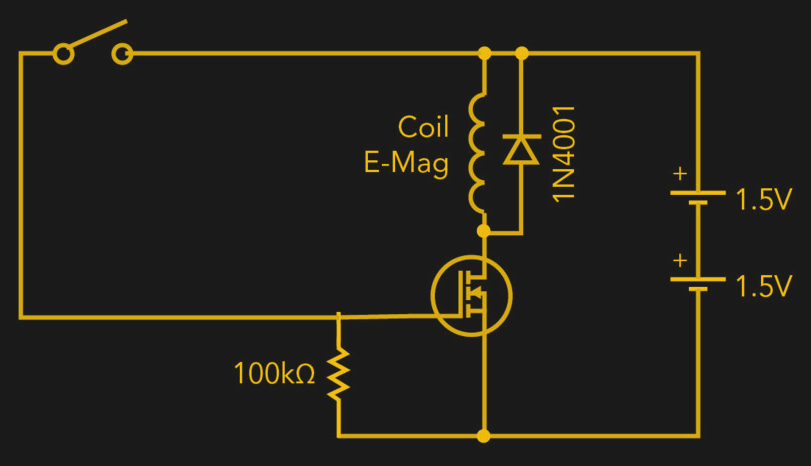
The sounder is a somewhat more complex device than the key, and uses an electromagnet to pull down a lever and produce an audible clicking noise. In the most basic case, the coil is directly connected to the key, but in a modern twist [Matt] has added a MOSFET into the circuit so the electromagnet is triggered locally within the sounder. This prevents sparks from eroding the contacts in the key, and alleviates problems associated with current loss over long wire runs.
Hackers and makers see the desktop 3D printer as something close to a dream come true, a device that enables automated small-scale manufacturing for a few hundred dollars. But it’s not unreasonable to say that most of us are idealists; we see the rise of 3D printing as a positive development because we have positive intentions for the technology. But what of those who would use 3D printers to produce objects of more questionable intent?
We’ve already seen 3D printed credit card skimmers in the wild, and if you have a clear enough picture of a key its been demonstrated that you can print a functional copy. Following this logic, it’s reasonable to conclude that the forensic identification of 3D printed objects could one day become a valuable tool for law enforcement. If a printed credit card skimmer is recovered by authorities, being able to tell how and when it was printed could provide valuable clues as to who put it there.
This precise line of thinking is how the paper “PrinTracker: Fingerprinting 3D Printers using Commodity Scanners” (PDF link) came to be. This research, led by the University at Buffalo, aims to develop a system which would allow investigators to scan a 3D printed object recovered from a crime scene and identify which printer was used to produce it. The document claims that microscopic inconsistencies in the object are distinctive enough that they’re analogous to the human fingerprint.
But like many of you, I had considerable doubts about this proposal when it was recently featured here on Hackaday. Those of us who use 3D printers on a regular basis know how many variables are involved in getting consistent prints, and how introducing even the smallest change can have a huge impact on the final product. The idea that a visual inspection could make any useful identification with all of these parameters in play was exceptionally difficult to believe.
In light of my own doubts, and some of the excellent points brought up by reader comments, I thought a closer examination of the PrinTracker concept was in order. How exactly is this identification system supposed to work? How well does it adapt to the highly dynamic nature of 3D printing? But perhaps most importantly, could these techniques really be trusted in a criminal investigation?
OpenSCAD is one of the most powerful 3d modeling applications around. Its beauty is in its simplicity; if you need a box, you can just write the code for a box. If you need some bit of plastic to keep your 3D printer running, you can just write the code for that bit of plastic. Like all programming languages, OpenSCAD is only really powerful if you have a huge back-catalog of various components ready for reuse. That’s where [Mark]’s library for hinged boxes comes in handy. Every type of box you would ever want to create, from boxes with covers, magnet closures, or cases for your glasses is easily accessible with just a few lines of code.
The work presented here is an OpenSCAD script to generate two-piece hinged boxes, with rounded corners, a lid, interlocking rims, and optional snap fit, magnet, or screw closures. As you would expect from OpenSCAD, everything in this script is parametric. You can change any measurement or simply delete entire sections of the box.
The included examples consist of a small mini-Altoids tin-sized ‘Bee Box’ with a snap-fit lid. All of the relevant dimensions of the snap-fit lid are variables. Other examples include an eyeglass case and a box for small parts storage that interlock. If you have a few rolls of filament, a lot of time on your hands, and want to organize your workbench, you could do worse than checking out a few of these OpenSCAD boxes.
Historically speaking, lithophanes are images made in porcelain with an etching or moulding process, in which an image is visible when backlit due to the varying thickness of the material. Porcelain isn’t the easiest thing to work with, but thankfully for those of us in the present, 3D printers are here to make everything better. [RCLifeOn] has been experimenting with printing lithophanes with great results.
The trick to printing a good lithophane is all in the preparation. It’s important to pick an image that looks good in greyscale, as this is not a process that reproduces color in any way. [RCLifeOn] then discusses the finer points of printer setup to get a nice looking print. Layer heights should be as small as possible to avoid visible vertical bands, and the lithophane should be printed in a vertical orientation, to avoid the print sagging due to a lack of support. Infill is best set to 100%. Most importantly, the printer should avoid crossing the outline of the print to avoid any stringy plastic artifacts spoiling the final product.
It’s a great guide that should help even a 3D printing novice create a great print with the minimum of fuss. A lithophane can make a wonderful gift and is also a good test of a printer’s capabilities, due to the fine detail required. We’ve seen them produced before too, in a wonderful lightbox configuration. Video after the break.