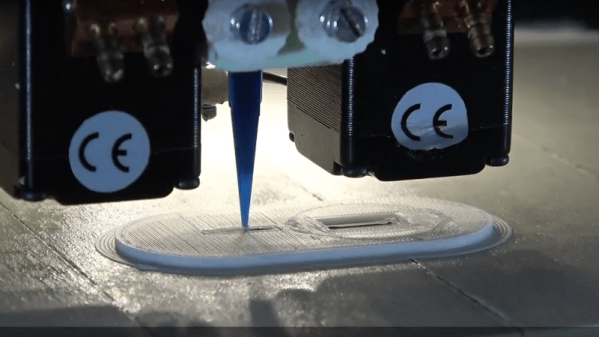
Simple tools are great, but sometimes it is most convenient to just use something easy, and since it gets the work done, you don’t try out some of the other features. Tinkercad is a great example of that kind of program. It is actually quite powerful, but many people just use it in the simplest way possible. [Chuck] noticed a video about making a 3D-printed hinge using Tinkercad and in that video [Nerys] manually placed a bunch of hinges using cut and paste along with the arrow keys for positioning. While it worked, it wasn’t the most elegant way to do it, so [Chuck] made a video showing how to do it parametrically. You can see that video below, along with the original hinge video.
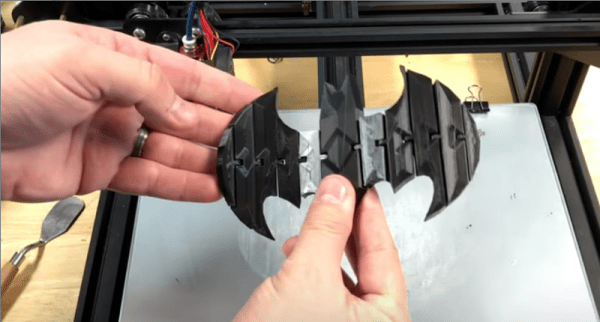
There are really two major techniques [Chuck] shows. First, he adds the necessary pieces to create the hinges to the Tinkercad toolbox. That makes it really simple to add them to any of your future designs. Second, he uses a combination of numeric parameters and duplication to quickly and precisely place the hinge components across another object — in this case a Batman logo.