Toy Car Pumps The Wheels With Balloon Power

We’ve had our eye on [Greg Zumwalt]. He’s been working on some very clever 3D-printed mechanisms and his latest prototype is an air engine for a toy car. You can supply the air for the single cylinder with a compressor, or by blowing into it, but attaching an inflated balloon makes the system self-contained.

Last week we saw the prototype of the engine by itself, and wondered if this had enough power to drive a little train engine. We were almost right as here it is powering the front wheels of a little car.

This isn’t [Greg’s] first rodeo. He’s been working on self-contained locomotion for a while now. Shown here is his spring-driven car which you pull backwards to load the spring. It’s a common feature in toys, and very neat to see with the included 3D-printed spring hidden inside of the widest gear.

That print looks spectacular, but the balloon-powered prototype tickles our fancy quite a bit more. Make sure you have your sound on when you watch the video after the break. It’s the chuga-chuga that puts this one over the top. [Greg] hasn’t yet posted files so you can print your own (it’s still a prototype) but browse the rest of his designs as you wait — they’re numerous and will bring an even bigger smile to your face. Remember that domino-laying LEGO bot [Matthias Wandel] built a few years back? [Greg] has a printable model for it!

Continue reading “Toy Car Pumps The Wheels With Balloon Power”

Laser Cutting A 3D Printer

The concept of self-replicating 3D printers is a really powerful one. But in practice, there are issues with the availability and quality of the 3D-printed parts. [Noyan] is taking a different approach by boostrapping a 3D printer with laser-cut parts. There are zero 3D-printed parts in this project. [Noyan] is using acrylic for the frame and the connecting mechanisms that go into the machine.

The printer design chosen for the project is the Prusa i3. We have certainly seen custom builds of this popular design before using laser-cut plywood for the frame. Still, these builds use 3D-printed parts for some of the more complicated parts like the extruder carriage and motor brackets. To the right is the X-carriage mechanism. It is complicated but requires no more than 6 mm and 3 mm acrylic stock and the type of hardware traditionally associated with printer builds.

With the proof of concept done, a few upgrades were designed and printed to take the place of the X-axis parts and the belt tensioner. But hey, who doesn’t get their hands on a 3D printer and immediately look for printable solutions for better performance?

We first saw a laser-cut RepRap almost nine years ago! That kit was going to run you an estimated $380. [Noyan] prices this one out at under $200 (if you know someone with a laser cutter), and of course you can get a consumer 3D printer at that price point now. Time has been good to this tool.

Soluble Molds For Composite Parts

People have been experimenting with 3D printed molds for fiberglass and carbon fiber for a while now, but these molds really aren’t much different from what you could produce with a normal CNC mill. 3D printing opens up a few more options for what you can build including parts that could never be made on any type of mill. The guys at E3D are experimenting with their new dissolvable filament to create incredible parts in carbon fiber.

For the last year, E3D has been playing around with their new soluble filament, Scaffold. This is the water-soluble support material we’ve all been waiting for: just throw it in a bucket of warm water and it disappears. The normal use case for this filament is as a support material, but for these experiments in composites, E3D are just printing whole objects, covering them in carbon fiber prepreg, vacuum bagging them, and allowing them to cure. Once the carbon fiber isn’t floppy and gooey, the support material is dissolved in water, leaving a perfect composite part.

E3D aren’t that experienced with composites, so they handed a bit of filament off to So3D for some additional experimentation. The most impressive part (in the title pic for this post) is a hollow twisted vase object. This would have required a six-part machined mold and would have cost thousands of dollars to fabricate. Additional experiments of embedding ABS parts inside the Scaffold mold were extremely successful.

As you would expect, there are limitations to this process. Since E3D are using a dissolvable mold, this is a one-time deal; you’re not going to be pulling multiple composite parts off a 3D printed mold like you would with a machined mold. Curing the parts in a very hot oven doesn’t work — Scaffold filament starts to sag around 60°C. Using prepreg is recommended over dry fabric and resin, but that seems to be due more to the skill of the person doing the layup rather than an issue with materials.

3D Print Your Next Dwelling In A Day

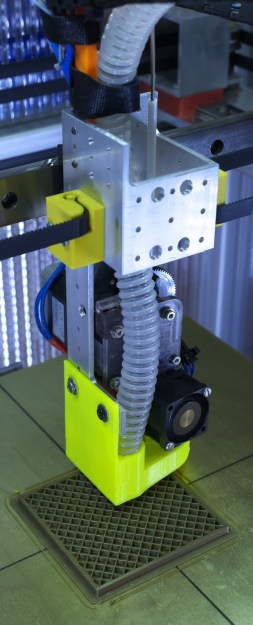
What’s the shortest amount of time in which a 400 square foot home can be built? A few weeks? Try a fully printed structure in 24 hours for a little over $10,000.

This radial residence was materialized out of concrete in Stupino, Russia by [Apis Cor], and six collaborating companies, as a prototype. As opposed to traditional — such as it is for tech largely in its infancy — assembly of pre-printed or fabricated pieces, the building was printed as a whole, with the printer removed by crane before finishing the rest of the construction. It features a bathroom, hallway, living room, and a compact kitchen — everything a bachelor or bachelorette needs.

Continue reading “3D Print Your Next Dwelling In A Day”

3D Printing Gets Cheesy

Has it ever crossed your mind that everything you see for sale–no matter how mundane–is someone’s life passion? Or, at least, their work passion. Somewhere as we speak two or three people are in a room trying to figure out how to make a whoopie cushion for two cents less than before. Someone is touting the virtues of the newest design in egg cartons. The guys that make the tube that carries your money to the bank teller at the drive through window? They exist, too.

It is natural for us to think about improving 3D printers but most of us print plastic. We might wish we could print metal. But researchers in a few places are printing cheese. We didn’t say hackers with the muchies, we said researchers. There’s a colorful slide show from the University College Cork in Ireland, for example. They printed cheese at two different speeds and used a laser scanning microscope and a rheometer to analyze the results. We’ve seen rheometers in plastic factories, but never in the kitchen. Meanwhile on the hacker front, apparently spray cheese cans work as an easy cold extruder (see video below).

Continue reading “3D Printing Gets Cheesy”

We Can Now 3D Print Slinkys

A mark of a good 3D print — and a good 3D printer — is interlayer adhesion. If the layers of a 3D print are too far apart, you get a weak print that doesn’t look good. This print has no interlayer adhesion. It’s a 3D printed Slinky, the kind that rolls down stairs, alone or in pairs, and makes a slinkity sound. Conventional wisdom says you can’t print a Slinky, but that didn’t stop [mpclauser] from trying and succeeding.

This Slinky model was made using a few lines of JavaScript that output a Gcode file. There is no .STL file, and you can’t edit this CNC Slinky in any CAD tools. This is also exceptionally weird Gcode. According to [mpclauser], the printer, ‘zigzags’ between an inner and outer radius while constantly increasing the height. This is the toolpath you would expect from a 3D printed Slinky, but it also means the usual Gcode viewers throw a fit when trying to figure out how to display this thing.

All the code to generate your own 3D printable Slinky Gcode file is up on [mpclauser]’s Google Drive. The only way to see this print in action is to download the Gcode file and print it out. Get to it.

Innovating A Better Printing Platform

Just because you have a fancy new 3D printer doesn’t mean that innovation should stop there. Almost everyone has had a print go foul if the first layer doesn’t properly adhere to the printing platform — to say nothing of difficulty in dislodging the piece once it’s finished. Facing mixed results with some established tricks meant to combat these issues, [D. Scott Williamson] — a regular at Chicago’s Workshop 88 makerspace — has documented his trials to find a better printer platform.3D Printer Steel Print Plate 1

For what he had (a printer without a heated plate), painter’s tape and hairspray wasn’t cutting it, especially when it came time to remove the print as the tape wouldn’t completely come off the part. How then, to kill two birds with one stone? Eureka! A flexible metal covering for the printing plate.

Continue reading “Innovating A Better Printing Platform”