3D Printing With Sublime Sublimation

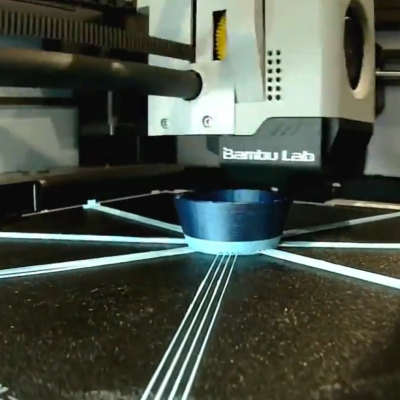
[Teaching Tech] got an interesting e-mail from [Johan] showing pictures of 3D prints with a dye-sublimated color image on the surface. Normally, we think of dye sublimation, we think of pressing color pictures onto fabric, especially T-shirts. But [Johan] uses a modified Epson inkjet printer and has amazing results, as you can see in the video below.

The printers use separate tanks for ink, which seems to be the key. If you already have an Espon “tank” printer, you are halfway there, but if you don’t have one, a cheap one will set you back less than $200 and maybe even less if you pick one up used.

Continue reading “3D Printing With Sublime Sublimation”

A man in a red plaid shirt draped over an olive t-shirt holds sandpaper in one hand an an aluminum tube filled with white beads in the other over a wooden table.

Activated Alumina For Desiccating Your Filament

When you first unwrap a shiny new roll of filament for your FDM printer, it typically has a bag of silica gel inside. While great for keeping costs low on the manufacturing side, is silica gel the best solution to keep your filament dry at home?

Frustrated with the consumable nature and fussy handling of silica gel beads, [Build It Make It] sought a more permanent way to keep his filament dry. Already familiar with activated alumina beads, he crafted a desiccant cylinder that can be popped into the oven all at once instead of all that tedious mucking about with emptying and refilling plastic capsules.

A length of aluminum intake pipe, some high temperature epoxy, and aluminum mesh are all combined to make a simple, sealed cylinder. During the process, he found that using a syringe filled with the epoxy led to a much more precise application to the aluminum cylinder, so he recommends starting out that way if you make these for yourself.

We suspect something with a less permanent attachment at one end would let you periodically swap out the beads if you wanted to try this hack with the silica beads you already had. Perhaps some kind of threaded pipe fitting? If you want a more active dryer, try making one with a Peltier. If you want to know just how dry your filament is getting, you could also put in a sensor. You might also wonder, do you really need to dry filament at all?

Continue reading “Activated Alumina For Desiccating Your Filament”

Art of 3D printer in the middle of printing a Hackaday Jolly Wrencher logo

3D Printering: Adaptive Bed Leveling

Have you ever read about something and thought, “Gee whiz! Why did I never think about that?” That was my reaction to reading about a feature commonly associated with Klipper called adaptive bed leveling or adaptive mesh leveling. Too bad I don’t typically use Klipper, but it all worked out, and I’ll show you how it might work for you.

What Is It?

Time to tram your bed!

Once a luxury, most 3D printers now come with some kind of bed level sensor. The idea is that the printer can probe the bed to determine the shape of the build plate and then adjust the build plate accordingly. So if a particular spot on the bed is 0.5 mm too high, the nozzle can rise 0.5 mm when it is in that area. There are several techniques Marlin firmware uses, including what I usually use: UBL. Some people scan the bed once and hope it won’t change much. Others will do a time-consuming scan before each print.

However, adaptive bed leveling is a bit different. The idea is that the printer only probes the area where the part is going to print. If your print bed is 235 mm x 235 mm but your part is 50 mm square, you could just probe the points under the 50 mm square.

This does several things. For a given number of points, there is less motion, so it should be faster. Also, for the same number of points, you will have a much denser mesh and, thus, a better idea of what the bed is at any given point. You could even reduce the number of points based on the size of the part you are printing.

When you think about it, it is a dead simple idea. What’s not to love? For most print jobs, you’ll have less work for the printer, faster prints, and a denser mesh. But how do you do it?

Continue reading “3D Printering: Adaptive Bed Leveling”

3D Scanning, Phone Edition

It seems to make sense. If you have a 3D printer, you might wish you could just scan some kind of part and print it — sort of like a 3D photocopier. Every time we think about this, though, we watch a few videos and are instantly disappointed by the results, especially with cheap scanners. If you go the hardware route, even cheap is relative. However, you can — in theory — put an app on your phone to do the scanning. Some of the apps are free, and some have varying costs, but, again, it seems like a lot of work for an often poor result. So we were very interested in the video from [My 3D Print Lab] where he uses his phone and quite a few different apps and objectively compares them.

Unsurprisingly, one of the most expensive packages that required a monthly or annual subscription created an excellent scan. He didn’t print from it, though, because it would not let you download any models without a fee. The subject part was an ornate chess piece, and the program seems to have captured it nicely. He removed the background and turntable he was using with no problems.

Other apps didn’t fare as well, either missing some of the parts or failing to omit background elements. You may have to do some post-processing. Some of the other expensive options have free trials or other limits, but you can at least try them for free. One of the free trials let you do three free scans, but each scan took about 8 hours to process.

Continue reading “3D Scanning, Phone Edition”

Injection Molding Using A 3D Printer

Recently [Stefan] of CNC Kitchen took a gander at using his gaggle of 3D printers to try injection molding (IM). Although the IM process generally requires metal molds and specialized machinery, 3D printers can be used for low-volume IM runs which is enough for limited production runs and prototyping before committing to producing expensive IM molds. In the case of [Stefan], he followed Form Labs’ guidance to produce molds from glass-infused Rigid 10K resin (heat deflection temperature of 218 °C). These molds are very rigid, as the ceramic-like noise when [Stefan] taps two together attests to.

Injection molded bolt, with imperfections on the head. (Credit: Stefan, CNC Kitchen)

The actual injection process is where things get more hairy for [Stefan], as he attempts to push the clamped-shut mold against the nozzle of the FDM printer to inject the molten plastic, rather than using an IM press. With PLA at standard extrusion temperature the plastic barely gets into the mold before solidifying, however. Following this, higher temperatures, different materials (PETG, TPU) and high flow-rate extruders are attempted, with varying results.

Many of the struggles would seem to be due to poor mold design, rather than fundamental issues with using an FDM. The Form Labs document details some of the basics, such as opening up the injection gate (to decrease pressure inside the mold), adding air vents to improve flow and so on. Commentators to the video with professional experience point out many of these issues as well, along with the benefits of preheating the mold.

With the caveat that most of the challenge is in making a good mold, we’ve even injection molding done with nothing more exotic than a hot glue gun. If you’ve got a friend, or a long enough lever, you can even inject the plastic by hand.

Continue reading “Injection Molding Using A 3D Printer”

Clearly 3D Printing

[Joel] picked up a wireless mouse kit. The idea is you get some 3D printing files and hardware. You can print the shell or make modifications to it. You can even design your own shell from scratch. But [Joel] took a different approach. He created a case with transparent resin. You can see the impressive result in the video below.

While the idea of buying the mouse as a kit simplifies things, we would be more inclined to just gut a mouse and design a new case for it if we were so inclined. We were more impressed with the results with the transparent resin.

Continue reading “Clearly 3D Printing”

Adding Texture To 3D Prints

[3DJake] likes putting textures on 3D prints using things like patterned build plates and fuzzy skin. However, both of those techniques have limitations. The build plate only lets you texture the bottom, and the fuzzy skin texture isn’t easy to control. So he shows how to use Blender to create specific textures to produce things like wood-like or leather-like surfaces, for example. You can see how it works in the video below.

As [Jake] points out, you might be able to use other artistic programs to do this, but the kind of things we use like FreeCAD of Fusion360 aren’t going to cut it.

Continue reading “Adding Texture To 3D Prints”