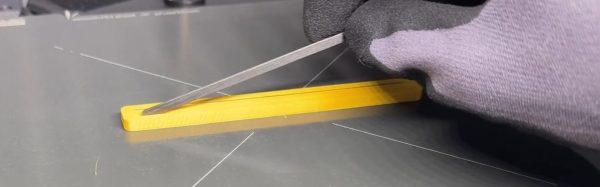
MorPhlex: The TPU Filament That Goes Soft After You Print It

In FDM 3D printing cycles TPU is a bit of a special filament. Not so much because of its properties, but because it’s rather stretchy even as a filament, which makes especially printing certain hardness grades of TPU into somewhat of an nightmare. An interesting new contender here comes from a company called BIQU, who reckon that their ‘MorPhlex’ TPU solves many of those problems. Recently the [ModBot] channel on YouTube got sent a spool of the filament for testing.

The BIQU MorPhlex TPU filament being turned into squishy slippers. (Credit: ModBot, YouTube)

The ‘magic’ here is that this TPU claims to be a 90A TPU grade while on the spool, but after printing it becomes 75A, meaning a lot softer and squishier. Perhaps unsurprisingly, a big selling point on their product page is that you can print squishy shoes with it. Beyond this is claims to be compatible with ‘most FDM printers’, and the listed printing parameters are typical for TPU in terms of extruder and bed temperature.

After drying the filament as recommended for TPU in general, test prints were printed on a Bambu Lab H2D. Here BIQU recommends not using the AMS, but rather the dedicated TPU feeding channel. For the test prints some slippers were printed over the course of two days. In hindsight glue stick should have been applied to make parts removal easier.

The slippers were indeed squishy, but the real test came in the form of a Shore A hardness meter and some test cube prints. This showed an 80 – 85A for the BIQU MorPhlex test cube depending on whether to test the side or top. As the product datasheet indicates a final hardness of 75A +/- 3A, one could argue that it’s kind-of in spec, but it mostly raises questions on how parameters like temperature and extrusion speed affect the final result.

Josef Prusa Warns Open Hardware 3D Printing Is Dead

It’s hard to overstate the impact desktop 3D printing has had on the making and hacking scene. It drastically lowered the barrier for many to create their own projects, and much of the prototyping and distribution of parts and tools that we see today simply wouldn’t be possible via traditional means.

What might not be obvious to those new to the game is that much of what we take for granted today in the 3D printing world has its origins in open source hardware (OSHW). Unfortunately, [Josef Prusa] has reason to believe that this aspect of desktop 3D printing is dead.

If you’ve been following 3D printing for awhile, you’ll know how quickly the industry and the hobby have evolved. Just a few years ago, the choice was between spending the better part of $1,000 USD on a printer with all the bells and whistles, or taking your chances with a stripped-down clone for half the price. But today, you can get a machine capable of self calibration and multi-color prints for what used to be entry-level prices. According to [Josef] however, there’s a hidden cost to consider.

Continue reading “Josef Prusa Warns Open Hardware 3D Printing Is Dead”

3D-Printing A Full-Sized Kayak In Under A Day

If you want to get active out on the water, you could buy a new kayak, or hunt one down on Craigslist, Or, you could follow [Ivan Miranda]’s example, and print one out instead.

[Ivan] is uniquely well positioned to pursue a build like this. That’s because he has a massive 3D printer which uses a treadmill as a bed. It’s perfect for building long, thin things, and a kayak fits the bill perfectly. [Ivan] has actually printed a kayak before, but it took an excruciating 7 days to finish. This time, he wanted to go faster. He made some extruder tweaks that would allow his treadmill printer to go much faster, and improved the design to use as much of the belt width as possible. With the new setup capable of extruding over 800 grams of plastic per hour, [Ivan] then found a whole bunch of new issues thanks to the amount of heat involved. He steps through the issues one at a time until he has a setup capable of extruding an entire kayak in less than 24 hours.

This isn’t just a dive into 3D printer tech, though. It’s also about watercraft! [Ivan] finishes the print with a sander and a 3D pen to clean up some imperfections. The body is also filled with foam in key areas, and coated with epoxy to make it watertight. It’s not the easiest craft to handle, and probably isn’t what you’d choose for ocean use. It’s too narrow, and wounds [Ivan] when he tries to get in. It might be a floating and functional kayak, just barely, for a smaller individual, but [Ivan] suggests he’ll need to make changes if he were to actually use this thing properly.

Overall, it’s a project that shows you can 3D print big things quite quickly with the right printer, and that maritime engineering principles are key for producing viable watercraft. Video after the break.

Continue reading “3D-Printing A Full-Sized Kayak In Under A Day”

Continuous-Path 3D Printed Case Is Clearly Superior

[porchlogic] had a problem. The desire was to print a crystal-like case for an ESP32 project, reminiscent of so many glorious game consoles and other transparent hardware of the 1990s. However, with 3D printing the only realistic option on offer, it seemed difficult to achieve a nice visual result. The solution? Custom G-code to produce as nice a print as possible, by having the hot end trace a single continuous path.

The first job was to pick a filament. Transparent PLA didn’t look great, and was easily dented—something [porchlogic] didn’t like given the device was intended to be pocketable. PETG promised better results, but stringing was common and tended to reduce the visual appeal. The solution to avoid stringing would be to stop the hot end lifting away from the print and moving to different areas of the part. Thus, [porchlogic] had to find a way to make the hot end move in a single continuous path—something that isn’t exactly a regular feature of common 3D printing slicer utilities.

The enclosure itself was designed from the ground up to enable this method of printing. Rhino and Grasshopper were used to create the enclosure and generate the custom G-code for an all-continuous print. Or, almost—there is a single hop across the USB port opening, which creates a small blob of plastic that is easy to remove once the print is done, along with strings coming off the start and end points of the print.

Designing an enclosure in this way isn’t easy, per se, but it did net [porchLogic] the results desired. We’ve seen some other neat hacks in this vein before, too, like using innovative non-planar infill techniques to improve the strength of prints.

Continue reading “Continuous-Path 3D Printed Case Is Clearly Superior”

[Ben] at workbench with 3D-printed sea scooter

Watertight And Wireless In One Go: The DIY Sea Scooter

To every gadget, tool, or toy, you can reasonably think: ‘Sure I could buy this… but can I make it myself?’ And that’s where [Ben] decided he could, and got to work. On a sea scooter, to be exact.

This sea scooter was to be a fully waterproof, hermetically sealed 3D-printed underwater personal propulsion device, with the extreme constraint that the entire hull and mechanical interfaces are printed in one go. No post-printing holes for shafts, connectors, or seals. It also meant [Ben] needed to embed all electronics, motor, magnetic gearbox, custom battery pack, wireless charging, and non-contact magnetic control system inside the print during the actual print process.

As [Ben] explains, both Bluetooth and WiFi ranges are laughable once underwater. He elegantly solves this with a reed-switch-based magnetic control system. The non-contact magnetic drive avoids shaft penetrations entirely. Power comes from a custom 8S LiFePO₄ pack, charged wirelessly through the hull. Lastly, everything’s wrapped in epoxy to make it as watertight as a real submarine.

The whole trick of ‘print-in-place’ is that [Ben] pauses the builder mid-print, and drops in each subsystem like a secret ingredient. Continuing, he tweaks the printer’s Z-offset, and onwards it goes. It’s tense, high-stakes work; a 14-hour print where one nozzle crash means binning hundreds of dollars’ worth of embedded components.

Still, [Ben] took the chance, and delivered a cool, fully packed and fully working sea scooter. Comment below to discuss the possibilities of building one yourself.

Continue reading “Watertight And Wireless In One Go: The DIY Sea Scooter”

The Trials Of Trying To Build An Automatic Filament Changer

Running out of filament mid-print is a surefire way to ruin your parts and waste a lot of time. [LayerLab] was sick of having this problem, and so sought to find a proper solution. Unfortunately, between off-the-shelf solutions and homebrew attempts, he was unable to solve the problem to his satisfaction.

[LayerLab] had a simple desire. He wanted his printer to swap to a second spool of filament when the first one runs out, without ruining or otherwise marring the print. It sounds simple, but the reality is more complicated. As an Australian, he couldn’t access anything from InfinityFlow, so he first attempted to use the “auto refill” features included on the Bambu Labs AMS 2. However, it would routinely make filament changes in outside wall areas of a print, leaving unsightly marks and producing poorer quality parts.

His next effort was to use the Wisepro Auto Refill Filament Buffer. It’s a feeder device that takes filament from two spools, and starts feeding the backup spool in to your printer when the primary spool runs out. Unfortunately, [LayerLab] had a cavalcade of issues with the device. It would routinely feed from the secondary spool when there was still primary filament available, jamming the device, and it didn’t come with a proper mounting solution to work with consumer printers. It also had bearings popping out the top of the housing. Attempts to rework the device into a larger twin-spool rig helped somewhat, but ultimately the unreliability of the Wisepro when changing from one spool to another meant it wasn’t fit for purpose. Its feeder motors were also to trigger the filament snag cutters that [LayerLab] had included in his design.

Ultimately, the problem remains unsolved for [LayerLab]. They learned a lot along the way, mostly about what not to do, but they’re still hunting for a viable automatic filament changer solution that suits their needs. Filament sensors help, but can only do so much. If you reckon you know the answer, or a good way forward, share your thoughts in the comments. Video after the break.

Continue reading “The Trials Of Trying To Build An Automatic Filament Changer”

How To Design 3D-Printed Parts With Tolerance In Mind

One of the continuing struggles with FDM printing is making sure that parts that should fit together actually do. While adding significant tolerance between parts is an option, often you want to have a friction fit or at least a gap that you cannot drive a truck through. In a video by [Slant 3D] a number of tips and tricks to improve parts design with tolerance in mind are provided.

Starting with the fairly obvious, such as avoiding sharp corners, rounding off edges and using chamfered edges  and filets for e.g. lids to make getting started easy, the video then moves into more advanced topics. Material shrinkage is a concern, which is where using thin walls instead of solid blocks of material helps, as does using an appropriate infill type. Another interesting idea is to use a compliant mechanism in the lid to get a friction fit without getting all print parameters just right.

On the opposing side to the lid – or equivalent part – you’d follow many of the same tips, with the addition of e.g. slots that allow for the part to flex somewhat. All of this helps to deal with any variability between prints, with the suggested grip fins at the end of the video being probably the most extreme.

Continue reading “How To Design 3D-Printed Parts With Tolerance In Mind”