Car Hacker Hacks Lawn Care Carb Into Hot Rod Car

Internal combustion engines have often been described (quite correctly) as air pumps, and because of this nature, they tend to respond very well to more air. Why? Because more air means more fuel, and more fuel means more power- the very nature of hot rodding itself. [Thunderhead289] is an accomplished car hacker, and he’s decided to take things the opposite direction: Less air, less fuel… more mileage? As you can see in the video below the break, [Thunderhead289] has figured out how to mount a single barrel carburetor from a lawn mower to the four barrel intake of a Ford 302– a V8 engine that’s many times larger than the largest single cylinder lawnmower!

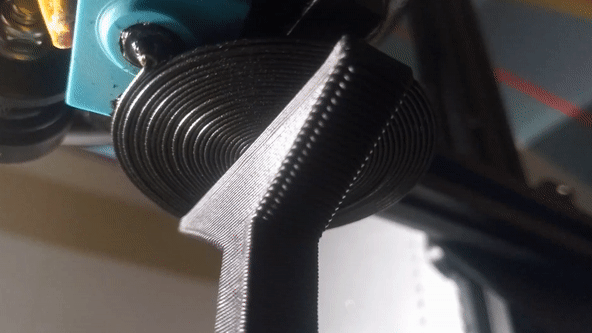
The hacks start not just with the concept, but with getting the carburetor installed. Rather than being a downdraft carburetor, the new unit is a side draft, with the float bowl below the carb’s venturi. To mount it, a 3d printed adapter was made, which was no small feat on its own. [Thunderhead289] had to get quite creative and even elevate the temperature of his workshop to over 100 degrees Fahrenheit (38 Celsius) to get the print finished properly. Even then, the 34 hour print damaged his Ender printer, but not before completing the part.

The hackery doesn’t stop there, because simply mounting the carburetor is only half the battle. Getting the engine to run properly with such a huge intake restriction is a new task all its own, with a deeper dive into fuel pressure management, proper distributor timing, and instrumenting the car to make sure it won’t self destruct due to a poor fuel mixture.

While [Thunderhead289] hasn’t been able to check the mileage of his vehicle yet, just getting it running smoothly is quite an accomplishment. If silly car hacks are your thing, check out [Robot Cantina]’s 212cc powered Insight and how they checked the output of their little engine. Thanks to [plainspicker] for the tip!

Continue reading “Car Hacker Hacks Lawn Care Carb Into Hot Rod Car”

The Honda Takedown: How A Global Brand Failed To Read The Room

Perhaps the story of the moment in the world of 3D printing concerns a Japanese manufacturer of cars and motorcycles. Honda has sent a takedown notice requesting the removal of models starting with the word “Honda” to the popular 3D printing model repository site Printables. It’s left in its wake puzzlement, disappointment, and some anger, but what’s really going on? Perhaps it’s time to examine what has happened and to ponder what it means for those who put online printable parts and accessories for cars or any other item manufactured by a large corporation.

If You Make Something, What Rights Do You Have?

Soichiro Honda with his 1964 Formula 1 car
Soichiro Honda, famous for being an engineer rather than a serial litigator. Roderick Eime, CC BY 2.0.

The story is that as far as we can glean from reports online, the takedown notice was sent only to Printables by the European arm of Honda, and was pretty wide-ranging with any Honda-related model in its scope. Printables complied with it, but as this is being written there are plenty of such models available from Thingiverse and other model repository sites.

Anyone who makes a career in content creation has by necessity to have a working knowledge of copyright and intellectual property law as it’s easy for the unwary to end up the subject of a nasty letter, so here at Hackaday while we’re not lawyers this is a subject on which we have some professional experience. What follows then is our take based on that experience, our view on Honda’s motivation, and whether those of you who put up 3D models have anything to worry about. Continue reading “The Honda Takedown: How A Global Brand Failed To Read The Room”

Printable Carbide Opens Up Interesting Possibilities

Sandvik, a large company headquartered in Sweden, has apparently been producing cemented carbide for a long time — according to them, since 1932. The material is known for being highly wear-resistant. Now the company says they have a process to 3D print the material. You can see a video about the new material, below.

If you haven’t encountered this material, it is essentially fine carbide particles bound in metal. You’ll find the material widely used in cutting tools. The slogan “Freedom of Design has Never Been Harder” is both clever and confusing, but we took their point.

The process is more or less like other metal binder technology. A powder of tungsten carbide and cobalt mixed with glue creates a green body which you still need to fire to get to the finished part.

What kind of things can you make? Here’s a quote from one of Sandvik’s engineers:

For instance, in wire drawing, productivity is usually limited by how fast the wire can be drawn with maintained quality, which in turn depends on the temperature in the wire drawing die. People have been trying to solve this problem for decades, but it’s been extremely difficult. A 3D printed, cooled wire nib is the answer to this riddle. It took a mere four days to produce, from the first basic sketch to the fully sintered product – thanks to our materials and proprietary process.

Don’t plan on loading up your Ender 3 with cemented carbide filament. This is, after all, a metal material. However, 3D printing can offer geometries that would be difficult to obtain with traditional methods. So even if you have to turn to a professional 3D printing shop, it is good to know you can create in this ultra-hard material.

Printing in metal has a different set of issues than using plastics. If you really want your current printer to do metal, it can, but you’ll have to cheat a bit. Or try electroplating.

Continue reading “Printable Carbide Opens Up Interesting Possibilities”

Reducing Warping In Metal 3D Prints

We are used to dealing with warping when printing with thermoplastics like ABS, but metal printers suffer from this problem, too. The University of Michigan has a new technology, SmartScan, that promises to reduce this problem. You can see a video about the technique, below.

The idea is to develop a thermal model of the printed part before laser sintering and then move the laser in such a way that heat doesn’t accumulate. The video shows how engraving metal in the traditional way causes the metal to warp as the laser heats up areas. Using the SmartScan thermal model, they were able to reduce deformation by almost half.

Continue reading “Reducing Warping In Metal 3D Prints”

Don’t Tune Your 3D Printer To Middle ‘C’ After All

Layer shift caused by the belt being way too loose.

3D printer belt tension seems like a simple thing to deal with — you set the tension and then check it’s good now and then. If it gets really loose, then the teeth can slip and you’ll get some shifts in the print, ruining it, but its an easy fix. But, we hear you ask, how do you determine what the correct tension is? Well, here’s [Lost in Tech] with a video showing some measurement techniques and analysis of a typical 3D printer, (video, embedded below) using nothing more special than a set of luggage scales. A simple theory suggested was that a tighter belt tension would result in increased radial load on the stepper motor bearings, which in turn, due to friction, would result in an increase in temperature of the motor.  After setting a few tension values on one of the belts, it was noted that tension values at the upper end of the range, resulted in a measured increased in temperature of two degrees celcius, and a large increase in noise. This can’t be good for the motor.

Continue reading “Don’t Tune Your 3D Printer To Middle ‘C’ After All”

Texture Map GCode Directly In Blender With NozzleBoss

We’ve seen this funky dual disk polar printer already recently, but [Heinz Loepmeier] has been busy working on it, so here’s an update. The primary focus here is nozzleboss, a blender plugin which enables the surface textures of already sliced objects to be manipulated. The idea is to read in the gcode for the object, and convert it to an internal mesh representation that blender needs in order to function. From there the desired textures can be applied to the surfaces for subsequent stages to operate upon. One trick that nozzleboss can do is to create weight maps to tweak the extrusion flow rate or print velocity value according to the pixel value at the surface — such ‘velocity painting’ can produce some very subtle surface effects on previously featureless faces. Another trick is to use the same weight maps and simply map colours to blender text blocks which are injected into the gcode at export time. These gcode blocks can be used swap tool heads or extruders, enabling blending of multiple filament colours or types in the same object.

Some nice examples of such printing manipulation can be seen on [Heinz’s] instagram page for the project. So, going back to the hardware again, the first video embedded below shows the ‘dual disk polar printer’ fitted with a crazy five-extruders-into-one-nozzle mixing hotend setup, which should be capable of full CMYK colour mixing and some. The second video below shows an interesting by-product of the wide horizontal motion range of the machine, that the whole printing area can be shifted to a nozzle at the other end of the gantry. This enables a novel way to switch extruders, by just moving the whole bed and print under the nozzle of interest! One final observation — is that of the print surface — it does look rather like they’re printing direct onto a slab of marble, which I think is the first time we’ve seen that.

Interesting printer designs are being worked on a lot these days, here’s a really nice 5-axis prusa i3 hack, and if you want to stay in the cartesian world, but your desktop machine is just too small, then you can always supersize it.

Continue reading “Texture Map GCode Directly In Blender With NozzleBoss”

the water gravity air powered engine running

Gravity-Water-Air Powered Engine

Air engines are a common occurrence here on Hackaday. They’re relatively novel and reasonably easy to 3D print without requiring any fluids or supporting machinery. For example, [Tom Stanton] took a previous air engine design, did away with the air compressor, and instead used gravity and water to create just a few PSI to run the engine.

The basic setup is to have a large jug of water up somewhere high. Flexible tubing runs down to [Tom’s] custom acrylic pressure chamber. A little CNC-ing and some epoxy made a solid chamber, and we’re happy to report that [Tom] did some initial simulation before construction to make sure he wasn’t accidentally building a bomb. Some back of the napkin math showed that he could expect around 0.6 bar (around eight psi) with his setup. His first test showed almost precisely that. Unfortunately, [Tom] ran into some issues despite the early success. His engine would stop as it drew air and the pressure dropped, and the replenishing rate of the pressure was limited by the relatively small inlet hole he had drilled.

To fix this, he printed a larger diaphragm for the engine, so the lower air pressure had more to push against. This allowed the engine to run for a good while before the tank filled up. Additionally, he smoothed and polished everything, so it was as low friction as possible. We know we often state it here, but it is incredible what can be achieved with 3D printed parts these days.

We love seeing the iteration evident in this video. The various engine versions splayed across the table offer a powerful story about [Tom’s] persistence. Powering an engine is a small step to powering your whole home.

Continue reading “Gravity-Water-Air Powered Engine”