Mastodon Comes To The IBM PC

Elon Musk has bought Twitter for an eye-watering sum, and his live adventures in chaotic mismanagement of a social media company have become a compelling performance for the rest of us. As we munch on our tasty popcorn and enjoy the show, many Twitter users have jumped ship for the open-source alternative Mastodon. It offers much to the escapee including instances tailored to particular communities, but aside from all that it’s got something Twitter never had. You can now use a Mastodon client on an IBM PC.

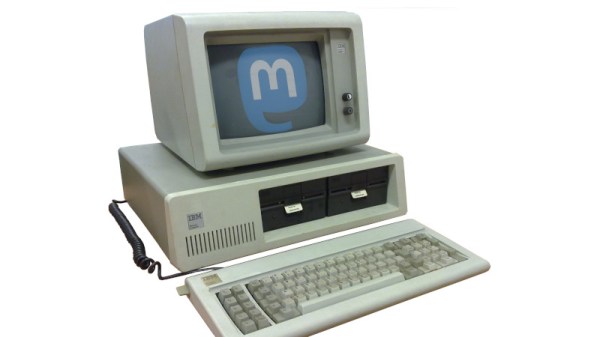
Many of you are no doubt looking askance at us, as you have been Tooting for years from behind the keyboard of a PC. But it’s likely that the PC you’re using is a generic modern x86 machine running an up-to-date operating system such as a GNU/Linux flavour or Microsoft Windows, by contrast here we’re referring to the original, the daddy of them all. Because the client we’re talking about is DOStodon, designed to run on a real IBM PC as though it’s the early 1980s again.

Stunt hacks aside, whether or not you fire up DOStodon on a 16-bit machine to get your Fediverse fix, it’s an interesting piece of software because it’s written in Javascript. Which in turn brings us to DOjS from the same author, a DOS Javascript canvas with sound. Not everyone will be raring to run their Javascript code on an early 1980s PC, but its existence proves that there’s plenty of life in the old platform yet.

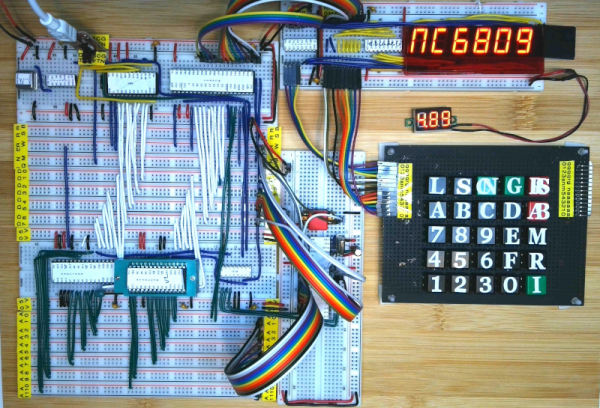
Need more Mastodon on unexpected platforms? How about the ESP32?

Header image: Ruben de Rijcke, CC BY-SA 3.0, and Jin Nguyen, AGPL .

A home-made wireless game controller

ColecoVision Barn Find Gets Wireless Makeover

Few things are more satisfying than finding an old, forgotten piece of technology somewhere and bringing it back to life. And while it’s great to see a rare sports car or an Apollo Flight Computer being restored, even not-very-successful game consoles from the 1980s can make for some great repair stories. Just look at how [Discreet Mayor] describes his restoration and modification efforts on a ColecoVision that he literally found in a barn.

Given that the ColecoVision was on the market between 1982 and 1985, we can assume that [Discreet Mayor]’s console had been sitting on a shelf for at least three decades, and the machine was definitely showing its age. Several components had failed due to corrosion, including the clock crystal, a 7400 series logic chip and a capacitor in the power supply, but since these are all standard components it was rather straightforward to replace them.

The controllers however were sadly beyond repair. Replacing them with standard joysticks wasn’t really an option because the ColecoVision controllers included a numeric keypad, which was mainly used to select game options. Making something completely new was the way to go, and [Discreet Mayor] decided to go for a wireless system while he was at it. After all, he had already developed a modular wireless IoT system based on the IEEE 802.15.4 standard, which turned out to be a perfect fit for this system.

The splash screen of ColecoVision's Venture[Discreet Mayor] built a simple joystick-plus-fire-button setup on a piece of MDF and equipped it with his IoT transmitter. Instead of adding a replacement numeric keypad he decided to use the joystick to simulate the most commonly-used buttons: “right” for “1”, “down” for “2” and so on. The receiver module uses digital switches to mimic keypresses to the console’s input port. The end result might look a bit hacky, but the console is fully functional again and runs its games just like it did over thirty years ago.

We’ve seen several projects that add wireless controllers to a variety of classic consoles. If you’ve got a ColecoVision that turns out to be beyond salvaging, you can always just build your own from scratch.

A 386 motherboard with a custom ISA card plugged in

Emulate Any ISA Card With A Raspberry Pi And An FPGA

One of the reasons the IBM PC platform became the dominant standard for desktop PCs back in the mid-1980s was its open hardware design, based around what would later be called the ISA bus. Any manufacturer could design plug-in cards or even entire computers that were hardware and software compatible with the IBM PC. Although ISA has been obsolete for most purposes since the late 1990s, some ISA cards such as high-quality sound cards have become so popular among retrocomputing enthusiasts that they now fetch hundreds of dollars on eBay.

So what can you do if your favorite ISA card is not easily available? One option is to head over to [eigenco]’s GitHub page and check out his FrankenPiFPGA project. It contains a design for a simple ISA plug-in card that hooks up to a Cyclone IV FPGA and a Raspberry Pi. The FPGA connects to the ISA bus and implements its bus architecture, while the Pi communicates with the FPGA through its GPIO ports and emulates any card you want in software. [eigenco]’s current repository contains code for several sound cards as well as a hard drive and a serial mouse. The Pi’s multi-core architecture allows it to run several of these tasks at once while still keeping up the reasonably high data rate required by the ISA bus.

In the videos embedded below you can see [eigenco] demonstrating the system on a 386 motherboard that only has a VGA card to hook up a monitor. By emulating a hard drive and sound card on the Pi he is able to run a variety of classic DOS games with full sound effects and music. The sound cards currently supported include AdLib, 8-bit SoundBlaster, Gravis Ultrasound and Roland MT-32, but any card that’s documented well enough could be emulated.

This approach could also come in handy to replace other unobtanium hardware, like rare CD-ROM interfaces. Of course, you could take the concept to its logical extreme and simply implement an entire PC in an FPGA.

Continue reading “Emulate Any ISA Card With A Raspberry Pi And An FPGA”

Bringing Up An Old Motherboard Is A Delicate Process

If you were around for the early days of the personal computer revolution, you’ll no doubt recall the excitement every time IBM announced a new version of its beige boxes. For a lot of us, the excitement was purely vicarious, for despite the “personal” moniker, mere mortals could rarely afford a branded IBM machine. But it was still cool to keep track of the latest releases, and dream of the days when cheap clones would make it possible to play.

[Anders Nielsen]’s recent find of an original IBM Model 5160 motherboard sort of echoes that long-ago excitement, but in a different way. This board, from a PC XT built in 1984, was in unknown condition upon arrival, so [Anders] set about a careful process to try to bring the board back to life. A quick visual inspection leaves one with a sense of both how much things have changed, and how much they’ve stayed the same. Aside from the big 40-pin DIP 8088 CPU and the BIOS ROMs, the board is almost completely populated with discrete logic chips, but at the same time, the basic footprint of a motherboard has changed very little.

The bring-up process in the video below includes checks of all the power rails for shorts, which ended up being a good call — drat those tantalums. After fixing that issue, [Anders] had a bit of trouble getting the board to POST, and eventually resorted to dumping the BIOS ROMs and inspecting the contents. One of the chips had picked up a case of the scramblies at some point, which was easy enough to fix thanks to images of the 5160 ROMs available online. We thought the trick of using a 64k ROM and just writing the BIOS image twice was pretty clever.

In the end, the board came up, although without video or keyboard — that’s for another day. Can’t find your own PC XT motherboard to play with? Then maybe you can just build one.

Continue reading “Bringing Up An Old Motherboard Is A Delicate Process”

Computer Space Flies Again

[Sean] from Classic Arcade Repairs fixes classic arcade machines, and he got a request to repair a very special machine. It’s Computer Space, the first commercial arcade cabinet ever made, and loosely based on Spacewar! This grand-daddy of coin-op was a literal barn find, and was in pretty bad shape after sitting for years. All the parts appeared to be original, making them 50 years old. As you can imagine, that combination didn’t bode well for the health of the components. There’s a couple hours of footage here, but it’s invaluable troubleshooting advice, and very cool to see such an old machine being worked on.

Part one is the intro, and [Sean] started with an HP logic analyzer, just probing the many TTL chips on the board looking for floating or otherwise suspicious outputs. Figure out the obviously faulty chips and replace each with a socket and new chip. Just about every diode in the machine needed replacing.

Part two of the repair starts with a broken trace repair, and the discovery that all the ceramic capacitors on the boards were leaky. The interesting thing is that a multimeter tested those caps as having the correct capacitance, but a dedicated leak tester discovered the problem.

Part 3 shows the process of running the remaining chips through a logic tester, which found more problematic ICs. In some cases, a chip would only sometimes test as working. And strangely, one of the new, replacement chips turned out to have a problem. Though as a commenter pointed out, it could be a falling edge vs rising edge variation of the logic chips to blame. Or maybe the new chips were counterfeit. Hard to nail down.

Part 4 starts with a gotcha moment, where one of the first repairs to the board was a misstep. What appeared to be a damaged trace, was actually a factory modification (a bodge cut?). Then a lucky break really helped out, where only half of one of the 7476 chips was in use, and one of the chips on hand was only half working. Put the dead bit into the unused slot, and the machine really started to behave.

Part 5 is the victory lap, where all the components finally arrived, and everything starts working on the bench. How cool to see the old machine bleeping and blooping again.

Building A Sinclair ZX81 In 2022 With All New Parts

As the supply of genuine retrocomputers dwindles and their prices skyrocket, enthusiasts are turning their eyes in other directions to satisfy their need for 8-bit pixelated goodness. Some take the emulation route, but others demand a solution that’s closer to the original hardware. Following the latter path, [iNimbleSloth] is answering the question as to whether it’s possible to build a Sinclair ZX81 from all-new parts in 2022.

The ZX81 was Sir Clive’s second Z80-based computer, and its low price made it an instant success which paved the way for the legendary ZX Spectrum. From here in 2022 the original Ferranti ULA chip that contained all the logic is unobtainable except by raiding another ’81, so he’s using a design that has the same functionality in 74 series logic. The PCB is the same size as the original, and he’s paired it with a keyboard PCB using tactile switches. The video below the break is the first of what is to be a series, and he will be looking at a readily available 3D printed ZX81 case and the re-manufactured membrane keyboard.

For those of us who first learned to code in its meager 1k of memory the ’81 will always be a special computer. Sure it had many faults, but simply having an affordable real computer at all in 1981 was special. To see one being made from scratch is special then, and it would be nice to think that a few other people might learn how a computer works the Sinclair way.

Continue reading “Building A Sinclair ZX81 In 2022 With All New Parts”

Old 6809 Computer Lives Again On Breadboards

Among old CPUs, the 6809 never got as much attention as some of its cousins. The Radio Shack CoCo used it and so did a construction article in Wireless World Magazine. Now [Dave] has reconstructed that computer on breadboards and it looks great. The files are on GitHub and there is even a series of videos about the machine. You can watch the first one below.

You can even read the original articles in the January 1981 Wireless World where the board used a 6802. The upgrade to a 6809 appears in the July 1981 issue. The magazine promised you could build the system for £100. Besides the 6809 there were only a few chips. A PROM, two RAM chips, A 6821 PIA, and a 74LS138 decoder for address selection. An MC1413 transistor array also allowed for a 7-segment display and a keypad along with a 7442 BCD decoder.

Continue reading “Old 6809 Computer Lives Again On Breadboards”