Protect Your Property With This Fire-Breathing Billionaire

Let’s face it: if you can’t trust a fire-breathing billionaire industrialist to protect your stuff, who can you trust? (Video, embedded below.)

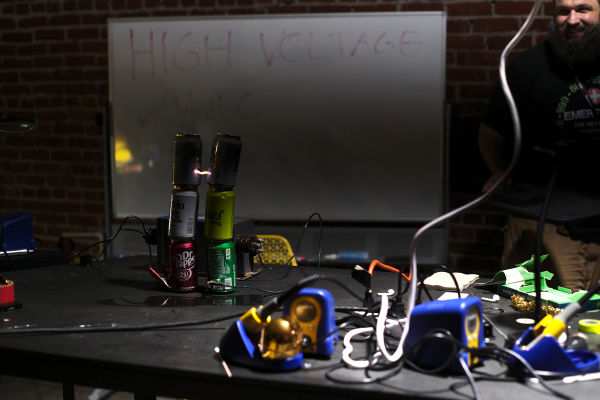
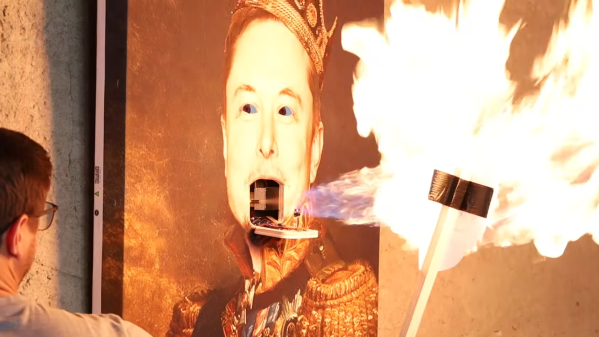
This one is straight out of the Really Bad Ideas™ files, and comes to us from [Marc Radinovic]. His story on this one is that he wants to protect the stuff in his new house, and felt that a face-recognition system with a flame thrower would be the best way to address that. And to somehow make it even better, said system would be built into a ridiculous portrait of everyone’s favorite plutocrat. The guts of the system are pretty much what you’d expect — a camera and a Raspberry Pi running OpenCV and a face recognition library, a butane reservoir and a solenoid valve, an arc lighter as an ignition source, and an Arduino and some completely not sketchy at all wiring to control all pieces. And LCD displays for [Elon]’s eyes, of course.

The system is trained to recognize [Marc]’s face and greets him cheerfully when he’s in view. [Non-Marc] people, however, are treated a bit less accommodatingly, up to and including a face-melting fireball. Effigies of other billionaires got the treatment; strangely, [Marc]’s face-recognition algorithm didn’t even recognize another [Mark] as a human face, which when you think about it is pretty darn funny.

So, certainly not a practical security system, and definitely not something you should build, but it’s pretty good fun anyway. It reminds us a bit of the fire-breathing duck we saw years ago.

Continue reading “Protect Your Property With This Fire-Breathing Billionaire”

an RGB LED display showing expected arrival times of trams and buses sitting on a table

A Private View Of A Public Transport Sign

[Stefan Schüller] was a fan of the LED signs that display arrival information for the trams and buses in their city of Zürich. [Stefan] was having trouble finding a source to purchase the signs so, instead, decided to build one himself.

[Stefan] decided to recreate the 56×208 single color 2mm dot pitch display with an 128 x 64 P2 RGB LED screen respecting the same 2 mm pitch. The display is driven by an ESP32 DMA RGB LED matrix shield utilizing a HUB75 RGB LED matrix library, all being powered from a 5 V 4 A power supply.

In addition to driving the LED matrix display, the ESP32 polls Zürich’s public transportation API and then parses the XML for the relevant information. Since [Stefan] wanted to match the fonts as closely as possible,
he created a new font from scratch, including the bus and accessibility icons. The new font was encoded into a glyph bitmap distribution format (BDF) that was then converted to work with Adafruit’s GFX library, with [Stefan] creating a custom conversion tool, called bdf2adafruit, to do the last leg of the conversion.

Since the LED matrix had full color capability, [Stefan] decided to add a little extra flourish and color code the transportation lines with the official tram colors. All source code is available on his GitHub repository for the project, for those looking for more detail.

We’ve featured DIY builds of public transportation feeds before. With the ubiquity of low cost RGB LED displays and public APIs, hopefully we’ll see many more!

Bringing Up An Old Motherboard Is A Delicate Process

If you were around for the early days of the personal computer revolution, you’ll no doubt recall the excitement every time IBM announced a new version of its beige boxes. For a lot of us, the excitement was purely vicarious, for despite the “personal” moniker, mere mortals could rarely afford a branded IBM machine. But it was still cool to keep track of the latest releases, and dream of the days when cheap clones would make it possible to play.

[Anders Nielsen]’s recent find of an original IBM Model 5160 motherboard sort of echoes that long-ago excitement, but in a different way. This board, from a PC XT built in 1984, was in unknown condition upon arrival, so [Anders] set about a careful process to try to bring the board back to life. A quick visual inspection leaves one with a sense of both how much things have changed, and how much they’ve stayed the same. Aside from the big 40-pin DIP 8088 CPU and the BIOS ROMs, the board is almost completely populated with discrete logic chips, but at the same time, the basic footprint of a motherboard has changed very little.

The bring-up process in the video below includes checks of all the power rails for shorts, which ended up being a good call — drat those tantalums. After fixing that issue, [Anders] had a bit of trouble getting the board to POST, and eventually resorted to dumping the BIOS ROMs and inspecting the contents. One of the chips had picked up a case of the scramblies at some point, which was easy enough to fix thanks to images of the 5160 ROMs available online. We thought the trick of using a 64k ROM and just writing the BIOS image twice was pretty clever.

In the end, the board came up, although without video or keyboard — that’s for another day. Can’t find your own PC XT motherboard to play with? Then maybe you can just build one.

Continue reading “Bringing Up An Old Motherboard Is A Delicate Process”

DIY Streamdeck Helps You Professionalize Your Twitch Show

The one thing that separates the pros on Twitch from the dilettantes is the production values. It’s all about the smooth transitions, and you’ll never catch the big names fiddling with dodgy software mid-stream. The key to achieving this is by having a streamdeck to help control your setup, like this straightforward design from [Electronoobs]. (Video, embedded below.)

The build relies on an Arduino Micro, which is a microcontroller board perfectly equipped to acting as a USB macro keyboard. It’s paired with a Nextion LCD touchscreen that displays buttons for various stream control features, like displaying a “Be Right Back” screen or cuing up video clips. The build also features bigger regular buttons for important quick-access features like muting a mic. It’s all wrapped up in a 3D printed housing, with some addressable RGB LEDs running off another Arduino to add some pizazz. The neat trick is that the build sends keycodes for F13-F24, which allows for the streamdeck’s hotkeys to avoid conflicting with any other software using conventional keyboard hotkeys.

It’s a useful tool that would be of use to anyone streaming on Twitch or other platforms. Alternatively, you could repurpose an old phone to do a similar job. Video after the break.

Continue reading “DIY Streamdeck Helps You Professionalize Your Twitch Show”

Bicycle Inner Tube Becomes Rugged Pencil Case

If you’re a cyclist that lives in an area with poorly-maintained infrastructure, you’ll likely have plenty of punctured inner tubes begging for reuse. Consider crafting them into a rugged, hard-wearing pencil case with this design from [Yorkshire Lass].

[Yorkshire Lass] does a great job of not only explaining the basic design of the pencil case, but also the unique techniques required to work with inner tubes in this manner. For best results, the tube must first be straightened by stretching it for some time along a flat board. Strips of the rubber must then be cut to suit, and then assembled into the pattern to make the pencil case. Sewing up the case also requires some special techniques outside those used in regular sewing. That’s largely down to the fact that rubber can’t be pinned in place without leaving a permanent hole in the material. Thankfully, the write-up explains all the traps for those new to sewing inner tubes, which we’d have to suspect is most of us.

Assembled properly, you’ll end up with a pencil case made of far tougher material than most. Plus, it makes a great fashion accessory to flaunt to other bicycle or recycling evangelists at your school, college, or workplace. Even better, there’s scope to run a group craft session with your local bike group given everyone surely has a few dud mountain bike tubes laying around.

We’ve seen some other neat hacks intended to store pens and pencils around the workshop. Meanwhile, if you’ve got your own great reuse ideas for old bicycle inner tubes, do drop us a line!

Welcome Back, Supercon!

The last two Novembers, Hackaday’s annual gathering was held in remote mode: Remoticon instead of Supercon. While still recovering from jetlag, I’m reflecting on the pros and cons of live versus virtual events. And wondering how we can combine the virtues of both for next year. Come brainstorm with me!

The blatantly obvious pros of having a live Supercon is the ease of talking to everyone who is there, trading code tips, life experience, and must-see projects. In person, you can physically trade badge add-ons in real time, without waiting for customs to clear the packages. Simply hanging out has a real charm to it, and doing so over shared tacos is even better. Spontaneous collaborations were easy and natural. And finally, while you can watch someone electrocute a twinkie with a neon sign transformer on YouTube, you can’t smell the ozone.

Against this, all of the expensive travel, the aforementioned jetlag for some, and the real-world limitations that only so many people can fit in a given physical space at once.

The best part of Remoticon was hearing from people who wouldn’t have been able to make it to an in-person con, whether it’s because it’s of geography or money. Since everything is online, there’s no missing out, and anyone can freely dip in to one talk or another. The online chat channels were better attended during Remoticon as well – perhaps because they were the only game in town – but that was a more global community.

There’s probably nothing that can be done about the tacos, but what could we do about incorporating the benefits of Remoticon? We did stream one stage live, and we had two chat channels open for commentary the whole time. If you took part remotely in Supercon, let us know how it went, and if you have any suggestions to improve our remote experience for next time. Because in the end, we want Hackaday to be as inclusive and as global as the hacker community itself.

Banner Photo by Poyu Chen.

A Muppet On A Tricycle

[Donald Bell] wanted to recreate the magic of seeing Kermit on a tricycle from a 2018 NY Maker Faire he attended, so he created his own take of a Muppet on a Radio Flyer kids tricycle bike.

The underside of the back axle of a red radio flyer tricycle with electronics for, two motors and a battery pack

He started by attaching a ready made puppet to a classic Radio Flyer dual deck toddler tricycle using zip ties and split pipe insulation to give the limbs stiffness. [Donald] then put all the electronics, including the 12 V 50 RPM DC motor, 24 V 22.4 Ah Li-Ion battery pack, TB67H420FTG motor driver, and the Arduino Uno microcontroller under the back axle.

The motor transfers power to one of the back wheels via pulleys and timing belts with an additional ASMC-04B 24 V servo used to steer the tricycle via a steel pushrod. The RC communication is done with a FlySky FS-GT2 2.4 GHz 2-channel system. [Donald] gives a detailed list of parts that he uses in a Google doc for anyone wanting to know more.

[Donald] goes into great length about the limitations of the build, including the low clearance of the electronics underneath, the finicky nature of the timing belts and the “uncanny valley” that the size of the puppet induces to a casual observer. Regardless, the build is exceptional and paves the way for a variety of improvements for anyone wanting to extend the idea either further into the creepy or cute domain.

Retrofitting vehicles with motorized control are a crowd favorite, as seen with some projects like a stroller controller from Maker Faires of the past.

Continue reading “A Muppet On A Tricycle”