Computer Space Flies Again

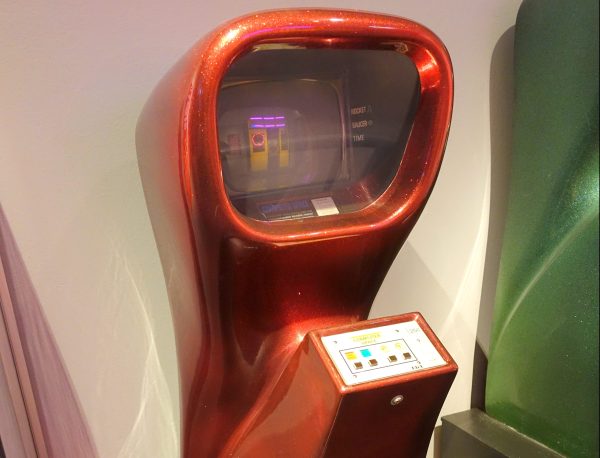
[Sean] from Classic Arcade Repairs fixes classic arcade machines, and he got a request to repair a very special machine. It’s Computer Space, the first commercial arcade cabinet ever made, and loosely based on Spacewar! This grand-daddy of coin-op was a literal barn find, and was in pretty bad shape after sitting for years. All the parts appeared to be original, making them 50 years old. As you can imagine, that combination didn’t bode well for the health of the components. There’s a couple hours of footage here, but it’s invaluable troubleshooting advice, and very cool to see such an old machine being worked on.

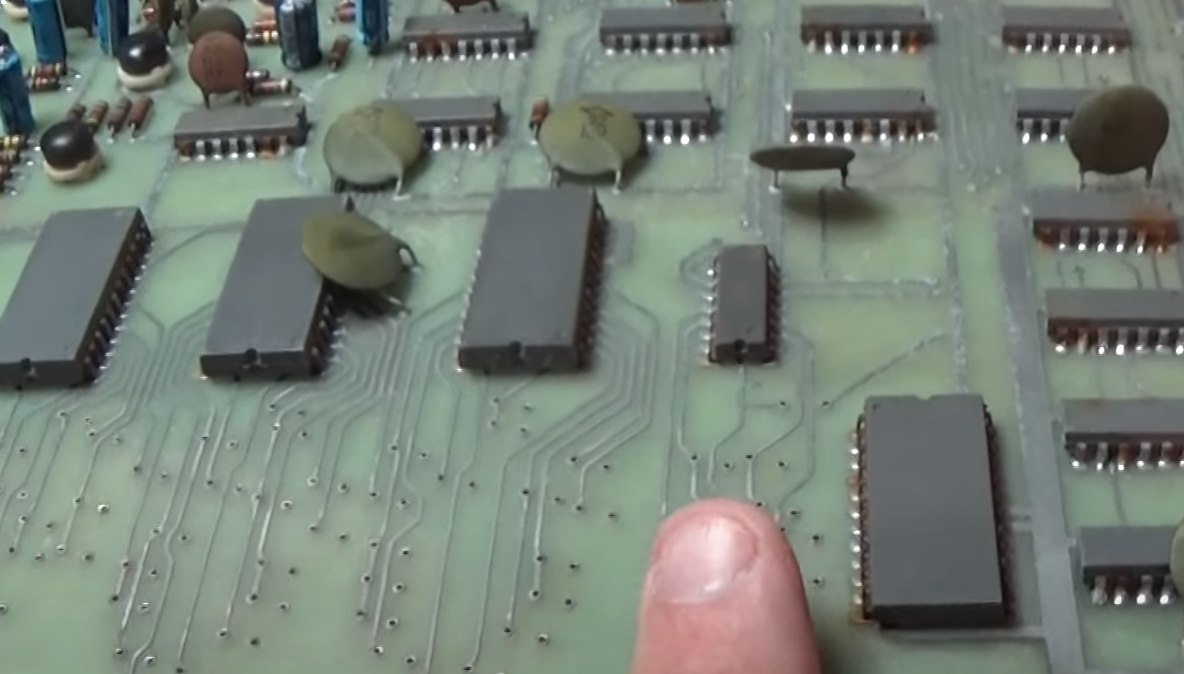
Part one is the intro, and [Sean] started with an HP logic analyzer, just probing the many TTL chips on the board looking for floating or otherwise suspicious outputs. Figure out the obviously faulty chips and replace each with a socket and new chip. Just about every diode in the machine needed replacing.

Part two of the repair starts with a broken trace repair, and the discovery that all the ceramic capacitors on the boards were leaky. The interesting thing is that a multimeter tested those caps as having the correct capacitance, but a dedicated leak tester discovered the problem.

Part 3 shows the process of running the remaining chips through a logic tester, which found more problematic ICs. In some cases, a chip would only sometimes test as working. And strangely, one of the new, replacement chips turned out to have a problem. Though as a commenter pointed out, it could be a falling edge vs rising edge variation of the logic chips to blame. Or maybe the new chips were counterfeit. Hard to nail down.

Part 4 starts with a gotcha moment, where one of the first repairs to the board was a misstep. What appeared to be a damaged trace, was actually a factory modification (a bodge cut?). Then a lucky break really helped out, where only half of one of the 7476 chips was in use, and one of the chips on hand was only half working. Put the dead bit into the unused slot, and the machine really started to behave.

Part 5 is the victory lap, where all the components finally arrived, and everything starts working on the bench. How cool to see the old machine bleeping and blooping again.

Dot-Painting Graffiti Machine Is Wonderfully Simple

Traditionally, when many of us think of graffiti, we think of artists spraying away with simple paint cans. However, there’s often a lot of tech and art that goes into the field these days. [Vitaly Tesh] built himself a impressive dot-painting spray rig that’s really rather nifty.

The dot maker performed ably in this piece by [Vitaly].
The build starts with [Vitaly] using a heated Stanley knife to cut away a propeller assembly from a small toy drone. He then fits a small plastic disc to the motor in place of the prop.  The disc has a cutout so that as it spins, it only allows paint to pass at certain times. The whole package bolts onto a regular spray can, so it can be used with any paint color or brand that’s desired.

The spray can paints individual dots on the wall at varying distances apart, thanks to the spinning disc. Varying the speed of the motor or the rate at which the can is moved relative to the wall changes the pitch of the dots. Importantly, [Vitaly] included a drip capture system so that paint that doesn’t pass out of the dot aperture doesn’t leak all over his hands or the wall, ruining the piece.

We’ve seen robots put to work painting murals on walls, too. Video after the break.

Continue reading “Dot-Painting Graffiti Machine Is Wonderfully Simple”

Upgrading A Line Trimmer With 3D Printed Parts

Many have complained about the hassle of rewinding their weed whackers with fresh trimmer line. Manufacturers responded by making models with solid plastic blades instead. Some of these suck, though, like this Ozito model belonging to [Random Sequence]. 3D printing was the way forward, adapting the blade trimmer to use traditional line.

The design is simple. [Random Sequence] created a small plastic tab which matches the attachment tab of the Ozito trimmer’s plastic blades. On the end of the tab, in lieu of a blade is a round slot into which a length of trimmer line can be inserted. The trick is to use a cigarette lighter to slightly melt a bulb onto a length of trimmer line so that it doesn’t pull through the slot. Centrifugal force (argue about it in the comments) keeps the line from falling out.

[Random Sequence] prints them in PETG, but notes that the part could benefit from additional strength. They do break when hitting tough objects, much like the stock trimmer blades do. Also, unlike a bump-feed trimmer head, there’s no way to auto-feed more line. Instead, one must simply assemble more of the tab-adapters with fresh line manually.

Overall, though, it’s a great way to fit stronger, more capable trimmer line to a weed whacker otherwise hamstrung by weak blades. It’s reported to work with Ozito and potentially Bosch tirmmers, and parts are on Thingiverse for those wishing to print their own.

Just as string trimmer line was once used as 3D printing filament, you can also go the other way, turning old plastic bottles into trimmer line. If you’ve whipped up your own fun hacks for tools in the garden, don’t hesitate to let us know.

Sound off with your best name for a weed whacker in the comments, too. The Australians may hold the title with “whipper snipper,” but we’re open to other submissions!

DIY equatorial mount

A DIY Equatorial Mount Using Harmonic Drives

As an amateur astrophotographer will tell you, you just don’t get to capture the really interesting objects without spending a ton of money on some decent pieces of kit. Telescope aside, there really is a surprising amount of complexity, weight, and associated costs with the telescope mount alone, let alone one that is capable of any sort of programmable tracking. [Alan (Jialiang) Zhao] clearly wanted to up their game, and having suffered some of the shortcomings of their Sky-Watcher HEQ-5 pro Equatorial mount decided to go ahead and build an open-source mount, Alkaid, which hopefully works a bit better for them.

In simple terms, the difficulty of photographing an extremely dim, distant object (or one that is larger but diffuse) is that the camera sensor needs to spend a significant amount of time signal-averaging, to gather enough lightSheet of parts freshly water cut from aluminium plate 
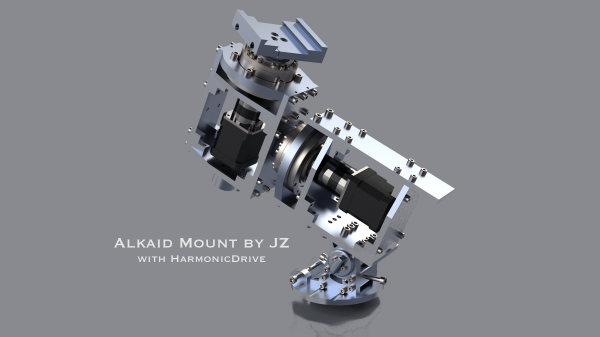
for anything to be seen at all, through the noise. But, this ball of rock we sit on is rotating constantly, so the only solution is to track the object of interest, to compensate. This is referred to as equatorial tracking, and allows the rotation of the Earth to be compensated for during a long exposure.

The design of each of the two axes revolves (sorry!) around the use of a NEMA-17 stepper motor with a 27:1 planetary gearbox, driving into a harmonic reducer gearbox. Harmonic drives (aka strain wave drives) are pretty neat, working on the principle of a fixed, but circularly distorting ring gear that transmits torque from the inside surface to the outside, with almost no backlash. They are expensive parts, but for a super smooth movement, this is what you want. The huge output torque they allow, meant that [Alan] was able to build a mount for a heavy telescope without any counterbalances. Structurally, the whole thing is constructed from 10 mm thick aluminium plates that were cut with a waterjet and subsequently milled to finish. Continue reading “A DIY Equatorial Mount Using Harmonic Drives”

Trigger Your Home Automation Routines With Home Buttons

Home automation systems are all well and good, so long as the person who built it all is around to drive it. Let’s face it, they’re quite often a complex web of interconnected systems, all tied to the specifics of one’s home — and someone less familiar with it all could get a little irritated if, on a chilly day, the interface to the boiler is via a Python script, and something won’t work. Just saying. Home Buttons by [Matej Planinšek] over on Hackaday.IO is a nicely polished project, which aims to take some of the hackiness out of such automation by providing a sleek front end to those automation routines, enabling anyone to rock on over and set one in action without hassle.

Internal PCB shown in the foreground, with the complete unit behind.The PCB is based around the ESP32-S2-mini which deals with WiFi connectivity and integration with Home Assistant using the usual MQTT protocol. We expect integration with other flavors of home automation would not be difficult to achieve. The center of the unit holds a simple E-Ink display, for that low-standby power. Specifically, the unit chosen is a Good Display GDEY029T94 2.9″ which this scribe can confirm is easy to interface and pretty cheap to purchase from the usual Chinese online vendors. This was matched up with six clicky Alps SKRB-series low-profile tact switches, which sit on either side of the display, and corresponds to a flexure-type affair on the 3D printed front casing. Neat and simple.

The PCB design was provided in Altium format, which you can find on the project GitHub page. This shows a straightforward design, with a few nice little details here and there. The internally mounted 18650 cell is reportedly good for at least a year of operation, but when time, it can be charged via USB. A Xysemi XB8608AF (PDF) protection chip provides appropriate limiting for the 18650 cell, shielding it from the perils of overcharging, discharging, and whatnot. Not that that is likely in this current setup. A Sensiron SHTC3 humidity and temperature sensor is also in there, hanging off the I2C bus, which makes sense for this application.

Home Automation hacks are plenty on these pages, like this scroll-wheel interface, for instance. If all this stuff is looking quite overbearingly complicated to get into, how about starting with a Pico W?

Building A Sinclair ZX81 In 2022 With All New Parts

As the supply of genuine retrocomputers dwindles and their prices skyrocket, enthusiasts are turning their eyes in other directions to satisfy their need for 8-bit pixelated goodness. Some take the emulation route, but others demand a solution that’s closer to the original hardware. Following the latter path, [iNimbleSloth] is answering the question as to whether it’s possible to build a Sinclair ZX81 from all-new parts in 2022.

The ZX81 was Sir Clive’s second Z80-based computer, and its low price made it an instant success which paved the way for the legendary ZX Spectrum. From here in 2022 the original Ferranti ULA chip that contained all the logic is unobtainable except by raiding another ’81, so he’s using a design that has the same functionality in 74 series logic. The PCB is the same size as the original, and he’s paired it with a keyboard PCB using tactile switches. The video below the break is the first of what is to be a series, and he will be looking at a readily available 3D printed ZX81 case and the re-manufactured membrane keyboard.

For those of us who first learned to code in its meager 1k of memory the ’81 will always be a special computer. Sure it had many faults, but simply having an affordable real computer at all in 1981 was special. To see one being made from scratch is special then, and it would be nice to think that a few other people might learn how a computer works the Sinclair way.

Continue reading “Building A Sinclair ZX81 In 2022 With All New Parts”

The Importance Of Physical Models: How Not To Shoot Yourself In The Foot Or Anywhere Else

We take shortcuts all the time with our physical models. We rarely consider that wire has any resistance, for example, or that batteries have a source impedance. That’s fine up until the point that it isn’t. Take the case of the Navy’s Grumman F11F Tiger aircraft. The supersonic aircraft was impressive, although it suffered from some fatal flaws. But it also has the distinction of being the first plane ever to shoot itself down.

So here’s the simple math. A plane traveling Mach 1 is moving about 1,200 km/h — the exact number depends on a few things like your altitude and the humidity. Let’s say about 333 m/s. Bullets from a 20 mm gun, on the other hand, move at more than 1000 m/second. So when the bullet leaves the plane it would take the plane over three seconds to catch up with it, by which time it has moved ever further away, right?

Continue reading “The Importance Of Physical Models: How Not To Shoot Yourself In The Foot Or Anywhere Else”