Counting Is For Sheep: Use A Light To Fall Asleep

How do you get to sleep at night? For some of us, it can be the most difficult thing we do all day. Worrying about falling asleep and letting other intrusive thoughts in night after night only compounds the problem, as less sleep leads to depression which (for us) leads to even less sleep. We lay there, trapped inside a vortex of churning thoughts, imprisoned in a mind that feels like it’s malfunctioning and half-wishing for a future where instructor-led meditation videos can be beamed to the insides of our eyelids. In the meantime, there is FADing, the Fall Asleep Device.

FADing takes its cues from a relaxation technique that uses light to focus your attention and control your breathing. The light’s intensity waxes and wanes on a schedule designed to get you down from the average eleven breaths per minute to a zen-like six breaths per minute. You surrender to the light, breathing in as it intensifies and breathing out as it fades. There are commercial products that bring this technique to the bedroom, but they aren’t cheap and don’t offer much control. Fail to fall asleep in the prescribed window and you’re back to square one with one more thing to think about: buyer’s remorse.

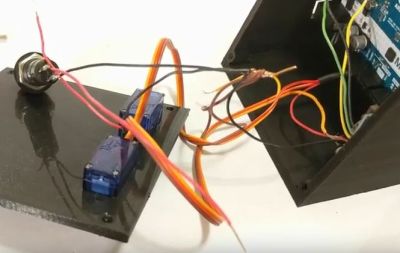
[Youz] was inspired by these devices but dissatisfied with the price tag and lack of options, so he created his own version with a flexible window of operation that appeals to both back- and side-sleepers. It uses an Arduino Nano and two momentaries to control two LEDs, a relay to hold the power after startup, a 9V, and a diode to protect the Nano. One LED projects on the ceiling, and the other radiates through a slice of acrylic which has been shaded blue. One button is for power, and the other lets you add time by two-minute increments. You can see the build video after the break and then tell us how you’d do it with a 555, a coin cell, and a chunk of uranium glass in the comments.

Once you can focus on your breathing without a light, reuse that Nano to measure the quality of all that sleep you’re getting.

Continue reading “Counting Is For Sheep: Use A Light To Fall Asleep”

An Indoor Garden? That’s Arduino-licious

Gardening is a rewarding endeavour, and easily automated for the maker with a green thumb. With simplicity at its focus,  Hackaday.io user [MEGA DAS] has whipped up a automated planter to provide the things plants crave: water, air, and light.

[MEGA DAS] is using a TE215 moisture sensor to keep an eye on how thirsty the plant may be, a DHT11 temperature and humidity sensor to check the airflow around the plant, and a BH1750FVI light sensor for its obvious purpose. To deliver on these needs, a 12V DC water pump and a small reservoir will keep things right as rain, a pair of 12V DC fans mimic a gentle breeze, and a row of white LEDs supplement natural light when required.

The custom board is an Arduino Nano platform, with an ESP01 to enable WiFi capacity and a Bluetooth module to monitor the plant’s status while at home or away. Voltage regulators, MOSFETs, resistors, capacitors, fuses — can’t be too careful — screw header connectors, and a few other assorted parts round out the circuit. The planter is made of laser cut pieces with plenty of space to mount the various components and hide away the rest. You can check out [MEGA DAS]’ tutorial video after the break!

Continue reading “An Indoor Garden? That’s Arduino-licious”

Giving Stranger Things For Christmas

[rudolph] was at a loss on what to get his niece for Christmas. It turns out she’s a huge fan of Stranger Things, so the answer was obvious: make her an alphabet wall she can control!

Downsizing the scale to fit inside a document frame, [rudolph] calls their gift rudLights, and a key parameter of this build was to make it able to display any phrases sent from their niece’s Amazon Fire tablet instead of constantly displaying hard-coded phrases. To do so, it has a HC-05 Bluetooth module to forward the commands to the NeoPixel LEDs running on a 5V DC power supply.

[rudolph] enlisted the help of their son to draw up the alphabet display — printed straight onto thematically decorative wallpaper — and cut out holes in the light bulbs for the LEDs.  Next up was cut some fibre board as a firm backing to mount the electronics inside the frame and drill holes for the NeoPixels. It was a small odyssey to cut and solder all the wires to the LEDs, but once done, [rudolph] divided their rudLight alphabet into three rows and added capacitors to receive power directly.

Continue reading “Giving Stranger Things For Christmas”

DIY Dungeon Crawler Game Plays On Single LED Strip

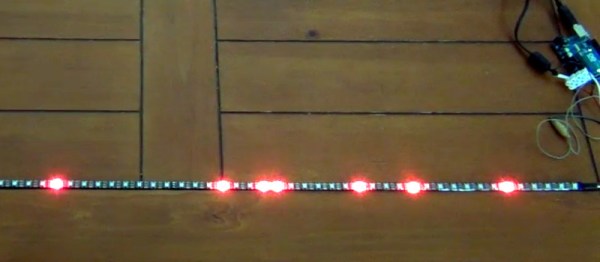
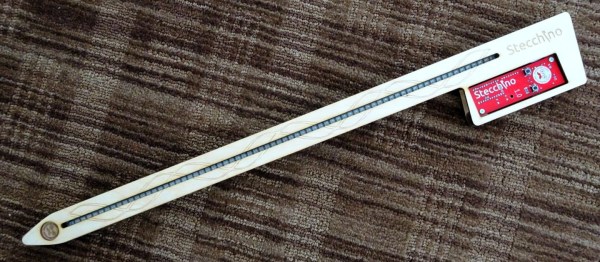
A delightful version of a clever one-dimensional game has been made by [Critters] which he calls TWANG! because the joystick is made from a spring doorstop with an accelerometer in the tip. The game itself is played out on an RGB LED strip. As a result, the game world, the player, goal, and enemies are all represented on a single line of LEDs.

How can a dungeon crawler game be represented in 1D, and how is this unusual game played? The goal is for the player (a green dot) to reach the goal (a blue dot) to advance to the next level. Making this more difficult are enemies (red dots) which move in different ways. The joystick is moved left or right to advance the player’s blue dot left or right, and the player can attack with a “twang” motion of the joystick, which eliminates nearby enemies. By playing with brightness and color, a surprising amount of gameplay can be jammed into a one-dimensional display!

Code for TWANG! is on github and models for 3D printing the physical pieces are on Thingiverse. The video (embedded below) focuses mainly on the development process, but does have the gameplay elements explained as well and demonstrates some slick animations and sharp feedback.

Continue reading “DIY Dungeon Crawler Game Plays On Single LED Strip”

Retro Flip Clock Gets A Retrofit

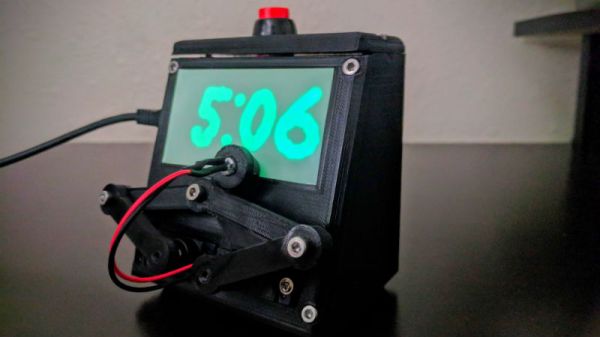
Retro tech is almost always ripe for the hacking — be it nostalgia, an educational teardown, or acknowledging and preserving the shoulders upon which we stand. Coming across an old West-German built flip clock, YouTuber [Aaron Christophel] retrofitted the device while retaining its original mechanical components!

No modern electronics are complete without LEDs of some kind, so he has included a strip in the base of the clock face for visibility and cool factor. He doesn’t speak to the state of the clock beforehand, but he was able to keep the moving bits of the clock working for its second shot at life.

Continue reading “Retro Flip Clock Gets A Retrofit”

Building A Better Kerbal Space Program Controller

If you have even the most passing interest in space and what it takes to get there, you’ve probably already played Kerbal Space Program (KSP). If you haven’t, then you should set aside about ten hours today to go check that out real quick. Don’t worry, Hackaday will still be here when you get back. Right now you need to focus on getting those rockets built and establishing a network of communication satellites so you can get out of low orbit.

For those of you who’ve played the game (or are joining us again after playing KSP for the prescribed 10, 12, 16 hours), you’ll know that the humble computer keyboard is not very well suited to jaunts through space. You really want a joystick and throttle at the absolute minimum for accurate maneuvers, but even you’ll be spending plenty of time back on the keyboard to operate the craft’s various systems. If you want the ultimate KSP control setup, you’ll need to follow in the footsteps of [Hugo Peeters] and build your own. Luckily for us, he’s written up an exceptionally well detailed guide on building KSP controllers that should prove useful even if you don’t want to clone his.

Wiring switches and buttons to the Arduino.

At the most basic level, building a KSP controller consists of hooking a bunch of switches and buttons to a microcontroller such as the Arduino or Teensy, and converting those to USB HID key presses that the game understands. This works fine up to a point, but is limited because it’s only a one-way method of communication. For his controller, [Hugo] forked KSPSerialIO, a plugin for KSP that allows bidirectional communication between the game and your controller, enabling things like digital readouts of speed and fuel levels on the controller’s panel.

Once the logistics of how you’ll talk to the game are settled, the rest is really up to the individual. The first step in building your own KSP controller is deciding what you want it to do. Are you looking to fly planes? Control a rover? Maybe you just want a master control panel for your space station. There’s a whole lot of things you can build in KSP, and the layout, inputs, and displays on your controller should ideally reflect your play style.

[Hugo] went with a fairly general purpose panel, but did spend quite a bit of extra time to get some slick LED bar graphs hooked up to display resource levels of different systems on his craft. That’s an extra step that isn’t strictly required for a build like this, but once you see it, you’re going to have a hard time not wanting to include it on your own panel. He also went through the expense of having the panel and case professionally laser cut and etched, which definitely gives it a polished feel.

We’ve covered quite a number of custom KSP controllers here at Hackaday. The overlap between KSP players and hackers seems unusually high, but of course a game that lets you build and fly contraptions of your own design does sound like something that would be right up our alley.

We Couldn’t Afford An Oculus, So We Built One

Like a lot of 16-year-olds, [Maxime Coutté] wanted an Oculus Rift. Unlike a lot of 16-year-olds, [Maxime] and friends [Gabriel] and [Jonas] built one themselves for about a hundred bucks and posted it on GitHub. We’ll admit that at 16 we weren’t throwing around words like quaternions and antiderivatives, so we were duly impressed.

Before you assume this is just a box to put a phone in like a Google Cardboard, take a look at the bill of materials: an Arduino Due, a 2K LCD screen, a Fresnel lens, and an accelerometer/gyro. The team notes that the screen is what will push the price unpredictably, but they got by for about a hundred euro. At the current exchange rate, if you add up all the parts, they went a little over $100, but they were still under $150 assuming you have a 3D printer to print the mechanical parts.

Continue reading “We Couldn’t Afford An Oculus, So We Built One”