SAMD11 Provides Two Serial Ports For Price Of One

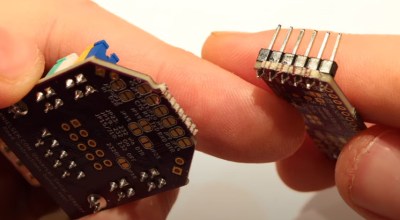
While the average computer user likely hasn’t given much thought to the lowly serial port in decades, the same can’t be said for the hardware hacker. Cheap serial-to-USB adapters are invaluable for snooping debug ports or programming chips, and if you ask us, you can never have too many laying around the bench. [Quentin Bolsée] loves them so much that he’s even figured out how to build a dual-port adapter with a SAMD11C14 microcontroller.

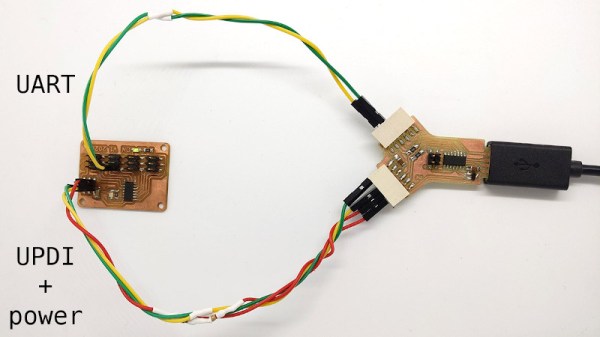
As [Quentin] explains in the write-up, this isn’t just some kind of Y-cable. When connected to the host computer, the adapter shows up as two distinct serial ports, each with independent settings for things like baud rate and parity. This handy little gadget will let you tap into the serial ports of two devices simultaneously if you’re looking to do some Hollywood-style hacking, but more practically, it allows you to establish a debug and programming interface to the same board using just one USB connection.

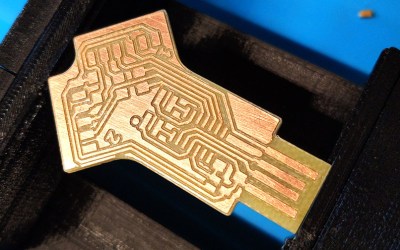
[Quentin] milled a custom PCB for his adapter, which we have to say looks phenomenal, but those with more limited equipment at home should be able to send the MIT licensed board files off for production. He’s also provided the source code for the SAMD11C14’s firmware, so you’ve got everything you need to spin up your own version of this neat tool.

Two ports not enough for your parallel hacking needs? Believe it or not, we’ve also seen a quad USB-to-serial adapter that you can put together, though it’s a considerably more complex circuit.

Arduino Compatible IR Blaster Keeps TVs At Bay

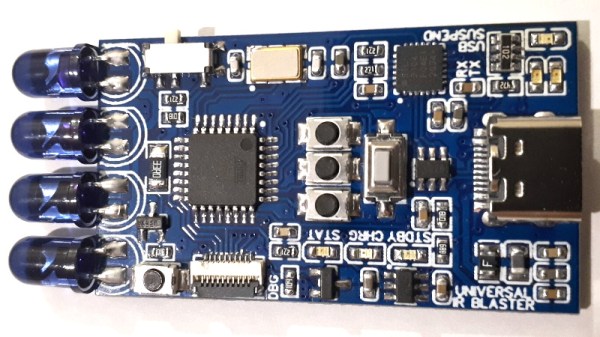
The TV-B-Gone is a well known piece of kit in hacker circles: just point it at a noisy TV in a public space, hit the button, and one of the hundreds of IR remote codes for “Power Off” that it blinks out in rapid succession is more than likely to get the intended response. Unfortunately, while a neat conversation starter, its practical use is limited to a single function. But not so with this programmable IR development board that creator [Djordje Mandic] describes as a “TV-B-Gone on steroids”.

Sure you can point it at a random TV and turn it off with a single button press, but you can also plug the board into your computer and control it directly through the serial connection provided by its CP2104 chip. Using a simple plain-text control protocol, the user can modify the behavior of the device and monitor its status. [Djordje] imagines this feature being used in conjunction with a smartphone application for covert applications. To that end, the device’s support for an onboard battery should keep it from draining the phone during extended operations.

Of course you could do something else entirely with it simply by firing up the Arduino IDE and writing some new code for the device’s ATmega328P microcontroller. As with the IR-enabled ESP8266 development board we looked at a few months ago, there are plenty of applications for an all-in-one board that allows you to communicate with the wide world of IR devices.

Continue reading “Arduino Compatible IR Blaster Keeps TVs At Bay”

Modified Yost Tames Pinout Plethora

Every hacker has an assortment of USB to TTL-serial adapters kicking around in their lab, and we have all been annoyed that each one has a different pinout. You layout a PCB or breadboard for the Sparkfun flavor (GND, CTS, VCC, TXD, RXD, DTR), but when you begin troubleshooting all you can find is a CH340 board (GND, +5V, TXD, RXD, DTR, +3.3V). You have to jumper everything, and it becomes a mess. It wasn’t much better back in the days of RS-232 level signaling, either. While the pinouts were consistent, there were other headaches. Did the connection need a NULL modem adaptor? And if you were unlucky, you might need a DB-25 to DE-9 adaptor, and the really unlucky might need one or more gender changers. Surely there’s a better way.

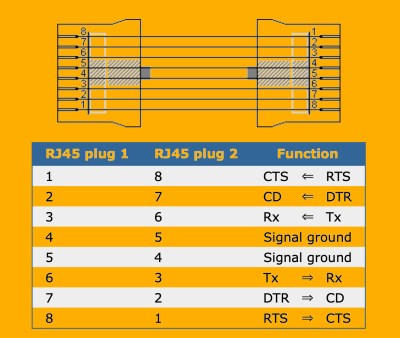
It turns out there was a better way, although it didn’t seem to have become as popular as one might expect. Back in 1987 [Dave Yost] formalized an interconnection scheme using RJ45 plugs and jacks while at Berkeley.  The signals were arranged in a mirrored fashion so that each cable is always a crossover — just plug two cables back-to-back if you really need a straight thru connection.

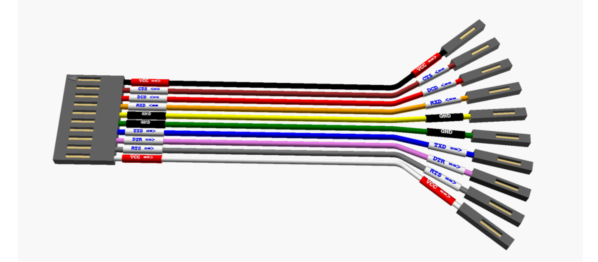
Even though he was dealing with RS-232 serial, nothing prevents us from using this scheme for logic level signaling. For example, consider the following 1×10 header pinout, where the original 8-pins are expanded to 10 to allow for power:

This is an extreme example, and can obviously be shrunk depending on how much handshaking, if any, or power is desired. Such a pinout lets you switch between DCE and DTE by simply flipping the connector around. And if a Dupont-style header slips off too easily in your applications, you could always use an RJ connector. This still doesn’t solve the Tower of Babel pinout problem with the USB-TTL adaptors. But standardizing on a serial pinout such as this for your projects and making cables or kludging your TTL adaptors will make serial debugging less painful.

Yost to Sparkfun Adaptor Cable

Back when he released this scheme in 1987, [Dave] pontificated:

“Maybe one day before the year 2,000, the world will have a new, simple, high-speed, flow-controlled, standard type of connection for point-to-point applications currently using RS-232, with an adaptor available to talk to old, RS-232 equipment.”

Let us know your thoughts in the comments below.

Turning The Raspberry Pi Into A MCU Programmer

Once you graduate beyond development boards like the Arduino or Wemos D1, you’ll find yourself in the market for a dedicated programmer. In most cases, your needs can be met with a cheap USB to serial adapter that’s not much bigger than a flash drive. The only downside is that you’ve got to manually wire it up to your microcontroller of choice.

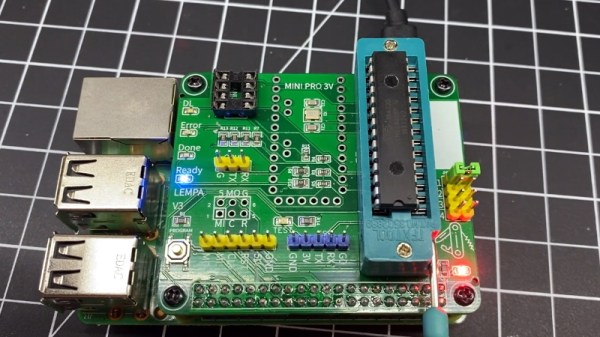
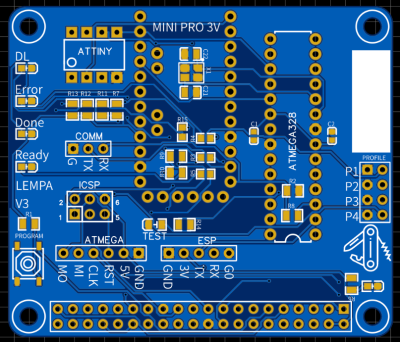
Unless you’re [Roey Benamotz], that is. He’s recently created the LEan Mean Programming mAchine (LEMPA), an add-on board for the Raspberry Pi that includes all the sockets, jumpers, and indicator LEDs you need to successfully flash a whole suite of popular MCUs. What’s more, he’s written a Python tool that handles all the nuances of getting the firmware written out.

After you’ve configured the JSON file with the information about your hardware targets and firmware files, they can easily be called up again by providing a user-defined ID name. This might seem overkill if you’re just burning the occasional hex, but if you’re doing small scale production and need to flash dozens of chips, you’ll quickly appreciate a little automation in your process.

Of course, if you’re just trying to flash some code in a pinch, there are some more expedient options out there. We’re particularly fond of using a development board to program the bare MCU.

Continue reading “Turning The Raspberry Pi Into A MCU Programmer”

Multiple 3D Printers, And One Pi To Rule Them All

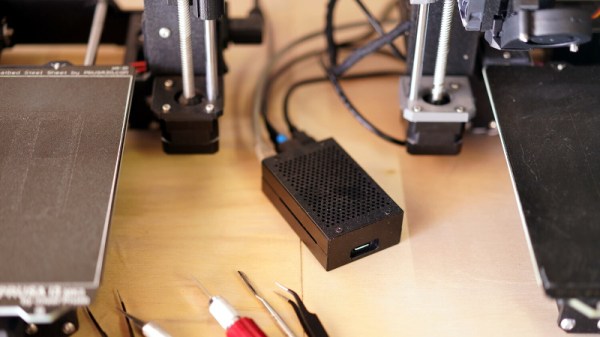
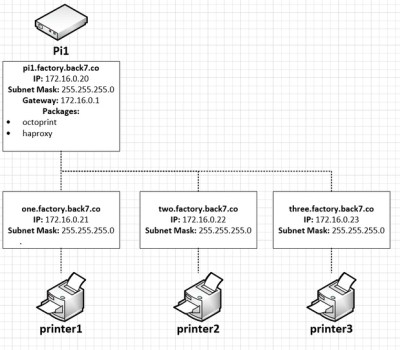
If you’ve got a desktop 3D printer, there’s an excellent chance you’ve heard of OctoPrint. This web front-end, usually running on a Raspberry Pi, allows you to monitor and control the printer over the network from any device that has a browser. But what if you’ve got two printers? Or 20? The logistics of each printer getting its own Pi can get uncomfortable in a hurry, which is why [Jay Doscher] has been working on a way to simplify things.

Leveraging the boosted processing power of the Raspberry Pi 4 and some good old fashioned Linux trickery, [Jay] is now controlling multiple printers from a single device. The trick is to run multiple instances of the OctoPrint backend and assign them to virtual network interfaces so they don’t interfere with each other. This takes some custom systemd unit files to get up and running on Raspbian, which he’s been kind enough to include them in the write-up.

But getting multiple copies of OctoPrint running on the Pi is only half the battle. There still needs to be a way to sort out which printer is which. Under normal circumstances, the printers would be assigned random virtual serial ports when the Pi booted. To prevent any confusion, [Jay] explains how you can use custom udev rules to make sure that each printer gets its own unique device node. Even if you aren’t trying to wrangle multiple 3D printers, this is a useful trick should you find yourself struggling to keep track of your USB gadgets.

If you’re wondering why [Jay] needs to have so many 3D printers going at the same time, we hear they’ve been keeping rather busy running off parts for commissioned copies of his popular projects. Something to consider the next time you’re wondering if there’s a way to make a happy buck out of this little hobby of ours, folks.

Hackaday Podcast 053: 1-Bit Computer Is A Family Affair, This Displays Is Actually Fabulous, And This Hoverboard Is A Drill Press

Hackaday editors Mike Szczys and Elliot Williams navigate the crowded streets of the hackersphere for the most interesting hardware projects seen in the past week. Forget flip-dot displays, you need to build yourself a sequin display that uses a robot finger and sequin-covered fabric to send a message. You can do a lot (and learn a lot) with a 1-bit computer called the WDR-1. It’s never been easier to turn a USB port into an embedded systems dev kit by using these FTDI and Bluepill tricks. And there’s a Soyuz hardware teardown you don’t want to miss.

Take a look at the links below if you want to follow along, and as always tell us what you think about this episode in the comments!

Take a look at the links below if you want to follow along, and as always, tell us what you think about this episode in the comments!

Direct download (60 MB or so.)

Continue reading “Hackaday Podcast 053: 1-Bit Computer Is A Family Affair, This Displays Is Actually Fabulous, And This Hoverboard Is A Drill Press”

Debugging With Serial Print At 5333333 Baud

Debugging with printf is something [StorePeter] has always found super handy, and as a result he’s always been interested in tweaking the process for improvements. This kind of debugging usually has microcontrollers sending messages over a serial port, but in embedded development there isn’t always a hardware UART, or it might already be in use. His preferred method of avoiding those problems is to use a USB to Serial adapter and bit-bang the serial on the microcontroller side. It was during this process that it occurred to [StorePeter] that there was a lot of streamlining he could be doing, and thanks to serial terminal programs that support arbitrary baud rates, he’s reliably sending debug messages over serial at 5.3 Mbit/sec, or 5333333 Baud. His code is available for download from his site, and works perfectly in the Arduino IDE.

The whole thing consists of some simple, easily ported code to implement a bare minimum bit-banged serial communication. This is output only, no feedback, and timing consists of just sending bits as quickly as the CPU can handle, leaving it up to the USB Serial adapter and rest of the world to handle whatever that speed turns out to be. On a 16 MHz AVR, transmitting one bit can be done in three instructions, which comes out to about 5333333 baud or roughly 5.3 Mbit/sec. Set a terminal program to 5333333 baud, and you can get a “Hello world” in about 20 microseconds compared to 1 millisecond at 115200 baud.

He’s got additional tips on using serial print debugging as a process, and he’s done a followup where he stress-tests the reliability of a 5.3 MBit/sec serial stream from an ATMega2560 at 16 MHz in his 3D printer, and found no missed packets. That certainly covers using printf as a debugger, so how about a method of using the debugger as printf?