Pipe In (Robot) Hand

How do you make a robot hand? If you are [Robimek], you start with some plastic spiral tubing, some servo motors, and some fishing line. Oh, and you also need an old glove.

The spiral tubing (or pipe, if you prefer) is cut in a hand-like shape and fused together with adhesive. The knuckle joints are cut out to allow the tubing to flex at that point. The fishing line connects the fingertips to the servo motors.

The project uses an Arduino to drive the servos, although you could do the job with any microcontroller. Winding up the fishing line contracts the associated finger. Reeling it out lets the springy plastic pipe pull back to its original position.The glove covers the pipes and adds a realistic look to the hand.
Continue reading “Pipe In (Robot) Hand”

An Affordable Panasonic Grid-EYE Thermal Imaging Camera

Thermal imaging cameras are objects of desire for hackers and makers everywhere, but sadly for us they can be rather expensive. When your sensor costs more than a laptop it puts a brake on hacking.

Thankfully help is at hand, in the form of an affordable evaluation board for the Panasonic Grid-EYE thermal imaging camera sensor. This sensor has sparked the interest of the Hackaday community before, featuring in a project that made the 2014 Hackaday Prize semifinals, but has proved extremely difficult to obtain.

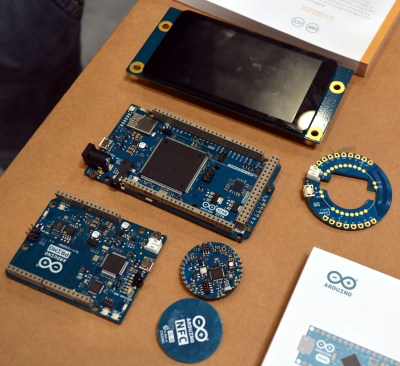
All that has now changed though with this board. It features the Grid-EYE sensor itself, an Atmel ATSAM-D21G18A microcontroller, and onboard Bluetooth, but has an interesting feature that, as well as being a standalone device, can be used as an Arduino shield. A full range of APIs are provided, and the code is BSD licensed.

This module is not the highest-spec thermal imaging camera on the market by any means, after all it has a resolution of only 64 pixels in an 8×8 grid. But its affordability and easy availability should trigger a fresh crop of thermal camera projects in our community, and we applaud that.

Thermal camera projects have featured quite a few times here on Hackaday. Some have been based on the FLIR Lepton module, like this one that combines its image with a 640×480 visible camera and another that claims to be one of the smallest thermal cameras, while others have harnessed raw ingenuity to create a thermal camera without a sensor array. This pan-and tilt design for example, or this ingenious use of light painting. Please, keep them coming!

[via oomlout]

Homebrew Multimode Digital Voice Modem

There’s an old saying that the nice thing about standards is there are so many of them. For digital voice modes, hams have choices of D-Star, DMR, System Fusion, and others. An open source project, the Multimode Digital Voice Modem (MMDVM), allows you to use multiple modes with one set of hardware.

There are some kits available, but [flo_0_] couldn’t wait for his order to arrive. So he built his own version without using a PCB. Since it is a relatively complex circuit for perf board, [flo_0_] used Blackboard to plan the build before heating up a soldering iron. You can see the MMDVM in action below.

Continue reading “Homebrew Multimode Digital Voice Modem”

The Infrared Theremin

The traditional theremin is more or less an audio oscillator with two metal rods. Using proximity sensing, one rod controls the pitch of the oscillator and the other controls the volume. [Teodor Costachiou] apparently asked himself the excellent question: Why does the proximity sensor have to use capacitance? The result is an Arduino-based theremin that uses IR sensors to determine hand position.

[Teodor] used a particular type of Arduino–the Flip and Click–because he wanted to use Click boards for the IR sensors and also to generate sound via an MP3 board based around a VS1053. The trick is that the VS1053 has a realtime MIDI mode, and that’s how this Theremin makes it tones.

Continue reading “The Infrared Theremin”

R2-D2 Keeps This University Bathroom Smelling Fresh

For a fun university project, [Cengizhan Can] and friends decided to make an automated air freshener for one of their bathrooms at the Utrecht University in the Netherlands. Happening to have an old R2-D2 plastic candy jar, they decided to try to see if they could make it Star Wars themed.

They loaded up the R2-D2 shell with an Arduino, a ton of sensors (don’t worry, nothing for spying) and an actuator for triggering the air freshener. During normal operation the LCD will display ambient temperature information and the approximate number of air freshener shots remaining in the canister. An external door sensor checks to see if the stall is open, and coupled with a light sensor, only sprays freshener after use, and when no one is in the stall anymore.
Continue reading “R2-D2 Keeps This University Bathroom Smelling Fresh”

Third Person Driving IRL

It’s a dream come true: remote control of a real car. Besides being a lot of fun, a life-size RC vehicle has some practical applications, like performing rescue operations or delivering supplies to dangerous areas. For [Carter], [Dave], [Ryan], and [Sean], the dream became reality in the span of 24 caffeine-and-chicken-finger-fueled hours during an Ohio State University hackathon. They dubbed the system MagiKarpet because it sits in place of the floor mat and runs on pixies.

The plan was to control the throttle, brake, and steering of a Chevy Cobalt using a PlayStation controller. For added fun, a camera mounted high above the back bumper would provide a third-person view, and this feed would be displayed on a monitor in the backseat. Everything is controlled by an Arduino Mega. A beefy linear actuator works the brake and is attached temporarily with a band of Shapelock that slips around the pedal. The throttle is pushed by a lever attached to a car window motor. Another motor connects to the steering wheel with cables that can turn it 90° left and right. Although the build was successful, they ran into a couple of issues. But what’s a hackathon experience without a few problems?

The linear actuator was jammed for about an hour after some early testing, but they got it unstuck. The PS controller was borked, so they had to roll their own joysticks. The school wouldn’t let them actually drive it around because of safety (killjoys but we get it), so they put it up on a jack to demonstrate it for the judges. They took second place, though we can’t imagine what would have beat this. Check out the complete build video after the break.

You might remember these guys from last year around this time. They took first place at the same hackathon with Robottermilk Puncakes, a app-controlled pancake machine. Now that you’re hungry for pancakes, feast your eyes on this endless one.

Continue reading “Third Person Driving IRL”

Testing DRAM, One Byte At A Time

A few weekends ago, [Chris] was in the mood for some retrogaming. That meant digging out the old Apple IIgs equipped with a monstrous RAM card with a whole three megabytes of RAM. This particular Apple IIgs had intermittent issues for a long time, and [Chris] was beginning to suspect the RAM was the culprit. Testing this required testing a few dozen individual RAM chips, so why not build something with an Arduino to make [Chris]’ life easier?

The chips found in [Chris]’ Apple are standard 1 M x 1 DRAM chips, the standard for late-80s computers. To test these chips on an Arduino, he picked up a beautiful ZIF socket, wired up the chip to an Arduino shield, and began the joyous process of figuring out how to interface DRAM to an Arduino.

Unlike static memories, DRAM needs to be refreshed periodically to recharge the capacitors. While this refresh cycle was the bane of designers and engineers throughout time, [Chris] actually doesn’t need to care about refreshing the DRAM. He’s just writing 1024 rows to the memory and reading it straight out – no need to refresh the memory. The trick comes from the multiplexed address bus. For his project, [Chris] needs to write 10 bits of the address, latch it, then write the other half of the address bits.

The DRAM tester was a success, and [Chris] put all the code and schematics up on GitHub. Solving the mystery of the broken Apple IIgs wasn’t as simple, as [Chris] thinks the problem might be in one of the support chips on the gigantic RAM card or the IIgs motherboard. Still, it’s a neat, quick build to test out a few DRAM chips.