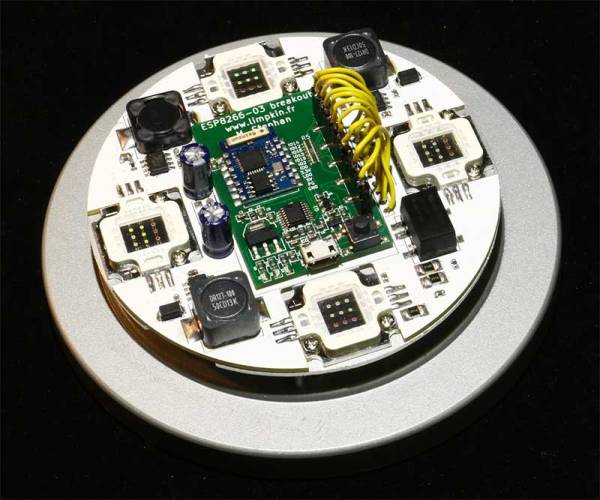
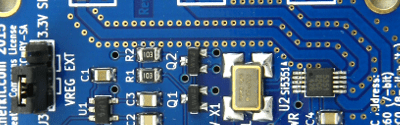
Bread Online

Bread Online Is A Bread Maker For The Internet Of Things

An engineering student at the University of Western Macedonia has just added another appliance to the ever-growing list of Internet enabled things. [Panagiotis] decided to modify an off-the-shelf bread maker to enable remote control via the Internet.

[Panagiotis] had to remove pretty much all of the original control circuitry for this device. The original controller was replaced with an Arduino Uno R3 and an Ethernet shield. The temperature sensor also needed to be replaced, since [Panagiotis] could not find any official documentation describing the specifications of the original. Luckily, the heating element and mixer motor were able to be re-used.

A few holes were drilled into the case to make room for the Ethernet connector as well as a USB connector. Two relays were used to allow the Arduino to switch the heating element and mixer motor on and off. The front panel of the bread maker came with a simple LCD screen and a few control buttons. Rather than let those go to waste, they were also wired into the Arduino.

The Arduino bread maker can be controlled via a web site that runs on a separate server. The website is coded with PHP and runs on Apache. It has a simple interface that allows the user to specify several settings including how much bread is being cooked as well as the desired darkness of the bread. The user can then schedule the bread maker to start. Bread Online also comes with an “offline” mode so that it can be used locally without the need for a computer or web browser. Be sure to check out the video demonstration below. Continue reading “Bread Online Is A Bread Maker For The Internet Of Things”

Hackaday’s Interview With Arduino CEO [Massimo Banzi]

I caught up with [Massimo Banzi] at the Shenzhen Maker Faire to talk about manufacturing in China, the current and future of Arduino, and how recent events may shape the Open Hardware landscape.

The big news from Arduino at SZMF is a new partnership with Seeed Studio to manufacture theGenuino. This is an official Arduino board manufactured in China for the Chinese market. Knowing that the board is official and connected to the founders is key point to get makers to adopt this hardware. [Massimo] makes a good point about the ideal of “Proudly Made in China” which I could see as a selling point for the burgeoning maker market there. This may be a growing principle in China, but in an ocean of clone boards it sounds like a tough path forward. On the other hand, their booth was mobbed with people putting in new orders.

[Massimo] belives the current Arduino strife has actually served to move the project forward. He cites the schism between arduino.cc and arduino.org for catalyzing manufacturing partnerships with both Adafruit Industries and Seeed Studios. This has resulted in official Arduino hardware that is not made only in Italy, but made in the region the hardware will be used; NYC for US orders, Shenzhen for China orders.

Our discussion wraps up with a plea from [Massimo] for the Hackaday community to be a little less fickle about projects using Arduino. That one makes me chuckle a bit!

Restoring An Espresso Machine To The 21st Century

[Rhys Goodwin] has a wonderful Italian espresso machine, a Brasilia ‘Lady’. But the electronics in it are a bit outdated. So he decided to give the entire thing an overhaul, while keeping it as original as possible!

As far as espresso machines go, this model is pretty simple. It uses a 300mL brass boiler with a 3-position solenoid valve. The thermostat is one of those simple bimetallic button thermostats which sadly, aren’t even that accurate — you couldn’t build a simpler machine, there’s not even a microcontroller in it. [Rhys] had his work cut out for him.

Arduino. PID controller. LCD display. New custom machined components, including a polished aluminum face plate for the LCD! He didn’t skimp out on this restoration. He even designed his own custom PCB to house the Arduino and provide the outputs for his new electronics, impressive!

Continue reading “Restoring An Espresso Machine To The 21st Century”

Stenography (Yes, With Arduinos)

What’s the fastest keyboard? Few subjects are as divisive in the geek community. Clicky or squishy? QWERTY or Dvorak? Old-school IBM or Microsoft Natural? The answer: none of the above.

danger-court-reporter-tyingThe fastest normal-keyboard typists (Dvorak or Qwerty) can get around 220 words per minute (wpm) in bursts. That sounds fast, and it’s a lot faster than we type, but that’s still below the minimum speed allowable for certified court reporters or closed captioners. The fastest court reporters clock in around 350 to 375 wpm for testimony. But they do this by cheating — using a stenotype machine. We’ll talk more about stenography in a minute, but first a hack.

The Hack

[Kevin Nygaard] bought a used Stentura 200 stenotype machine off Ebay and it wasn’t working right, so naturally he opened it up to see if he could fix it. A normal stenotype operates stand-alone and prints out on paper tape, but many can also be connected to an external computer. [Kevin]’s machine had a serial output board installed, but it wasn’t outputting serial, so naturally he opened it up to see if he could fix it. In the end, he bypassed the serial output by soldering on an Arduino and writing a few lines of code.

shot0001The serial interface board in [Kevin]’s machine was basically a set of switches that made contact with the keys as they get pressed, and a few shift registers to read the state of these switches out over a serial connection. [Kevin] tapped into this line, read the switch state out into his Arduino, and then transmitted the correct characters to his computer via the Arduino’s serial over USB. (Video demo) As hardware types like to say, the rest is a simple matter of software.

Continue reading “Stenography (Yes, With Arduinos)”

Arduinos (and Other AVRs) Write To Own Flash

In this post on the Arduino.cc forums and this blog post, [Majek] announced that he had fooled the AVR microcontroller inside and Arduino into writing user data into its own flash memory during runtime. Wow!

[Majek] has pulled off a very neat hack here. Normally, an AVR microcontroller can’t write to its own flash memory except when it’s in bootloader mode, and you’re stuck using EEPROM when you want to save non-volatile data. But EEPROM is scarce, relative to flash.

Now, under normal circumstances, writing into the flash program memory can get you into trouble. Indeed, the AVR has protections to prevent code that’s not hosted in the bootloader memory block from writing to flash. But of course, the bootloader has to be able to program the chip, so there’s got to be a way in.

The trick is that [Majek] has carefully modified the Arduino’s Optiboot bootloader so that it exposes a flash-write (SPM) command at a known location, so that he can then use this function from outside the bootloader. The AVR doesn’t prevent the SPM from proceeding, because it’s being called from within the bootloader memory, and all is well.

The modified version of the Optiboot bootloader is available on [Majek]’s Github.  If you want to see how he did it, here are the diffs. A particularly nice touch is that this is all wrapped up in easy-to-write code with a working demo. So next time you’ve filled up the EEPROM, you can reach for this hack and log your data into flash program memory.

Thanks [Koepel] for the tip!

Vibrating Distance Torch Illuminates The Dark Without Light

If you’ve ever had to move around in a dark room before, you know how frustrating it can be. This is especially true if you are in an unfamiliar place. [Brian] has attempted to help solve this problem by building a vibrating distance sensor that is intuitive to use.

The main circuit is rather simple. An Arduino is hooked up to both an ultrasonic distance sensor and a vibrating motor. The distance sensor uses sound to determine the distance of an object by calculating how long it takes for an emitted sound to return to the sensor. The sensor uses sounds that are above the range of human hearing, so no one in the vicinity will hear it. The Arduino then vibrates a motor quickly if the object is very close, or slowly if it is far away. The whole circuit is powered by a 9V battery.

The real trick to this project is that the entire thing is housed inside of an old flashlight. [Brian] used OpenSCAD to design a custom plastic mount. This mount replaces the flashlight lens and allows the ultrasonic sensor to be secured to the front of the flashlight. The flashlight housing makes the device very intuitive to use. You simply point the flashlight in front of you and press the button. Instead of shining a bright light, the flashlight vibrates to let you know if the way ahead is clear. This way the user can more easily navigate around in the dark without the risk of being seen or waking up people in the area.

This reminds us of project Tacit, which used two of these ultrasonic sensors mounted on a fingerless glove.

circuit board

Hackaday Prize Entry: Saving Water With The Vinduino

[Reinier van der Lee] owns a vineyard in southern California – a state that is in a bit of a water crisis. [Reinier van der Lee] also owns an arduino and a soldering iron. He put together a project the reduces his water usage by 25%, and has moved it to open source land. It’s called the Vinduino.

water animationIts operation is straight forward. You put a water sensor in the dirt. You turn on the water. When the water hits the sensor, you turn the water off. This was not, however, the most efficient method. The problem is by the time the sensor goes off, the soil is saturated to the point that the plant cannot take it all up, and water is wasted.

The problem was solved by using three sensors. The lowest most sensor is placed below the roots. So it should never go off. If it does, the plant is not taking in all the water, and you can reduce the output. The two sensors above it monitor the water as it transitions through the soil, so it knows when to decrease the water amount and watering cycle times.

Be sure to check out the project details. All code and build files are available on his github under the GNU General Public License 3.0


The 2015 Hackaday Prize is sponsored by: