Tell Time And Blink An LED On Your Wrist With WatchDuino

Watchduino Open Source Watch

Is your hipster wrist having a hard time waiting for the debut of the iWatch? There’s a new open hardware/software project out that could help calm your nerves. The WatchDuino is exactly what it sounds like, an Arduino-based wrist watch.

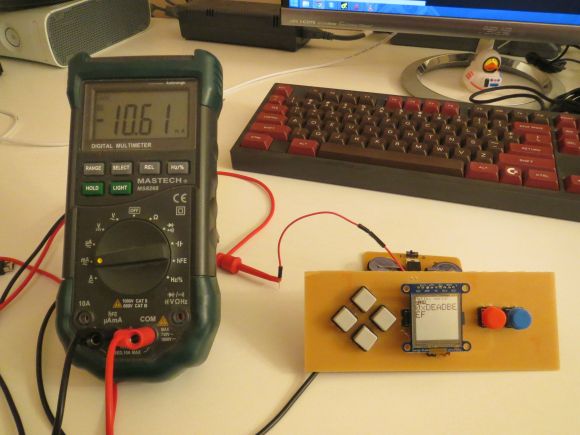
The component list is short and inexpensive. The meat and potatoes consist of an ATMega328, crystal, Nokia LCD screen and LiPo battery. The USB-rechargeable battery lasts about a week before needing to be such. Besides presenting the Time and Date in both analog or digital formats (as you would expect) there is an alarm and timer. Additionally, there are 2 games, Pong and Snake. Any lack of features is made up for the fact that the software is open and can be modified and added to by the community. We’re sure the development of this watch will be quick and significant.

Continue reading “Tell Time And Blink An LED On Your Wrist With WatchDuino”

Bacon Alarm Clock Won’t Burn Your House Down

Bacon Alarm Clock

If you have trouble waking up in the morning then maybe this alarm clock is for you. A bacon-aroma-releasing alarm clock!

Fueled by her love of bacon, Instructable’s user [llopez2005] decided she wanted to try making an alarm clock that would actually get her out of bed, hungry, and ready for bacon. Instead of trying to design a clock that would actually cook bacon — which might be a bit dangerous — she’s found an extract of bacon aroma which she could slowly release instead.

The clock makes use of an Arduino Uno with a RTC shield as well as a LED array for the clock’s display. The “bacon” is actually made out of bake-able clay, which sits on top of unscented wax, infused with the bacon aroma oil. The bacon and “bacon grease” sit in a baby frying pan over top of a small heater element designed for warming candles. Before the alarm goes off, a SSR turns on the element which slowly melts some of the wax, releasing its ever so delicious scent.

What we really like about the clock is the level of detail she put into its appearance. The base is designed after a small wood burning stove they have in the house, and she’s even made a Plexiglas display case for the frying pan — with holes to let the aroma out though of course!

Go On A Power Trip With Powerduino

powerduinoThings don’t always run the way we want them to or operate at the ideal temperature out of the box. Instead of spending extra for power controls that may or may not meet your needs, wouldn’t it make more sense to dial in the ideal level from the source? That’s what [dekuNukem] had in mind when he decided to make Powerduino, an arduino-compatible programmable power strip.

With Powerduino, [dekuNukem] can control the electrical consumption of all kinds of things without ever worrying about the irreversible deadliness of mains voltage. It actually uses a Teensy 3.1 which can be programmed with the Arduino IDE through the micro USB connector. He’s really tricked it out to the point of putting Kill A Watt meters to shame. A wi-fi module lets him control any of the outlets from anywhere, and the RTC module lets him make customized schedules for them. Powerduino has an SD card slot for logging energy consumption, and a 20 x 4 LCD screen makes it easy to directly interface with the power strip.

The Powerduino code is up on GitHub, and [dekuNukem]’s walkthrough video is after the jump.

Continue reading “Go On A Power Trip With Powerduino”

Reading Paper Tapes From Scratch!

Home made tape reader

Feeling a little nostalgic? Dying to read some paper ticker tapes? You can do it manually, but that’d take forever! [NeXT] decided to make a little PCB to help him out.

Having searched for paper tape readers for years, and even getting halfway through building the mechanical portion of it in his high-school tech class, [NeXT] decided to take a serious stab at it — and by golly, it works!

The reason he finally decided to go down this route is because you just can’t buy them (well, for cheap), and even the DIY or hobby ones out there are notoriously slow — what better reason to design it from scratch?

Continue reading “Reading Paper Tapes From Scratch!”

The Zorkduino

zork

Zork, the famous Infocom text-based adventure game, is actually quite the technical achievement in software engineering. It’s an amazingly large world to explore, albeit in text form only, running on an interpreter that allows paging, loading, and saving the complete state. All this, built to run on computers with meager amounts of RAM in the late 70s. You might think it would be easy to play Zork on an Arduino, but as [rossum] found out, that’s easier said than done (alternate blog link)

While most computers that were capable of running Zork had at least 8k of RAM, if not more, the ATMega328 in the Arduino only has 2k of RAM. Those fancy home computers of yore also had built-in video, a keyboard, and most of the time, a disk drive. The Arduino has none of that.

[Rossum] faced this challenge head on, capitalizing on the onboard hardware of the Arduino. Video is generated by using SPI mode on a UART at top speed – 8 MHz. This just shifts out pixels from the video buffer on an SD card. The keyboard is handled like any other PS/2 keyboard project on the Arduino, and audio is generated by toggling a pin at 1000Hz for a keypress, and 3600Hz for SD card access.

The finished product includes a bunch of other Infocom games on the SD card, including Leather Goddesses of Phobos, and the ability to run Hitchhiker’s Guide to the Galaxy, the game regarded by many as being better than the book. Video below.

Continue reading “The Zorkduino”

UMotio: An Arduino Compatible 3D Gesture Controller

uMotio

The Mooltipass project USB code contributor [Tom] and his friend [Ignatius] recently launched their Indiegogo campaign: meet the 3D gesture controller uMotio (Indiegogo link). As [Tom] has been spending much of his personal time helping the Mooltipass community, we figured that a nice way to thank him would be to try making their great open project one step closer to a disseminated product.

As you can see in the video embedded after the break, the uMotio is a plug and play system (detected as a USB HID joystick & keyboard with a CDC port) that can be used in many different scenarios: gaming, computer control, domotics, music, etc… The platform is based around an ATMega32u4 and the much discussed MGC3130 3D tracking and gesture controller. This allows a 0 to 15cm detection range with a resolution of up to 150dpi. uMotio is Arduino compatible so adapting it to your particular project can be done in no time especially using its dedicated expansion header and libraries. The uMotio blue even integrates an internal Li-ion battery and a Bluetooth Low Energy module.

Continue reading “UMotio: An Arduino Compatible 3D Gesture Controller”

Arduino Electronic Load

A Simple Programmable Electronic Load Using The Arduino

Some projects are both educational and useful. We believe that [Jasper’s] Arduino based electronic load is one of those project.

[Jasper’s] electronic load can not only act as a constant current load, but also as a constant power and constant resistive load as well. The versatile device has been designed for up to 30V, 5A, and 15W. It was based on a constant current source that is controlled by a DAC hooked up to the Arduino. By measuring both the resulting voltage and current of the load, the system can dynamically adapt to achieve constancy. While we have seen other Arduino based constant loads before, [Jasper’s] is very simple and straight forward compartively. [Jasper] also includes both the schematic and Arduino code, making it very easy to reproduce.

There are tons of uses for a voltage controlled current source, and this project is a great way to get started with building one. It is an especially great project for putting together your knowledge of MOSFET theory and opamp theory!