A team of mechanical and electrical engineering students at Olin College came up with a very fun semester project — a pneumatic powered marshmallow cannon that can track faces, and aim for the mouth!
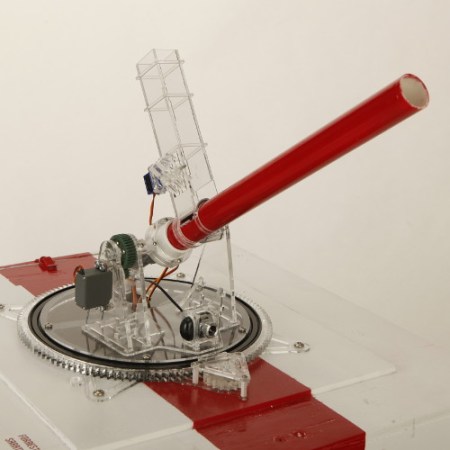
The device — dubbed the Confectionery Canon — is an impressive mechanical build which required many of Olin College’s manufacturing resources such as the laser cutter, the mill, and the lathe. The majority of the device was made out of acrylic, which was chosen for easy laser cutting, and affordability. Specific aluminum pieces provide strength and were made using mostly scrap found in the shop.
Four servos, a webcam, a solenoid and an Arduino Uno make up the electrical system, which uses Python and OpenCV to track faces (GitHub). A PVC tank is used as the pneumatic reservoir, charged with a safety release valve at 30PSI. To fire the cannon, a sprinkler valve is controlled by a beefy solenoid. It currently only has a magazine capacity of 4 large marshmallows, but the team is planning on upgrading soon.
They have put together a great website with tons of information on the project, and following the break is a fun promo video they made for the project — they even got the VP of the college to try it!