Battery Analyzer Puts Alkaline Cells To The Test

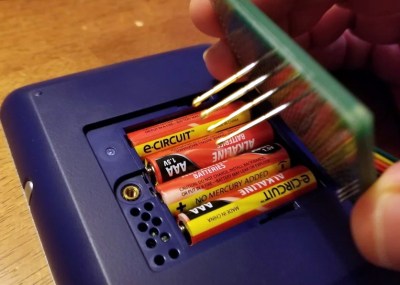
We know, we know. Generally speaking, you should try and switch your household devices over to rechargeable cells rather than using disposable alkaline batteries. But while they might seem increasingly quaint in the lithium-ion era, features such as a long shelf life make it worth keeping a pack of disposables around. So which ones should you buy? That’s what [Moragor] wanted to find out with his personal battery analyzer.

Designed as a shield for the Arduino Mega 2560, the analyzer combines a small programmable electronic load with a INA219 current sensor, OLED display, and SD card reader. The user selects the cutoff voltage and discharge rate before the test begins, and once it’s running, data is collected every second and saved to the SD card for later analysis. Once the battery voltage reaches the predetermined value, the test is over and you’re ready to put a new cell through its paces.

After testing 27 different brands of batteries, [Moragor] tabulated all the data and produced some helpful charts to illustrate the results. With few exceptions, the performance level for most of the batteries was remarkably similar. If anything, the test seemed to show that higher tier batteries from companies like Duracell and Energizer actually performed slightly worse than the mid-range offerings. Perhaps the biggest surprise is that, when the per-cell cost was factored in, the local cheapo batteries provided a better value than anything else in the test.

While the selection of battery brands may be different from where you live, the data [Moragor] collected is still a fascinating even if you don’t recognize some of the names on the chart. Of particular note is the confirmation that lithium batteries handily outperformed any of the Alkaline cells tested when it came to high-drain applications. We’d still rather they came in rechargeable form, but at least it’s a step in the right direction.

This Pineapple Keyboard Is The Bomb

Now why didn’t we think of this? While building a dactyl manuform — a semi-ergonomic split keyboard — [dapperrogue] had the life-changing epiphany that keyboards can be any shape or size, as long as there is room for wiring and a microcontroller inside. [dapperrogue]’s first foray into the world of fictional ordnance came in the form of an F-bomb — a round macro keeb made in the classic round explosive shape and covered with function keys. Building on the explosive feedback from that, [dapperrogue] built this bomb of a pineapple keeb, the only anti-personnel factor being the clickiness of the key switches.

This groovy grenade has 25 keys total, 24 of which are in a 4×6 grid around the body. The 25th key, the best one, is hiding under the lever and you bet it can only be actuated by pulling the pin first. We love the use of the lever because it makes us think of Morse code keyers, which might be what we would use that switch for.

Inside is an Arduino Pro Micro running QMK and some skillful wiring. The entirely 3D-printed enclosure is in two main pieces that are connected with M3 screws, plus the top. If you want to pack one of your own, the STLs and firmware are out on GitHub. Just don’t take it to the airport.

Be sure to check out the demos after the break — in the stock firmware, every key types out a different onomatopoeic boom-type sound. Are you more of a pacifist when it comes to macro pad design? That’s understandable. We have plenty of different builds to admire.

Continue reading “This Pineapple Keyboard Is The Bomb”

You Need An Automated Overhead Camera Assistant

It’s 2021. Everyone and their mother is filming themselves doing stuff, and a lot of it is super cool content. But since most of us have to also work the video capture devices ourselves, it can be difficult to make compelling footage with a single, stationary overhead view, especially when there are a lot of steps involved. A slider rig is a good start, but the ability to move the camera in three dimensions programmatically is really where it’s at.

[KronBjorn]’s excellent automated overhead camera assistant runs on an Arduino Mega and is operated by typing commands in the serial monitor. It can pan ±20° from straight down and moves in three axes on NEMA-17 stepper motors. It moves really smoothly, which you can see in the videos after the break. The plastic-minimal design is interesting and reminds us a bit of an ophthalmoscope phoropter — that’s that main rig at the eye doctor. There’s only one thing that would make this better, and that’s a dedicated macro pad.

If you want to build your own, you’re in luck — there’s quite a lot of detail to this project, including a complete BOM, all the STLs, code, and even assembly videos of the 3D-printed parts and the electronics. Slide past the break to check out a couple of brief demo videos.

Not enough room for a setup like this one? Try the pantograph version.

Continue reading “You Need An Automated Overhead Camera Assistant”

Eyecam Is Watching You In Between Blinks

We will be the first to admit that it’s often hard to be productive while working from home, especially if no one’s ever really looking over your shoulder. Well, here is one creepy way to feel as though someone is keeping an eye on you, if that’s what gets you to straighten up and fly right. The Eyecam research project by [Marc Teyssier] et. al. is a realistic, motorized eyeball that includes a camera and hangs out on top of your computer monitor. It aims to spark conversation about the sensors that are all around us already in various cold and clinical forms. It’s an open source project with a paper and a repo and a how-to video in the works.

The eyebrow-raising design pulls no punches in the uncanny department: the eye behaves as you’d expect (if you could have expected this) — it blinks, looks around, and can even waggle its brow. The eyeball, brow, and eyelids are actuated by a total of six servos that are controlled by an Arduino Nano.

Inside the eyeball is a Raspberry Pi camera connected to a Raspi Zero for the web cam portion of this intriguing horror show. Keep an eye out after the break for the Eyecam infomercial.

Creepy or fascinating, it succeeds in making people think about the vast amount of sensors around us now, and what the future of them could look like. Would mimicking eye contact be an improvement over the standard black and gray oblong eye? Perhaps a pair of eyes would be less unsettling, we’re not really sure. But we are left to wonder what’s next, a microphone that looks like an ear? Probably. Will it have hair sprouting from it? Perhaps.

Yeah, it’s true; two eyes are more on the mesmerizing side, but still creepy, especially when they follow you around the room and can shoot frickin’ laser beams.

Continue reading “Eyecam Is Watching You In Between Blinks”

Hacking The Classroom

With so many students attending class virtually these days, how can you give kids — or adults — some hands on experience with electronics projects? [Ben Finio] says you can by moving your lab to the virtual world using — of all things — Tinkercad. [Ben] should know something about a classroom since he is a lecturer at Cornell.

Of course, you could do this trick with any online simulator, but Tinkercad is nice because it is easy to use, looks real, and doesn’t cost the students a dime. [Ben] mentions there are some scenarios where it is especially useful like large classes or online classes. There are probably some cases where it doesn’t make sense, like teaching RF design, for example. Even then, maybe you just need a different tool.

Continue reading “Hacking The Classroom”

Arduino Plots Your Portrait With Style

Around these parts, we see plenty of plotter builds. They’re a great way to learn about CNC machines and you get to have fun making pictures along the way. [Ben Lucy] was undertaking just such a build of his own, but wanted to do something standalone that served a purpose. The result is the impressive Portable Portrait Painter.

What sets [Ben]’s project apart is how complete it is. Unlike other plotters that simply follow G-code instructions or process external images, the Portable Portrait Painter is a completely standalone machine. Fitted out with an OV7670 camera, hooked up to an Arduino, it’s capable of taking its own photos and then drawing them out as well.

Through some clever code from [Indrek Luuk], the Arduino Mega2560 is able to display a 20fps video preview on a color LCD screen. When the user presses a button, the current frame is captured and sent to the pen plotter. The plotting algorithm is particularly impressive, with images first processed with histogram compensation to maximise contrast. The pen is then drawn across the page line by line, and pressed into the page by varying amounts depending on the color value of each pixel. The darker the pixel, the thicker the stroke made by the pen. This more analog approach produces a much more detailed image than more basic plotters which either leave a mark or don’t.

The portraits produced by the plotter are impressive, and we like the edge-of-page artifacts, which add a little style to the final results. The Portrait Painter would make a great conversation piece at any Maker Faire or hackerspace night.

It’s a project that reminds us of some of the painting robots we’ve seen over the years. Video after the break.

Continue reading “Arduino Plots Your Portrait With Style”

A Magnetic Field Strength Meter Using An Arduino

We’re used to Hall effect devices as proximity sensors in mechanical systems, used to provide detection of something that has a magnet attached to it. However it’s easy to forget that the devices that provide a magnet-or-not digital output are only part of the story, and linear Hall effect devices provide a handy way to measure a static magnetic field. It’s something [mircemk] demonstrates, with an Arduino-powered magnetic field strength meter that uses a UGN 3503U Hall effect device.

The circuit is extremely simple, comprising the sensor, an Arduino Nano, and an OLED display. This device is handy because its voltage output has a known relationship to the gauss level the sensor is experiencing, so while the accuracy of its calibration isn’t verified it can at least give a believable reading derived from the Arduino’s ADC.

The whole is wrapped up in an attractive case that looks as though it has been made from PCB material, with the sensor protruding on what seems to be the shell of a plastic ballpoint pen. It makes a handy instrument that provides a useful function for not a lot of money, so what’s not to like! Take a look at the video below the break for the full story.

Surprisingly such projects are few and far between here at Hackaday, however it’s not the first magnetic field measurement we’ve seen.

Continue reading “A Magnetic Field Strength Meter Using An Arduino”