It is amazing how makers can accomplish so much when they put their mind to something. [Marcus Wu] has uploaded a mesmerizing video on how to build a 3D printed Curta Mechanical Calculator. After nine iterations of design, [Marcus] presents a polished design that not only works but looks like a master piece.
For the uninitiated, the Curta is a mechanical calculator designed around the time of World War II. It is still often seen used in time-speed-distance (TSD) rallies to aid in the computation of times to checkpoints, distances off-course and so on. Many of these rallies don’t allow electronic calculators, so the Curta is perfect. The complex inner workings of the contraption were a key feature and point of interest among enthusiasts and the device itself is a highly popular collectible.
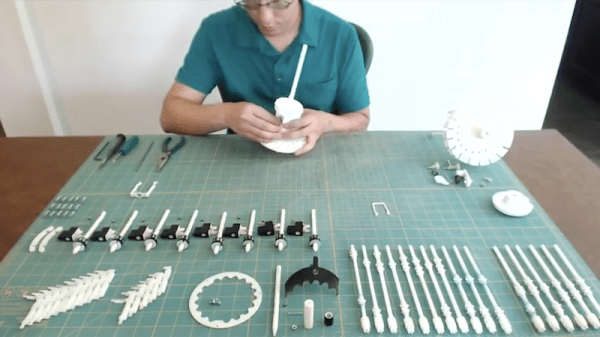
As for the 3D printed design, the attention to detail is impeccable. The current version has around 80 parts that need to 3D printed and a requires a few other screws and springs. Some parts like the reversing lever and selector knobs have been painted and digits added to complete the visual detail. The assembly took [Marcus Wu] around 40 minutes to complete and is one of the most satisfying builds we have ever seen.
What is even more amazing is that [Markus Wu], who is a software engineer by profession has shared all the files including the original design files free of cost on Thingiverse. A blog with written instructions is also available along with details of the iterations and original builds. We already did a post on a previous version so check it out for a little more background info.
Thanks for the tip [lonestar] Continue reading “3D Printed Curta Gets Upgrades”