Most of the stories we cover here are fresh from the firehose, the newest and coolest stuff to interest you during your idle moments. Sometimes though, we come across a page that’s not new, but is interesting in its own right enough to bring to your attention. So it is with our subject here, because when faced with a tube circuit design problem, we found salvation in a page from [The Valve Wizard].
Do you need to apply negative feedback to a triode amplifier? The circuit is simplicity itself, but sadly when we were at university they had long ago stopped teaching the mathematics behind the component values. Step forward everything you need to know about triode amplifier negative feedback.
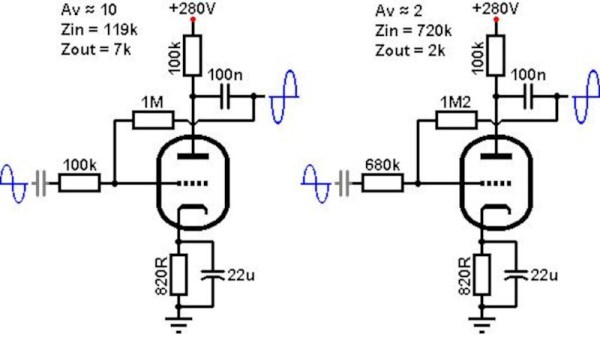
Negative feedback is a pretty simple idea: subtract a little of the amplifier’s output from the input. It reduces the amplifier’s gain with a flat response, so it’s useful for removing humps in the frequency response and reducing the tendency for distortion. In a single-ended triode amp it’s done with a resistor and capacitor from anode to grid, but the question is, just what resistor or capacitor?. Here the page has all the answers, taking the reader through calculating the desired gain, and picking the value of the capacitor to avoid affecting the frequency response. We wish that someone had taught us this three decades ago!
The website is full of really useful info about valve or tube amps, and it’s worth mentioning that he’s made it available in book format too. There’s no reason not to have a go at vacuum electronics. Meanwhile in case you are wondering what project prompted this, it was a quest to improve upon this cheap Chinese kit amplifier.