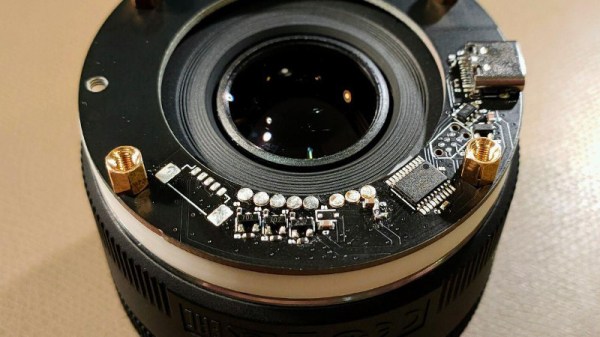
There was a time when a camera lens was simply a set of shaped pieces of glass in a tube, with a mount and an aperture. But as cameras have embraced electronics ever more, technology has found its way past the lens mount to the extent that all features of a modern lens are electronically controllable. Can they be used outside the confines of the camera they were designed for? If the user is [Jana Marie] then certainly, because she’s created a nifty USB adapter and mount for Canon lenses for use with her custom streaming camera.
The hardware is a 3D printed lens mount with a PCB that mates with the pins on the lens. An STM32 does the hard work and talks to the outside world through a USB interface, however it’s in the software that the real effort lies. The Canon lens protocol has been extended since the 1980s, and the commands for different generations of lenses can be convoluted. All the information is in a GitHub repository, so the curious hacker can roll their own.
There are a wealth of camera projects to be found for those that don’t mind tearing apart some of their more valuable possessions, and this isn’t the first we’ve seen involving the hacking of the Canon protocol.
Creating projects is fun, but the real value, as far as the imaginary Internet points are concerned, is how well you show them off for the clout. Taking a few snaps is fine, but if you want to produce a quality video of your project, it pays to put some thought and effort into the process.
Telling The Story
Before setting out to document your project on video, think about what you’re trying to communicate to the viewer. Are you attempting to create a step-by-step guide on how to recreate what you’ve done, or are you simply trying to show off the awesome finished product? These are two very different types of video, and will require different content and delivery entirely. It also guides how you shoot your video.
If you want to show off your build process, you’ll need to shoot as you go. This can be time consuming, but also a great way to show the reality of what goes into your work. I always like it when people convey the pitfalls and successes they faced along the way, and get people involved in the story. It also means that you’ll end up shooting a lot of footage and you’ll spend plenty of time editing it all together. Continue reading “How To Shoot A Great Project Video”→
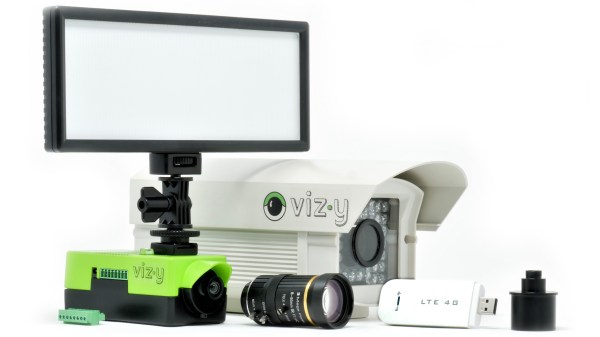
Vizy, a new machine vision camera from Charmed Labs, has blown through their crowdfunding goal on the promise of making machine vision projects both easier and simpler to deploy. The camera, which starts around $250, integrates a Raspberry Pi 4 with built-in power and shutdown management, and comes with a variety of pre-installed applications so one can dive right in.
The Sony IMX477 camera sensor is the same one found in the Raspberry Pi high quality camera, and supports capture rates of up to 300 frames per second (under the right conditions, anyway.) Unlike the usual situation faced by most people when a Raspberry Pi is involved, there’s no need to worry about adding a real-time clock, enclosure, or ensuring shutdowns happen properly; it’s all taken care of.
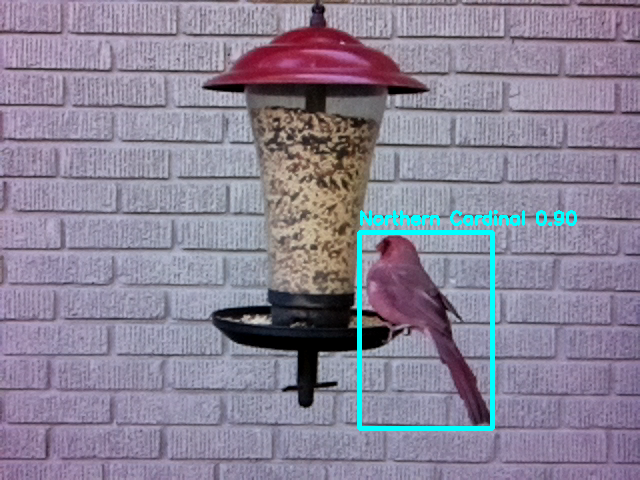
‘Birdfeeder’ application can automatically identify and upload images of visitors.
Charmed Labs are the same folks behind the Pixy and Pixy 2 cameras, and Vizy goes further in the sense that everything required for a machine vision project has been put onboard and made easy to use and deploy, even the vision processing functions work locally and have no need for a wireless data connection (though one is needed for things like automatic uploading or sharing.) For outdoor or remote applications, there’s a weatherproof enclosure option, and wireless connectivity in areas with no WiFi can be obtained by plugging in a USB cellular modem.
A few of the more hacker-friendly hardware features are things like a high-current I/O header and support for both C/CS and M12 lenses for maximum flexibility. The IR filter can also be enabled or disabled via software, so no more swapping camera modules for ones with the IR filter removed. On the software side, applications are all written in Python and use open software like Tensorflow and OpenCV for processing.
The feature list looks good, but Vizy also seems to have a clear focus. It looks best aimed at enabling projects with the following structure:
Detect Things (people, animals, cars, text, insects, and more) and/or Measure Things (size, speed, duration, color, count, angle, brightness, etc.)
Perform an Action (for example, push a notification or enable a high-current I/O) and/or Record (save images, video, or other data locally or remotely.)
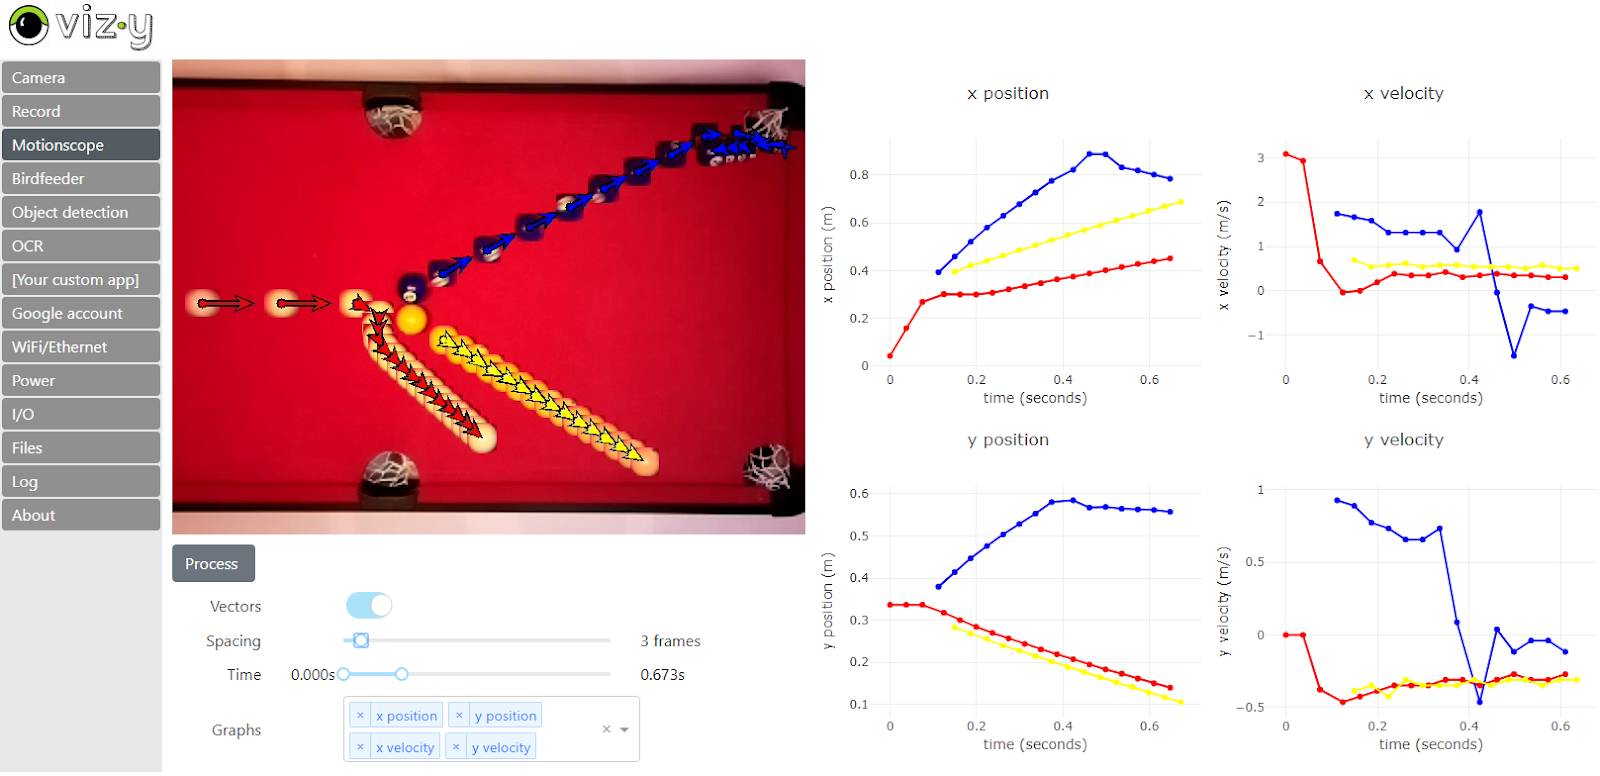
The Motionscope application tracking balls on a pool table. (Click to enlarge)
A good example of this structure is the Birdfeeder application which comes pre-installed. With the camera pointed toward a birdfeeder, animals coming for a snack are detected. If the visitor is a bird, Vizy identifies the species and uploads an image. If the animal is not a bird (for example, a squirrel) then Vizy can detect that as well and, using the I/O header, could briefly turn on a sprinkler to repel the hungry party-crasher. A sample Birdfeeder photo stream is here on Google Photos.
Motionscope is a more unusual but very interesting-looking application, and its purpose is to capture moving objects and measure the position, velocity, and acceleration of each. A picture does a far better job of explaining what Motionscope does, so here is a screenshot of the results of watching some billiard balls and showing what it can do.
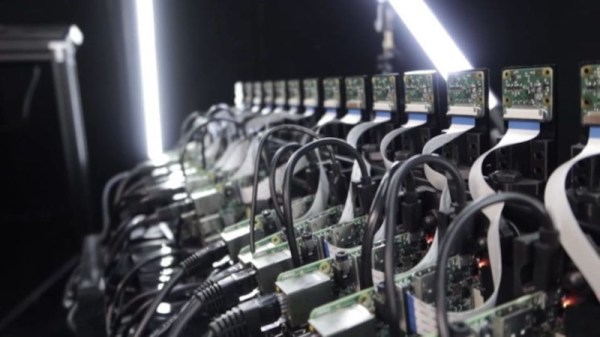
Bullet time became the hottest new cinema effect after it burst on the scene in The Matrix (1999). Back then, the cutting edge special effects required serious hardware and serious processing power to do the job. These days, of course, things have moved along somewhat. [Eric Paré] is no stranger to a high-end setup, but wanted to see what could be done at the lower end of the market. (Video, embedded below.)
Rather then relying on a bank of expensive DSLRs, [Eric] decided to try building a bullet-time camera rig out of 15 Raspberry Pis, and the standard Raspberry Pi Camera. Whereas just one camera in one of his professional setups may cost well over $1000, this entire rig was likely built for less than that in its entirety.
Initial results were jerky and unappealing, but [Eric] persevered. One of the biggest problems was inaccuracy in the camera assemblies, as they were stuck on with thermal paste. With some custom mods and tweaks, [Eric] was eventually able to get things to a passable state. It also has the benefit, compared to a DSLR rig, that the cameras can be mounted much more closely together due to their small size.
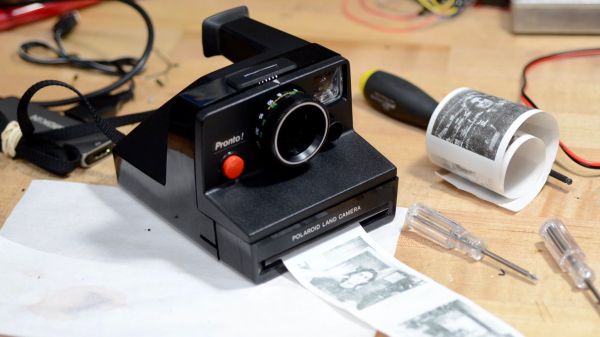
There’s nothing like a little diversion project to clear the cobwebs — something to carry one through the summer doldrums and charge you up for the rest of the hacking year. At least that’s what we think was up with [Sam Zeloof]’s printing Polaroid retro-conversion project.
Normally occupied with the business of learning how to make semiconductors in his garage, or more recently working on his undergraduate degree in electrical engineering, [Sam], like many of us, found himself with time to spare this summer. In search of a simple, fun project that wouldn’t glaze over the eyes of people when he showed it off, he settled on a printing party camera. The guts are pretty standard fare: a Raspberry Pi and Pi cam, coupled with a thermal receipt printer for instant hardcopy. The donor camera was a Polaroid Pronto from eBay, in good shape on the outside and mostly complete on the inside. A Dremel took care of the latter, freeing up space occupied by all the plastic bits that held the film cartridge and running gear of the film handling system.
The surgery made enough room to squeeze in the Pi Zero and a LiPo battery pack, along with a buck converter. Adding in the receipt printer and its drive board and mounting the Pi cam presented some challenges, but everything fit without breaking the original look and feel of the Polaroid. The camera now produces low-res hardcopy instantly using a dithering algorithm, and store high-resolution images on an SD card for later download. As a bonus, [Sam] included a simulated time and date stamp in the lower corner of the saved images, like those that used to show up on film.
[Sam]’s camera looks like a ton of fun. We’ve seen other Polaroid conversions, including a stunning SX-70 digital upgrade, but this one shines for its simplicity and instant hardcopy.
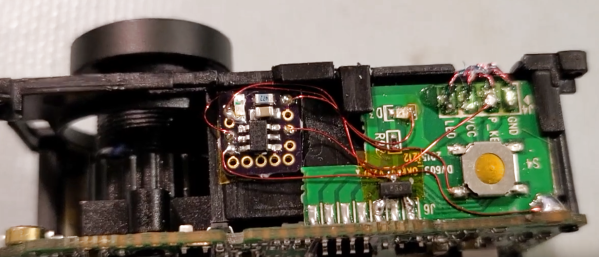
Repurposing commodity electronics is one of the true forms of hacking, and it’s always the simple little hacks that lead to big ones. [Everett] wanted to use a $20 GoPro clone as a dash cam, so he wired a microcontroller into it to automate some actions and make it practical.
The camera turns on automatically when connected to external power like a car charger, but starting and stopping a recording and power down all had to be done manually. [Everett] wanted to automate these functions, so he opened up the camera and started probing with an oscilloscope. He found the power button, record button, 3.3 V and external 5 V traces conveniently next to each other in the top of the camera.
To automate the required functions, he wired in a PIC10 on a small breakout board, powered by the 3.3 V line. It detects if 5 V is connected to the charging port on start-up via an N-channel FET, then automatically starts a recording. When the 5 V power is switched off with the car, it waits 10 seconds before stopping the recording and switching off the camera. If no external 5 V is not detected on start-up the microcontroller does nothing, which allows the camera to be used as a normal handheld. [Everett] mounted the camera to his rearview mirror with a magnetic bracket made using a combination of a 3D printer and 3D pen.
This is a simple and practical little hack, and the firmware is available on Github. Cheap dashcams are available for similar prices, but you won’t get any hacking satisfaction that way.
The very nature of actions cameras inspire hacking. You can simply add an external battery with the help of a 3D printer, or go all out and build a gimballed helmet cam from scratch
One of the most appealing aspects of USB-C is that it promises to be a unified power delivery system. You’ll no longer need to have a separate power cords for for your phone, camera, and laptop; physically they’ll all use USB-C connectors, and the circuitry in the charger will know how much juice to send down the line for each gadget. But in reality, we’ve all got at least a few pieces of older equipment that we’re not about to toss in the trash just because it doesn’t support the latest USB spec.
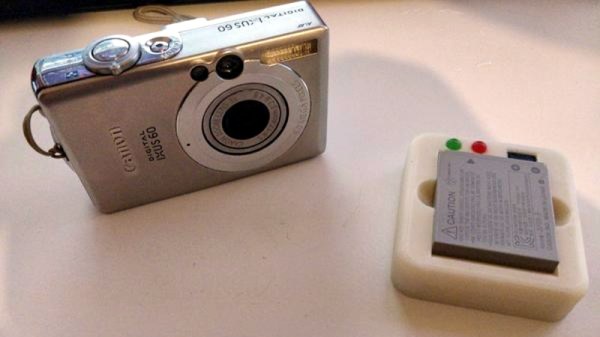
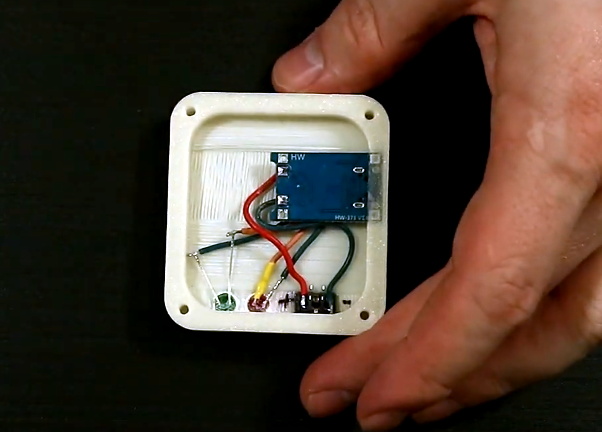
Note the relocated status LEDs.
Case in point, the old Canon camera that [Purkkaviritys] modified to take infrared pictures. Instead of abandoning it, he decided to make a custom USB-C charger for its NB-4L batteries. Since they’re just single cell 3.7 V lithium-ions, all he had to do was wire them up to the ubiquitous TP4056 charger module and design a 3D printed case to hold everything together.
He did go the extra mile and replace the SMD charging indicator LEDs on the PCB with 5 mm LEDs embedded into the 3D printed enclosure, though you could certainly skip this step if you were in a hurry. We imagine if you print the enclosure in a light enough color, you should be able to see the original LEDs glowing through the plastic.