3D Scanning By Calculating The Focus Of Each Pixel

calculating-focus-to-generate-depth-map

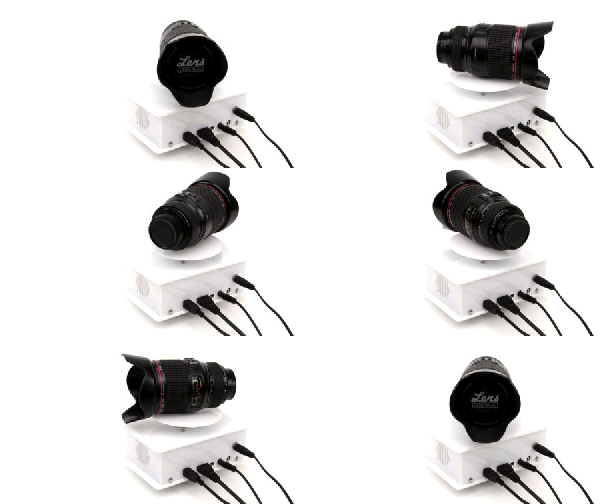
We understand the concept [Jean] used to create a 3D scan of his face, but the particulars are a bit beyond our own experience. He is not using a dark room and laser line to capture slices which can be reassembled later. Nope, this approach uses pictures taken with several different focal lengths.

The idea is to process the photos using luminance. It looks at a pixel and it’s neighbors, subtracting the luminance and summing the absolute values to estimate how well that pixel is in focus. Apparently if you do this with the entire image, and a set of other images taken from the same vantage point with different focal lengths, you end up with a depth map of pixels.

What we find most interesting about this is the resulting pixels retain their original color values. So after removing the cruft you get a 3D scan that is still in full color.

If you want to learn more about laser-based 3D scanning check out this project.

[Thanks Luca]

Embedded Solution For Uploading Webcam Pictures To The Cloud

carambola-webcam-uploader

We have friends watch the cats when we go out-of-town. But we always leave a server running with a webcam (motion activated using the Linux “motion” software) so we can check in on them ourselves. But this project may inspire a change. It leverages the features of a Carambola2 to capture images and upload them to Dropbox.

In the picture above the green PCB is a development board for the tiny yellow PCB which is the actual Carambola2. It is soldered on the dev board using the same technique as those HC-05 Bluetooth modules. That shielded board includes a Qualcomm SoC running Linux and a WiFi radio. The dev board feeds it power and allows it connect to the USB webcam.

There’s a bit of command line kung-fu to get everything running but it shouldn’t be out of reach for beginners. Linux veterans will know that taking snapshots from a webcam at regular intervals is a simple task. Uploading to a secure cloud storage site is not. A Bash script handles the heavy lifting. It’s using the Dropbox Application API so this will not violate their TOS and you don’t have to figure out your own method of authenticating from the command line.

GoPro Panning Time-lapse With Ikea Egg Timer

ikea-go-pro-time-lapse

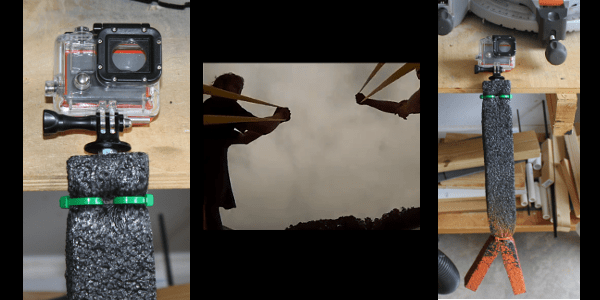
[Sebastian Schuster’s] weekend project was to turn his GoPro camera into a panning time-lapse rig. You’ll notice it’s in a waterproof case as his demo for the hack was an outdoor session and the weather’s not the best right now. He put this together quickly, easily, and on-the-cheap thanks to the Ikea egg timer and a 3D printed camera mount.

An egg timer is a popular choice for panning hacks. Any type that includes a dial that spins on the horizontal axis will do. The Ikea Stam egg timer has that raised handle which is easily gripped by the 3D printed part. You can get a hold of the design files through a web service which is new to us. [Sebastian] used Tinkercad for the design, and shared it in his project post linked above.

This is just one more tool in his collection of camera hacks. A couple years back we looked at a motorized pan and tilt platform he built.

Continue reading “GoPro Panning Time-lapse With Ikea Egg Timer”

Nikkor Optical Glass

Glass work is always a feast for the eyes, especially when it is hot glass. Watch as a Nikkor lens is made from beginning to end. It is wonderful to see the care taken to search by eye for defects, refraction issues, clarity etc. It may just be for the video, but it seems that the workers truly do take pride in their product.

What I found somewhat surprising was the amount of work that went into refining the glass BEFORE it was even put into a lens mold. I would have assumed that much of the work would have come after.

High Speed Photography With Friggin’ Lasers

[Bruce] built his own high-speed photography equipment for a fraction of the price it would have cost him to purchase it. He was inspired by a friend who showed him some example images. He headed into his shop and built an Arduino-based high-speed flash controller.

To capture an image like this one the camera is placed in a dark room and set for a long exposure. At just the right instant the flash is activating, capturing the image. In this case [Bruce] used an infrared laser diode pointed at a phototransistor to trigger the flash. When the droplet breaks the laser beam the Arduino triggers the flash after a calculated delay. It’s not specifically covered in his guide, but [Bruce] also mentions that this can be modified to use sound as a trigger. Here’s another sound-activated flash controller if you need inspiration.

The image at the top was made by dropping dye from a pipette into a pool of water. If you don’t have a pipette on hand you can head over to our LIFE blog to make one out of heat shrink tubing.

Adding Night Vision To The Raspberry Pi Camera

After months of promises, the Raspberry Pi camera is finally heading out to hackers and makers across the world. Of course the first build with the Pi cam to grace the pages of Hackaday would be removing the IR filter, and it just so happens [Gary] and his crew at the Reading hackerspace are the first to do just that.

As [Gary] shows in his video, the process of removing the Pi cam’s IR filter is extremely fiddly.  Getting the filter out of the camera involves removing the sensor, gently cutting it open with a scalpel, and finally gluing the whole thing back together with a tiny bit of superglue. Not for the faint of heart, and certainly not for anyone without a halfway decent bench microscope.

If you’re looking for a Raspberry Pi-powered security camera, game camera, or something for an astronomy application, this is the way to make it happen. You might want to be careful when removing the IR filter; [Gary] broke one camera on their first attempt. They got it to work, though, and the picture quality looks pretty good, as seen in the videos below.

Continue reading “Adding Night Vision To The Raspberry Pi Camera”

Filming Light Reflecting Off Objects

light

With high-speed cameras you’re able to see bullets passing through objects, explosions in process, and other high-speed phenomena. Rarely, though, are you able to see what happens when light shines on an object without hundreds of thousands of dollars worth of equipment. A group of researchers at The University of British Columbia are doing just that with hardware that is well within the range of any home tinkerer.

Making videos of light passing through and around objects has been done before (great animated gifs of that here), but the equipment required of previous similar projects cost $300,000 and couldn’t be used outside the controlled environment of a lab. [Matthias] and his team put together a similar system for about $1,000. The only hardware required is an off-the-shelf 3D time of flight camera and a custom driver powering six red laser diodes.

Aside from having a much less expensive setup than the previous experiments in recording the flight of a pulse of light, [Matthias] and his team are also able to take their and record the flight of light in non-labratory settings. They’ll be doing just that at this year’s SIGGRAPH conference, producing videos of light reflecting off attendee-produced objects in just a few minutes. You can check out the video for the project below.