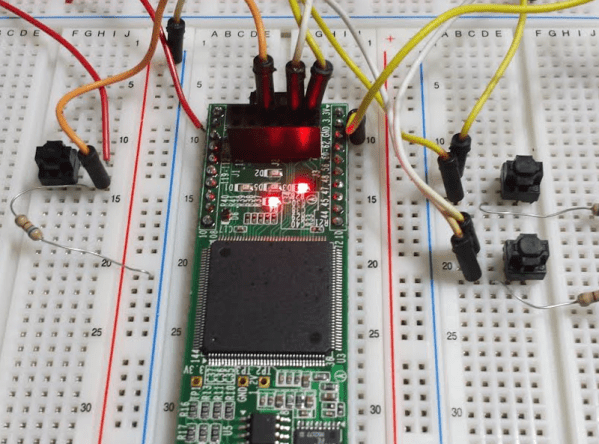
a Pi Pico on a breadboard, running a 7-segment counter gateware, with a 7-segment digit and a pushbutton next to the Pico

Want To Play With FPGAs? Use Your Pico!

Ever want to play with an FPGA, but don’t have the hardware? Now, if you have one of those ever-abundant Pi Picos, you can start playing with Verilog without getting an FPGA board. The FakePGA project by [tvlad1234], based on the Verilator toolkit, provides you with a way to compile Verilog into C++ for the RP2040. FakePGA even integrates RP2040 GPIOs so that they work as digital pins for the simulated GPIOs, making it a significant step up from computer-aided FPGA code simulation

[tvlad1234] provides instructions for setting this up with Linux – Windows, though untested, could theoretically run this through WSL. Maximum clock speed is 5KHz – not much, but way better than not having any hardware to test with. Everything you’d want is in the GitHub repo – setup instructions, Verilog code requirements, and a few configuration caveats to keep in mind.

We cover a lot of projects where FPGAs are used to emulate hardware of various kinds, from ISA cards to an entire Game BoyCPU emulation on FPGAs is basically the norm — it’s just something easy to do with the kind of power that an FPGA provides. Having emulation in the opposite direction is unusual,  though, we’ve seen FPGAs being emulated with FPGAs, so perhaps it was inevitable after all. Of course, if you have neither a Pico nor an FPGA, there’s always browser based emulators.

Continue reading “Want To Play With FPGAs? Use Your Pico!”

Here’s How The Precursor Protects Your Privacy

At some point, you will find yourself asking – is my device actually running the code I expect it to? [bunnie] aka [Andrew Huang] is passionate about making devices you can fundamentally, deeply trust, and his latest passion project is the Precursor communicator.

At the heart of it is an FPGA, and Precursor’s CPU is created out of the gates of that FPGA. This and a myriad of other design decisions make the Precursor fundamentally hard to backdoor, and you don’t have to take [bunnie]’s word for it — he’s made an entire video going through the architecture, boot protections and guarantees of the Precursor, teaching us what goes into a secure device that’s also practical to use.

Screenshot from the video, showing a diagram of how precursor's software and hardware components relate to each other If you can’t understand how your device works, your trust in it might be misplaced. In the hour long video, [bunnie] explains the entire stack, from the lower levels of hardware to root keys used to sign and verify the integrity of your OS, along the way demonstrating how you can verify that things haven’t gone wrong.

He makes sure to point out aspects you’d want to be cautious of, from physical security limitations to toolchain nuances. If you’re not up for a video, you can always check out the Precursor wiki, which has a treasure trove of information on the device’s security model.

As you might’ve already learned, it’s not enough for hardware to be open-source in order to be trustworthy. While open-source silicon designs are undoubtedly the future, their security guarantees only go so far.

Whether it’s esoteric hard drive firmware backdoors, weekend projects turning your WiFi card into a keylogger, or rootkits you can get on store-bought Lenovo laptops, hell, even our latest This Week In Security installment has two fun malware examples – there’s never a shortage of parties interested in collecting as much data as possible.

ICEBlaster: A Drag’n’Drop Bitstream Loader For ICE40

The iCE40 series of FPGAs gets a fair bit of coverage on these pages, largely due to its accessibility (thanks to huge efforts in reverse engineering and open tool chains) and likely also due to Lattice Semiconductors’ attitude to open source in general. Whilst these devices are small and rather limited, you can’t really beat them for a first foray into the subject. They’re plenty beefy enough for many of the simpler FPGA applications. [TinLethax] over on Hackaday.IO has plenty of experience with the devices, and has added another tool to our collective iCE40 arsenal, namely iCEBlaster, a USB mass storage device (MSC) style bootloader for drag-n-drop bitstream loading. The days of needing dedicated special programmers are starting to be numbered, with many chips now presenting a USB mass storage device to the host in order to upload the firmware image.

FPGAs don’t tend to operate this way, needing a device-specific bitstream loading upon start-up, which (unless they have OTP memory) is usually the job of an external configuration memory. iCEBlaster (a play on the Xilinx ByteBlaster programmer, maybe?) runs on the STM32F4xx series devices at least, but should be easily portable to others. The idea is pretty straightforward — dragging a new bitstream file onto the storage device initiates an FPGA target reset, which in turn allows the STM32 to send the bitstream over to the iCE40 via the SPI interface. Nothing more than that.

If you’ve been looking to get into the iCE40, this guide might be a good starting point, and every learning experience needs a good project to drive it, how about running Doom on a softcore RISC-V?

A Sipeed Tang Nano 9k board on a Thinkpad keyboard, with an LCD panel attached to it

An Open Toolchain For Sipeed Tang Nano FPGAs

[Sevan Janiyan] shares their research on putting an open FPGA toolchain together. Specifically, this is an open toolchain for the Sipeed Nano Tang FPGAs, which are relatively cheap offerings by Sipeed from China. The official toolchain is proprietary and requires you to apply for a license that’s to be renewed every year. There’s a limited educational version you can use more freely, but of course, that’s not necessarily sufficient for comfortable work.

This toolchain relies on the apicula project, an effort to reverse-engineer, reimplement and document the Gowin FPGA bitstream format, as well as the gowin integration for nextpnr (an open tool for FPGA place-and-route). With a combination of yosys, apicula, nextpnr and openFPGAloader, [Sevan] put together a set of commands you can use to build gateware for your Nano Tang FPGAs – without any proprietary limitations blocking your way. They show a basic blinkie demo, and also a demo that successfully operates a parallel LCD connected to the board.

The availability of open toolchains for FPGAs has always been somewhat of a sore point. Wondering about open FPGA toolchains? This Supercon 2019 talk by Tim [Mithro] Ansell will get you up to speed!

We thank [feinfinger (sneezing)] for sharing this with us!

Will MiSTer Fool You Into Learning FPGAs?

What’s the killer app for FPGAs? For some people, the allure is the ultra-high data throughput for parallelizable tasks, which can enable some pretty gnarly projects. But what if you’re just starting out? How about 1980s style video games?

The MiSTer FPGA project created a bit of FPGA hardware that makes it easy to build essentially any old school video game or computer platform. That’s a massive clean slate. Of course, you can simply download someone else’s Atari ST or Commodore 64 setup and load it up, but if you want to learn FPGAs while recreating old-school video game machines, you’re going to want to get your hands dirty.

[Mister Retro Wolf] started up a video series last winter (trailer embedded below) where he’s embarked on a project to recreate a classic video game machine from the ground up using the MiSTer FPGA platform. In particular, he’s going to recreate the Namco Tank Battalion arcade game, from the schematics, in Verilog.

This is literally building a 6502-based video game machine from scratch (in gateware), so if you’re interested in retrocomputing or FPGAs, you’ll have something to learn here. He’s gotten through the CPU, screen, tilemap graphics, and memory so far, but it’s not done yet. To follow along, get yourself some hardware and you can probably catch up.

We’ve covered the MiSTer FPGA project before, of course, because we think it’s cool. And if a video game arcade machine is going to be your gateway drug into the seedy world of programmable gates, then so be it.

Continue reading “Will MiSTer Fool You Into Learning FPGAs?”

Now The V In RISC-V Stands For VRoom

Hundreds of variations of open-source CPUs written in an HDL seem to float around the internet these days (and that’s a great thing). Many are RISC-V, an open-source instruction set (ISA), and are small toy processors useful for learning and small tasks. However, if you’re [Paul Campbell], you go for a high-end super-scalar, out-of-order, speculative, 8 IPC monster of a RISC-V CPU known as VRoom!.

That might seem a bit like word soup to the uninitiated in the processor design world (which is admittedly relatively small) but what makes this different from VexRISC is the scale and complexity. Rather than executing one instruction at a time sequentially, it executes multiple instructions, completing them concurrently in whatever order it can handle. The VexRISC chip is a good 32-bit modular design that can run Linux. It pulls a solid 1.57 DMIPS/MHz with everything turned on. The VRoom already clocks in at mighty 6.5 DMIPS/MHz, with more performance gains. It peaks at 8 instructions every clock cycle with a dual register file and a clever committing system to keep up.

VRoom is written in System Verilog to leverage Verilator (a handy linting and simulation framework), and while there is some C that generates different files, we’d wager it is pretty run-of-the-mill compared to a TypeScript based project. VRoom currently boots Linux thanks to an AWS-FPGA instance (a Xilinx VU9P Ultrascale), though it has to be trimmed to fit. [Paul] has big plans working his way up to a server-class chip with lots of cores and a huge cache.

It’s all on GitHub under a GPLv3 license; go check it out! [Paul] also has a talk with lots of great details. If you’re interested in getting into RISC-V but a server-class isn’t your speed, we heard Espressif is starting to use RISC-V cores in their ever-popular ESP series.

FPGA Starter Videos To Help Soften That Learning Curve

Digi-Key have been producing YouTube videos for a number of years now, and if you weren’t aware, they’re definitely worthy of some viewing time. The playlist we’re highlighting here is a pretty good introduction to FPGAs, specifically those supported by open source tools, with low cost hardware. If you’ve always wanted to get into hacking FPGA platforms, but don’t know where to start, this is going to be a big help. After first covering what an FPGA is and is not, and why you want to use one, [Shawn Hymel] dives in to the toolchain.

We’re really lucky that the bitstream for the Lattice iCE40 was reverse engineered by the super talented Claire (née Clifford) Wolf (AMP hour interview) which enabled the project ICEstorm toolchain to be created. Leveraging Yosys for synthesis and logic mapping, Icarus verilog coupled with GTKwave for simulation, netpnr for place and route and finally the project ICEstorm bitstream tools for packing into iCE40 format and loading onto the hardware. The whole toolchain flow is managed by APIO for simplicity, that is, provided your FPGA board is supported!

Of course, [Shawn] is using the low cost (for an FPGA) ICEStick by Lattice for this tutorial series, and they’re currently hard to get (you know why by now!) but, there are many other boards you could use. If you want to play with applications coupling a ARM micro to an FPGA, then the excellent BlackIce Mx is an option, but there are many other boards now with an decent micro nestled next to an FPGA and a few peripherals for convenience.

We should mention here, that project ICEstorm and the iCE40 is not the only show in town. Project Trellis has had our eye for a while, which targets the more complex Lattice ECP5 device. Yosys and friends do support more architectures, but the available flows usually require at least some vendor tool support at this time (looking straight at you, Xilinx) but as more devices get decoded, the open source tools will grow, and we will bring you that news!

What’s nice about this Digi-Key YT series, is that it doesn’t just cover the basic toolchain flow, then drop you in at the deep end of a big learning curve. There are videos covering subjects such as finite state machines (FSMs), test-benching and simulation, using embedded (block) memories, PLLs, harder subjects like dealing with metastability and clock-domain crossing (OK, he covers one technique – there’s more than one way to skin that particular cat) before finally looking at soft cores like the RISC-V. Lots to learn, and pretty well executed if you ask us! A Github version is available, for those who can’t stand watching the videos!

Continue reading “FPGA Starter Videos To Help Soften That Learning Curve”