Supercon 2023 – Going Into Deep Logic Waters With The Pico’s PIO And The Pi’s SMI

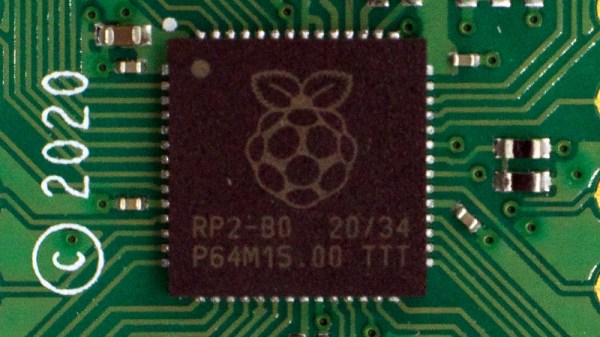
The Raspberry Pi has been around for over a decade now in various forms, and we’ve become plenty familiar with the Pi Pico in the last three years as well. Still, these devices have a great deal of potential if you know where to look. If you wade beyond the official datasheets, you might even find more than you expected.

Kumar is presently a software engineer with Google, having previously worked for Analog Devices earlier in his career. But more than that, Kumar has been doing a deep dive into maxing out the capabilities of the Raspberry Pi and the Pi Pico, and shared some great findings in an excellent talk at the 2023 Hackaday Supercon.

Continue reading “Supercon 2023 – Going Into Deep Logic Waters With The Pico’s PIO And The Pi’s SMI”

Bringing The PIO To The FPGA

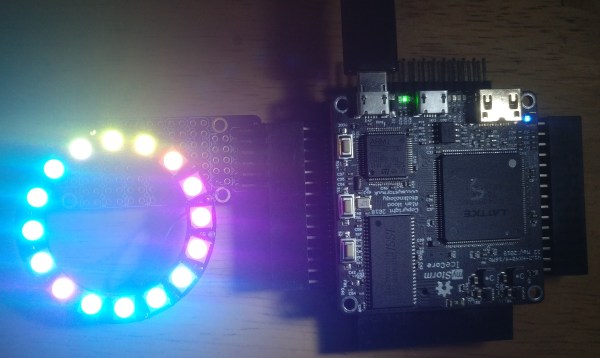
We’ve seen some pretty incredible hacks using the Raspberry Pi 2040. However, one of the most exciting bits of hardware onboard is the Programmable I/O (PIO). Not content with it just being a part of RP2040-based projects, [Lawrie Griffiths] has been porting the PIO to Verilog so anyone can enjoy it.

This particular implementation is based only on the spec that Raspberry Pi provides. For assembling PIO code, [Lawrie] uses Adafruit’s pioasm assembler they use for their MicroPython framework. There’s a simulator to test different programs, and the project targets the Blackice MX and the Ulx3s. A few example programs are included in the repo, such as outputting a pleasant guitar note over I2S and driving a chain of WS2812s.

The project is still incomplete but slowly making progress. It’s an incredible feat of reverse engineering. While the simulator can be used to debug programs, step through instructions, and inspect waveforms, the ultimate value of bringing the PIO to other systems is that now we can re-use the code. Things like the can2040, an implementation of the CAN bus protocol using the PIO. Or even a PIO-based USB host.

Bust Out That Old Analog Scope For Some Velociraster Fun!

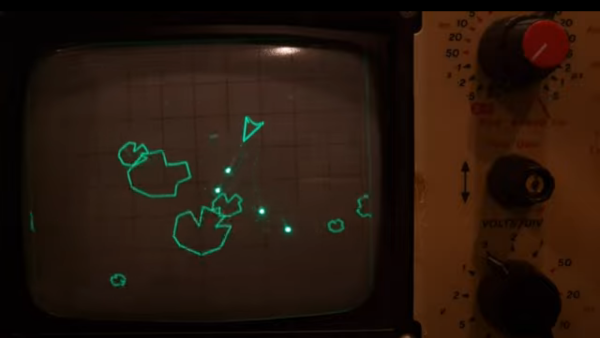
[Oli Wright] is back again with another installation of CRT shenanigans. This time, the target is the humble analog oscilloscope, specifically a Farnell DTV12-14 12 MHz dual-channel unit, which features a handy X-Y mode. The result is the Velociraster, a simple (in hardware terms) Raspberry Pi Pico based display driver.

Using a Pico to drive a pair of AD767 12-bit DACs, the outputs of which drive the two ‘scope input channels directly, this breadboard and pile-of-wires hack can produce some seriously impressive results. On the software side of things, the design is a now a familiar show, with core0 running the application’s high-level processing, and core1 acting in parallel as the rendering engine, determining static DAC codes to be pushed out to the DACs using the DMA and the PIO.

Continue reading “Bust Out That Old Analog Scope For Some Velociraster Fun!”

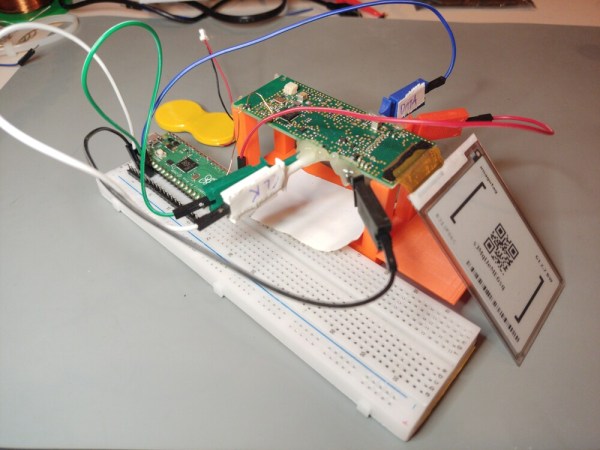
PCB mounted on 3D-printed holder, debug pins attached to Pi Pico on a breadboard. The battery is in the background, disconnected

Reverse Engineering E-Ink Price Tags

E-ink displays are great, but working with them can still be a bit tricky if you aren’t an OEM. [Jasper Devreker] got his hands on three e-ink shelf displays to reverse engineer.

After cracking the tag open, [Devreker] found a CC2510 microcontroller running the show. While the spec sheet shows a debug mode, this particular device has been debug locked making reading the device’s code problematic. Undaunted, he removed the decoupling capacitor from the DCOUPL pin and placed a MOSFET between it and the ground pin to perform a voltage glitch attack.

A Pi Pico was used to operate the MOSFET over PIO with the chip overclocked to 250 MHz to increase the precision and duration of the glitch. After some testing, a successful glitch pathway was found, but with only a 5% success rate. With two successive glitches in a row needed to read out a byte from the device, the process is not a fast one. Data pulled so far has shown to be valid code when fed into Ghidra, and this project page is being updated as progress continues.

If you want to delve further into hacking e-ink price tags, checkout this deep dive on the topic or this Universal E-paper Sniffer.

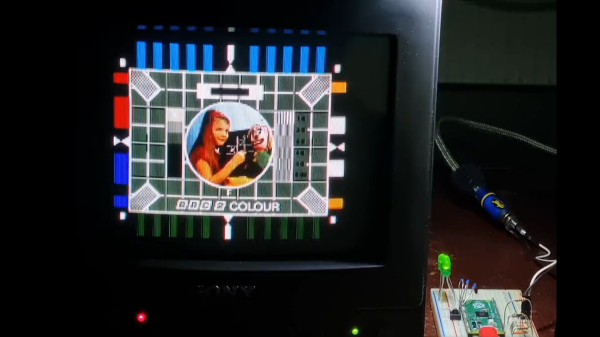
Generating PAL Video With A Heavily Overclocked Pi Pico

Barely a week goes by without another hack blessing the RP2040 with a further interfacing superpower. This time it’s the turn of the humble PAL standard composite video interface. As many of us of at least a certain vintage will be familiar with, the Phase Alternate Line (PAL to friends) standard was used mainly in Europe (not France, they used SECAM like Russia, China, and co) and Australasia, and is a little different from the much earlier NTSC standard those in the US may fondly recollect. Anyway, [Fred] stresses that this hack isn’t for the faint-hearted, as the RP2040 needs one heck of an overclock (up to 312 MHz, some 241% over stock) to be able to pull off the needed amount of processing grunt. This is much more than yet another PIO hack.

The dual cores of the RP2040 are really being pushed here. The software is split into high and low-level functions, with the first core running rendering the various still images and video demos into a framebuffer. The second core runs in parallel and deals with all the nitty-gritty of formatting the frame buffer into a PAL-encoded signal, which is then sucked out by the DMA and pushed to the outside world via the PIO. There may be a few opportunities for speeding the code up even more, but [Fred] has clearly already done a huge amount of work there, just to get it working at all. The PIO code itself is very simple but is instructive as a good example of how to use multiple chained DMA channels to push data through the PIO at the fastest possible rate.

Continue reading “Generating PAL Video With A Heavily Overclocked Pi Pico”

Showing a board with a Pi Pico plugged into it, a USB-A socket marked "USB host", and a character display that says "PASSED" referring to the board being the brains of a testing jig.

USB Host On RP2040 – With PIO

Folks from [Adafruit] are showing off a neat hack – USB host on RP2040, using the now-famous PIO peripheral. [Adafruit] builds a lot of RP2040 boards, and naturally, you gotta test them before you ship them to customers. They’ve been using very specific Teensies for that, and at some point, those became unobtainium. Based on the work of [sekigon-gonnoc] and with help of [Thach], they’ve made their TinyUSB library support bitbanging of USB over PIO, and successfully ported their test jig firmware to it!

The base Pico-PIO-USB repo by [sekigon-gonnoc] shows a pretty impressive state of affairs – with low-speed and full-speed USB host and full-speed USB device modes supported, and quite a few examples to get you started. [Adafruit]’s work integrates this code into their TinyUSB stack, specifically focusing on MST (mass storage) features – as this is what you need to program a RP2040. Of course, they also provide a mass storage example to boot!

Test jigs are pretty important to have when making multiple pieces of a board, and with RP2040 supporting more and more interfaces thanks to PIO, it sounds like the perfect chip for your next production testing-intended PCB. With the jig brains taken care of, you’ll want to look into building no less important mechanical part, and we’ve covered quite a few ways to sort that out – here’s an OpenSCAD script that generates lasercutting files out of KiCad boards, or a jig built out of scrap copperclad FR4, and a pretty extensive tutorial on making your own lasercuttable jigs, to boot.

Continue reading “USB Host On RP2040 – With PIO”

The Pi Pico board on top of a white box with an Ethernet jack, with a sensor module plugged onto the Pico's pin headers. A black MicroUSB and a green Ethernet cable are connected to this device.

An Elegant Ethernet Library For Your Next RP2040 Project

A few days ago we covered a project that brought Ethernet connectivity to the Raspberry Pi Pico using little more than some twisted pair and a RJ-45 connector. It was a neat trick, but not exactly ready for widespread adoption. Looking to improve on things a bit, [tvlad1234] has taken that project’s code and rewritten it into a friendly library you can use with any RP2040 board.

In case you missed it, the initial demo did 10BASE-T transmission by bit-banging with the PIO, and was able to send UDP messages to devices on the wired LAN. It was an impressive accomplishment, but its code didn’t make it easy to build your project around it. This new library makes UDP messaging as easy as a printf, offloading all non-PIO-managed Ethernet signal work onto the RP2040’s second CPU core. The library even generates a random MAC address out of your flash chip’s serial number!

As a demonstration of the new library, [tvlad1234] has put together a simple Ethernet-connected temperature monitor using the BMP085 or BMP180 sensor connect over I2C. If you feel like you could use an Ethernet transmit-only sensor in your life, browsing the source code would be a great start.