I was invited to tour the Northrop Grumman Aerospace Systems campus in Los Angeles this spring and it was fantastic! The Northrop Grumman lists themselves as “a leading global security company” but the project that stole my heart is their work on the James Webb Space Telescope (JWST) for NASA. On the one hand, I don’t see how it could possibly be pulled off as the telescope seems to cram every hard engineering challenge you can think of into one project. On the other hand, Northrop (plus NASA and all of their subcontractors) has been doing tough stuff for a very long time.
How Do You Tour Northrop Grumman?
This opportunity fell in my lap since [Tony Long] is a Hackaday reader and an engineer at Northrop. He’s the founder of their FabLab (which I’ll talk about a bit later) and was so bold as to send an email asking if one of the crew would like to stop by. Yes Please!
I was already headed out to the Supplyframe offices (Hackaday’s parent company) in Pasadena. [Tony] offered to pick me up at LAX and away we went to Redondo Beach, California for an afternoon adventure.
James Webb Space Telescope: Everything Hard About Engineering
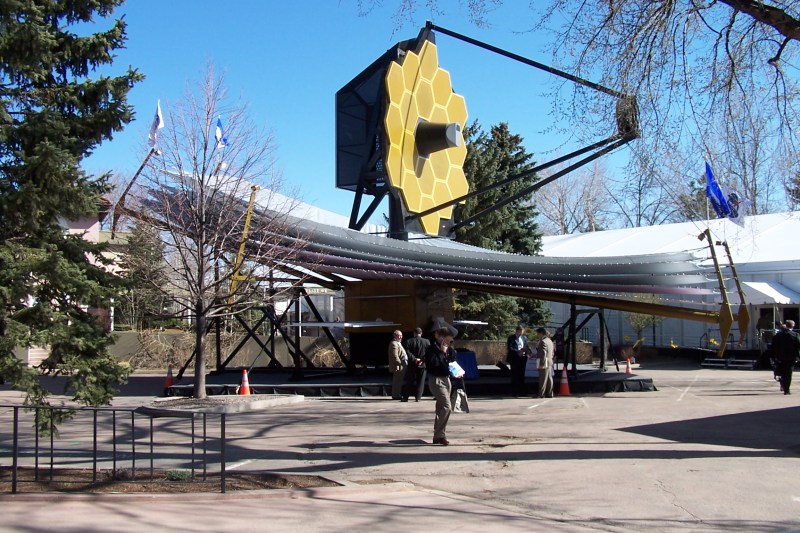
I had heard of the James Webb Space Telescope (JWST) but had never looked closely at the particulars of the project. Above you can see a scale model which Northrop built. I didn’t actually see this on my tour. It travels to different places, taking two semi trucks, with a dozen people spending four days to set it up each time. And that’s a not-real, relegated to the surface of the planet, item. What is it going to take to put the real one into space?
It’s not just going into space. It’s going to the second Lagrangian point. This is past the moon, about 1.5 million kilometers from the earth. If this thing breaks we can’t go out there and fix it. There’s a lot of pressure for success.
The main problem facing this satellite is heat. It will use a mirror array to harvest infrared radiation from very distant astronomical bodies. For this to happen it needs to have a very good optical array to gather infrared light and focus it on a collector, and it must be isolated from the heat of the sun, earth, and moon.

Finished Mirror delivered to Goddard

Back of the mirror

Mechanicals mounted on back of the mirror
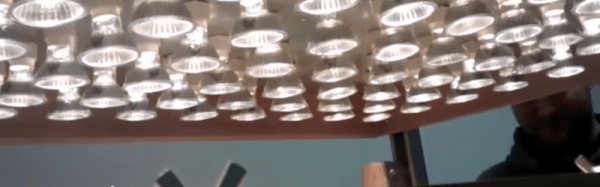
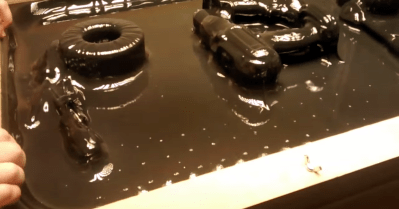
There is an array of 18 hexagonal mirrors which reflect the infrared onto a collecting mirror and in turn to the sensors. These mirrors are not made by Northrop, but they did have a prototype on display and it was incredible! Each mirror is made by Ball Aerospace out of beryllium. The concave surface is coated in gold for reflectivity and an actuator mounted on the back of each mirror can flex the surface to adjust the concavity and thereby the focal length. This is in addition to the ability to adjust the roll and pitch of each segment.

Early optical mount testing at Godard Space Center

Early Optical mount assembly
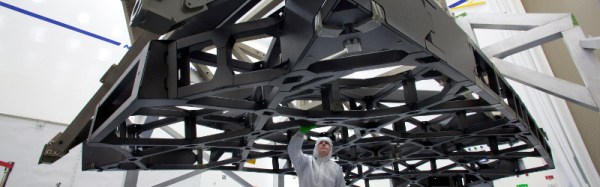
In the Northrop high bay they were working on the mounting system for these mirrors. It showed much more progress than the two images seen above. This is the central mount structure for the optics. The width of this structure is dictated by the size of the rocket which will launch it into space. When I saw it, folding wings had been added to either side of this main structure to host a dual-row of mirrors which are folded back into the telescopes during its storage position. The black material itself is a composite manufactured by Northrop. The cross-section they showed as an example was not much thicker than your fingernail but obviously quite rigid in the cast pipe shape.
You can see an animation of the unfolding process which was playing in the high-bay viewing room during the tour. Note the five-layer heat shield that needs to automatically unfold without snagging. This reminds me of [Ed van Cise’s] recollection of solar panel unfolding issues on the ISS. It’s a tough problem and it looks like much time has been spend making sure this design learns from past issues. That animation doesn’t show too many details about the mirror mechanics. I found video demonstrating how the mechanical part of the mirrors work to be quite interesting.
Learning more about what goes into the James Webb Space Telescope project is worth a lot of your time. I’m not joking about this including everything hard about engineering. The challenges involved in meeting the specification of this telescope are jaw-dropping and I’m certain the people working on the project across many different companies will make this happen.
Hackerspace Driving Corporate Culture
It was nice that [Tony] and his colleague [Adam] came right out and told me they reached out to Hackaday because they want to get the message out that Northrop is rejuvenating their corporate culture. They’re in the process of hiring thousands of engineers and part of this process is making the job fit with the lifestyle that these engineers want.
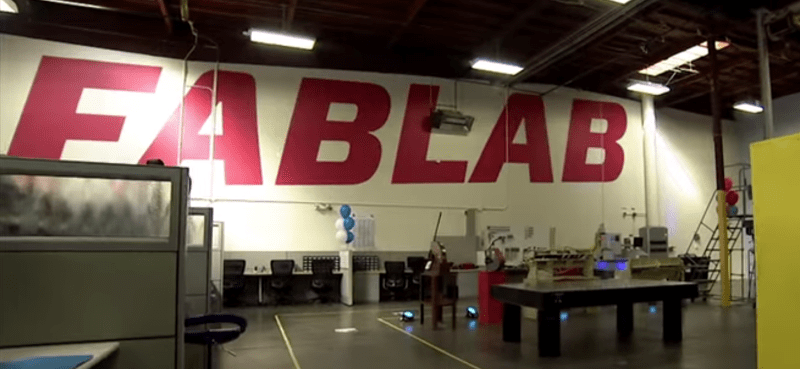
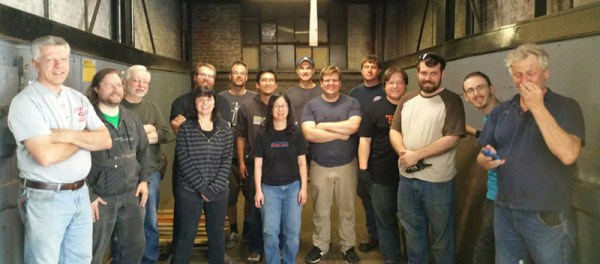
One big move in this direction is the formation of their FabLab. [Tony] is an engineer but 50% of his workload is tending to the FabLab. This is basically a hackerspace open to any of the roughly 20k employees at this particular location. Northrop fabricates amazing things, and when equipment is no longer used, the FabLab gets dibs on it. Imagine the possibilities!
 Part of this initiative is to get more engineers learning about the fabrication process. [Tony] used the example of researching by fabricating a simple proof-of-concept in the FabLab. This is an avenue to that buzzword: fail-fast. Before getting your department on board with what might be a costly and time-consuming project you can test out some of the parts which are a little hazy in your mind.
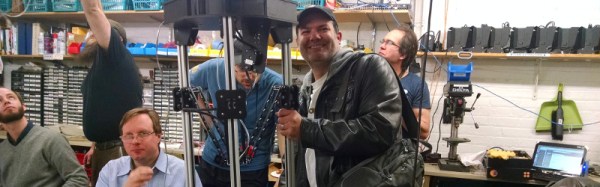
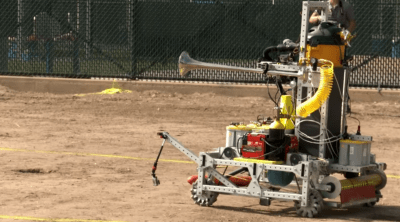
The device seen here is the product of a challenge that one of the groups participated in last year. They had about six months to develop a robot which can clear unexploded armaments. It was hanging out in one part of the hackerspace and is a great build. You can just make out a blue sphere hiding in the underbody. That’s a huge jamming gripper powered by the black and yellow shop-vac perched atop the chassis. The robot is remote controlled, with wireless GoPro cameras mounted all around and underneath. Of course the thing wouldn’t be complete without a giant silver air-horn. Safety first!
It will be interesting to see if the FabLab can build the kind of grass-roots community often associated with standalone hackerspaces. You can get a glimpse at the grand opening of the space in this video. We don’t quite remember seeing a hackerspace marketed in this manner. But if that’s what it takes to get the company on board it’s well worth it. A huge space, amazing tools, and no monthly membership fee make for a sweet deal. Oh, and the name FabLab apparently came from their mascot, the Fabulous Labrador, who can be seen in the clip wearing a string of pearls.
F/18 Assembly Plant
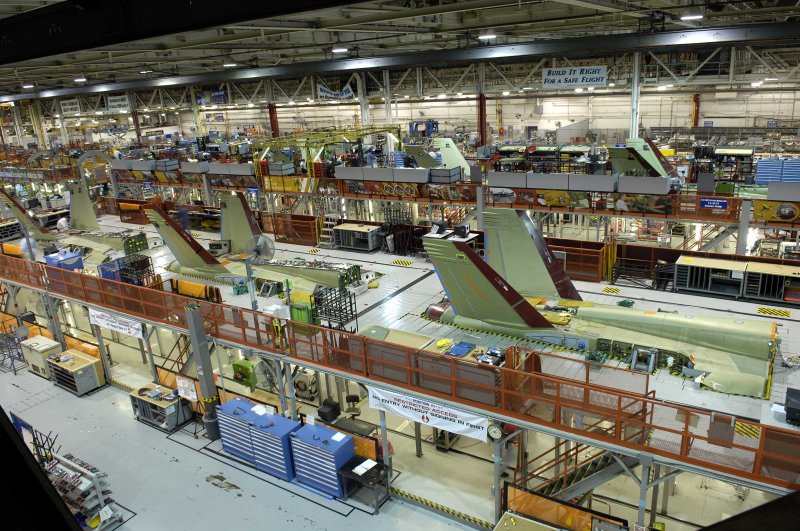
We wrapped up the day by touring the F/A 18 E/F Super Hornet assembly line. This is a huge plant. I don’t know how to better describe the sheer size of the assembly line than saying it took no less than twenty minutes to walk back to the parking lot at the end of this tour.
 Northrop Grumman serves as the principal subcontractor for Boeing on this project, so the end of the line isn’t quite a fully assembled airplane. But the fuselage — less cockpit, nose, wings, and engines — is still a formidable sight. I’ve never been this close to a fighter jet before and the size is impressive. Equally impressive is the building housing the line, which was build in 1942 and is still wood-framed to this day. They have huge engineered columns which have since been reinforced with steel. But that fact makes it no-less impressive.
The top concern during assembly is FOD, or Foreign Object Detection. These vehicles are exposed to huge forces and vibrations that will shake anything that’s not supposed to be there loose, and that can mean horrible damage to an expensive machine or much worse. Some of the things I found really interesting were the systems in place to make sure no part goes missing. All components come in cases that have an individual cutout area for each. Tools are scanned to each employee, if broken or worn out there are vending machines throughout the plant keeping track of them through a computerized system.
As part of the tour we walked through the composites plant next door. There are massive autoclaves for curing the resins. These are like a pipe sitting on its side with hemispherical doors on each end. I’m a poor judge of time and distance but I’d estimate these to be 18 feet in diameter and at least 35 feet long. Traditional composite fabrication — a worker laying down sheets of carbon-fiber on a mold — were under way. But the room next door housed a robot that looked like it was born in The Matrix. The spider-like head works next to a turning mandrel fitted with the form of the piece being fabricated. It lays out about seven strands of carbon fiber, building up a part that has no seams whatsoever. After curing the resin the mold is removed manually, piece by piece, from the inside of the part. To me the parts being built looked like air intake channels approximately 15 feet long and maybe 5 feet in diameter, although they were winding and not exactly cylindrical in shape. I wasn’t able to get very many details about them, but I was told these parts are for the F-35 Joint Strike Fighter. This is another subcontract Northrop Grumman has for Lockheed Martin.
Conclusion
Thank you to [Tony Long] and [Adam Gross] for spending to give Hackaday this tour. I had the impression that I was living an episode of one of my favorite programs How It’s Made, and that was awesome! Northrop Grumman has an educational outreach program so if you’re associated with a school in the area set up a tour of the JWST!
[Tony] ducked out with me for dinner; some excellent tacos — a quest I’ve been on during each visit to LA. He joined me afterward on a trip to Null Space Labs for their open night. They had moved since the last time I was there and if you’re in town you should check it out.
Attributes:
One thing I should mention is that I was not able to take any photographs on the premises. My story above is original but all the photos are stock or provided by Northrop at my request.
Main Post Image via JWST Flickr
Front Mirror via YouTube thumb.
Extended Reflection Mirror via YouTube video.


 The vacuum part of these tools