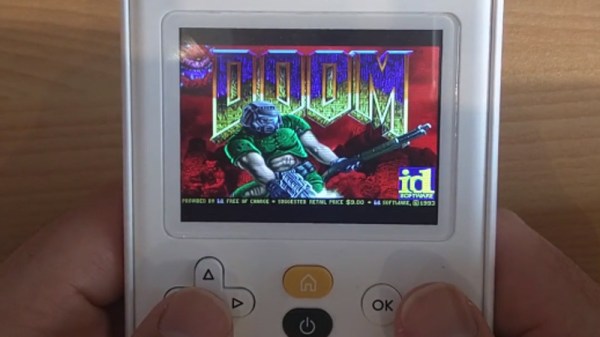
Graphing calculators are one of those funny markets that never seem to change. Standardized testing has created a primordial stew of regulatory capture in which ancient technology thrives at modern retail prices while changing little. The NumWorks calculator certainly isn’t the first competitor to challenge the Texas Instruments dynasty with a more modern interface (and a design from this decade), but behind it’s subtle color pops and elegant lines lies the real gem; a fantastically well documented piece of open source hardware. The last time we wrote about the NumWorks, it was to demonstrate a pretty wild hack that embedded an entire Pi Zero but it’s worth drawing attention to the calculator itself.
Hackaday readers traveling to the NumWorks website might spy the section at the bottom of the page titled “Developers” with tantalizing links like “Hardware,” “Software,” and “GitHub.” These lead to a wealth of knowledge about how the product is put together and sources to build the enclosure and firmware yourself (the PCB schematic and layout sources seem to be missing, though there is this handy gerber viewer). However merely posting sources is a low bar NumWorks far exceeds.
How is the firmware put together? Here’s a handy architecture guide! Why did they choose C++ and what tradeoffs were made to fit everything in a resource constrained embedded system? Here’s a design guide! How exactly does the math engine take in text, comprehend the expression contained therein, and evaluate it? There’s a document for it! There’s even a multi-platform SDK setup guide.
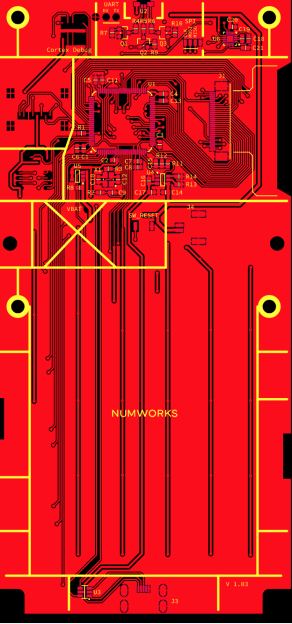
Firmware documentation is old hat; we’ve come to expect (or at least hope!) for it. For us the most interesting documentation is actually for the mechanical and electrical systems. The EE guides start with part selection (with datasheet links) then move on to walkthroughs of major areas of the schematic. At this point is should be no surprise that the board has pads for a completely standard 10 pin ARM debug connector and documented test points for UART, SPI, and an SD card.
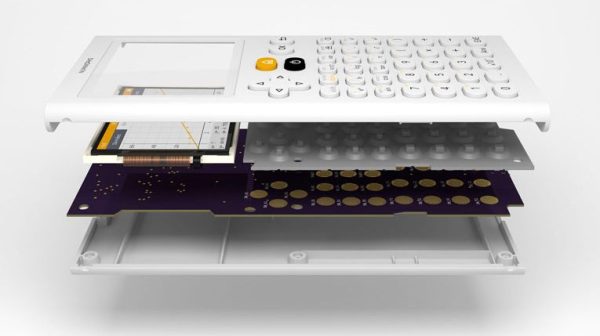
The mechanical pages read like a quick primer on design for injection molding and tricks to reduce assembly errors (called “poka-yoke“). Ever wondered what that funny frame plastic models come in is called? The NumWorks calculator’s buttons are made in one, and it’s called a “sprue”. There are pages describing each piece of the housing one at a time.
Treat yourself to a reading of NumWorks’ excellent documentation. And if you need a new calculator, maybe consider the open source option.
Continue reading “Open Source Calculator Teaches Us About Quality Documentation”